

Marijuana guides
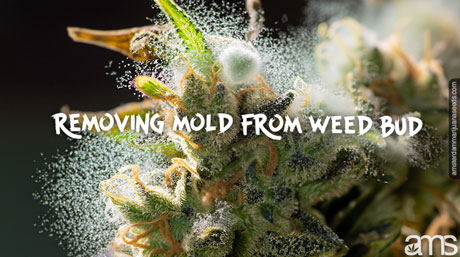
Effective Mold Management for Cannabis Plants


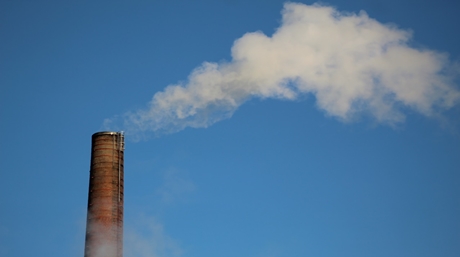
Discover Cannabis and CO2
Did you know that your plants can be harmed if they don’t get an adequate supply of CO2? Or that an excessive supply of carbon dioxide can potentially be harmful to your marijuana plants? Carbon dioxide is a crucial aspect of marijuana cultivation that can hinder or permanently halt the progress of plant growth. When it comes to supplying your plants with additional carbon dioxide, there are certain factors you need to keep in mind. In this piece “Cannabis and CO2” we will share ways to optimize CO2 levels for cannabis growth.

Why is carbon dioxide essential for cannabis cultivation?
It is essential to ensure that your plants receive a carbon dioxide level above 250 parts per million (ppm). Any CO2 level below this measure can pose immense risk to them. On the other hand, exposing your plants to dangerously high levels of carbon dioxide can be lethal. But why is carbon dioxide essential for cannabis cultivation? It enables plants to complete the process of photosynthesis. Photosynthesis is the conversion of carbon dioxide into energy in plants. As the name and formula imply, CO2 consists of one carbon atom and two oxygen atoms. This is significant because plants require 17 essential elements to grow and reproduce, and hydrogen, carbon, and oxygen make up 95% of a plant’s dry weight.
Many farmers suggest that adding CO2 to the cultivation room could improve yields by up to 20%. However, this guide will show you how to optimize carbon dioxide levels for better weed growth and excellent results.
How to introduce additional CO2 to your garden
There are several methods to add carbon dioxide to your garden. However, many of these methods do not guarantee controlled delivery of the desired PPM. Therefore, we recommend investing in reliable equipment to ensure proper CO2 supplementation.
CO2 generators
CO2 generators offer an effective way to improve the carbon dioxide levels in your plants. These products, resembling outdoor heaters, burn propane or natural gas to produce carbon dioxide. They also emit heat, making them suitable for larger spaces and climate-controlled enclosures.
Compressed CO2
Compressed CO2, stored in metal tanks like propane cylinders or scuba tanks, can be delivered to your plants through emitters. Unlike generating carbon dioxide on your own, compressed carbon dioxide is produced at a factory, eliminating concerns about heat generation. This makes compressed CO2 an excellent choice for small-scale growers.
What does carbon dioxide do for your cannabis plants?
Optimizing carbon dioxide levels for your plants will result in increased growth speed and higher yields. With accelerated growth, you can enjoy bountiful harvests every year, resulting in bigger and better yields without experiencing dry periods. When carbon dioxide is used properly, it increases the moisture content in your plants and enhances their resilience. This enables plants to withstand higher temperatures than they normally would without drying out quickly. As a result, your plants will thrive in hotter conditions, leading to improved growth.

Why use CO2 in cannabis cultivation?
There are two primary benefits of using CO2 in your marijuana plants: faster growth and greater yield. Additionally, plants store a certain amount of moisture and energy in their leaves, and carbon dioxide helps release that energy, allowing plants to blossom. Most cultivators agree that unlocking this stored energy can lead to a 20-30% increase in yield, along with a relative growth speed increase of at least 15%.
What do you need to know before adding CO2 to your cannabis plants?
Adding CO2 will increase the humidity of your cannabis garden, creating a more moist environment. However, higher moisture levels can also increase the risk of fungus and rot. Moreover, uncontrolled release of carbon dioxide can create a toxic environment for both your cannabis plants and yourself. A CO2 level of about 2000 ppm can harm your plants, and levels higher than that can be unsafe for animals and humans to breathe. It’s important to remember that a quantity below 250 ppm will harm your plants.
Since carbon dioxide is heavier than oxygen, it needs to rain down on your plants. Therefore, it’s necessary to regulate carbon dioxide levels to maximize its benefits without sacrificing the oxygen your plants require, and vice versa. In a nutshell, carbon dioxide supplementation will lead to bigger, improved, and higher annual yields.
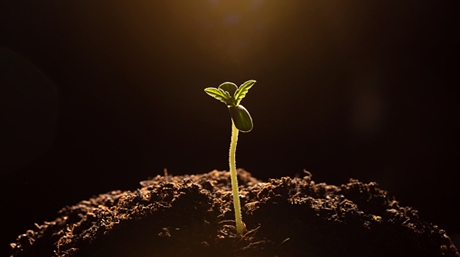
Germinating is the beginning of life for your cannabis plant, and it is essential to understand how it works.
This guide will discuss the different ways of germinating your marijuana seeds and some strategies to help you achieve the best results.
Why You Need to Germinate Cannabis Seeds Before Planting
Many different plants can germinate in the ground. However, cannabis seedlings can be fragile. Because of this, weed seeds should be germinated separately before planting. Immediately after the seeds have sprouted, they should be planted in a hydroponic setup, a soilless medium, or the soil.
During the planting process, you should ensure that the seeds are 2.5 cm (1 Inch) deep in whichever medium you choose and covered lightly.
After planting, you should wait one week for the seedling to start emerging from the soil. If the seed poked through the soil by the tenth day, it likely didn’t survive.
When to Germinate Your Cannabis Seeds
We recommend that you germinate your cannabis seeds when the hours of sunlight are long enough to allow for healthy growth.
In short, we recommend germinating your seeds in the spring when it is getting warmer and when the sun won’t disappear for long periods. You don’t need to follow a fixed calendar, although it can help. Instead, you can look outside your house and see when other plants are starting to sprout. Just make sure that good growing weather will be present for some time. Your plants should be getting about 12 hours of sunlight each day. You can help with this by making sure they have southern exposure.
This means ensuring your plants have access to the sky facing south. Now that we have a solid foundation of where to start let’s learn how to germinate your cannabis seeds.

How to Germinate Your Cannabis Seeds
Before we highlight the different methods of germinating marijuana, we need to understand what conditions the seeds need to germinate. The conditions include the following:
· Moisture – You need to ensure that the seeds are moist. You can soak cannabis seeds for between 20-30 hours. Do not oversoak them.
· Provide Peace– Don’t disturb the seeds; wait for the taproot to show up.
· Warmth– To assist with germination, keep the seeds warm. Make sure the environment is not too hot. Seeds can germinate in cooler temperatures, but the process takes a long time when it’s cold. You want to shoot between 20 to 25°C (68 to 77°F).
· Be Gentle– Be careful when taking care of the seeds; treat them gently as you move them. If possible, avoid touching the white root; this is the taproot and is fragile. It can easily snap off.
· Plant with the Pointed End Up– Make sure the pointed end is facing up when planting the seeds. This will ensure that the seedling does not waste energy trying to reorient itself.
· Plant About a Knuckle Deep – Don’t put the seeds too deep in the soil. You can place the seed about an inch under the soil’s surface.

Different Methods of Germinating Cannabis Seeds
The best germination method depends on the choice of the cultivator. Below are some of the common ways to germinate your cannabis seeds.
Germinating Cannabis Seeds in the Soil
Perhaps the easiest way to germinate cannabis seeds. The soil acts as a protective barrier for the seeds. It is also good at retaining moisture. What steps should you take to germinate seeds in soil?
Step 1: Ensure You Use the Correct Soil Type – This is the first step. The soil should either be gently fertilized or a seed starter with a pH level of 6.
The soil should also contain enough nutrients and the right acidity to strengthen the young plants during the first two weeks. After that, refrain from adding more nutrients to the soil unless there is an absolute need. After that, you can cause your plant to go into the nutrient lock.
Step 2: Place the Soil in a Container and Use a Pencil to Create a Small Hole – Once the soil is in the pot, you can use a pencil to create a hole that is half an inch to an inch deep. Once the seed is in the soil, bury it in the soil. After this stage, please do not touch the seed because it is very fragile.
Step 3: Water the Soil – Carefully water the soil with a spray bottle and place your pots under a fluorescent lamp. Keep your seeds away from a window. The temperature swings that happen at a window can interfere with germination. You must ensure the temperature range is between 20 to 25°C (68 to 77°F).
Ensure that you monitor the soil daily to ensure that it is moist. After 4 to 7 days, small stems should be sprouting through the soil.
Once the seedling grows to 5 to 10 cm (2 to 4 inches) height, you can now transplant the cannabis to a larger pot with more room for the roots to spread out. This indicates that you have successfully germinated the seeds into young plants.

Germinating Cannabis Seeds in Water
Germinating cannabis seeds in water is popular because it is faster. All you need to do is place your seeds in water and make adjustments as necessary.
As we stated earlier, germinating seeds require a balanced and ideal growing condition. For example, many water germinations require only 24 to 48 hours to ensure that the stems pop out of the seeds. However, some seeds can be soaked for up to a week.
Water germination can be fast because the seeds have all the water they need readily available. This allows the shell to be softened and to crack easily.
What do you need to do to germinate seeds in water?
Step 1: Fill a Glass with Tap Water and Leave It to Come to Room Temperature – Once you fill a glass with tap water, you should leave it in a warm room until it attains a temperature of at least 65 degrees Fahrenheit.
Step 2: Add Seeds to the Glass – Add 2 or 3 seeds to the glass and allow them to settle for some time. Then watch the glass for any changes. You can change the water to freshwater after every two days, but always make sure that it is at room temperature.
The seeds may start sprouting after two days, though some old seeds may take a week to sprout.
Step 3: Remove the Seeds from the Water – Once the seeds have sprouted, remove them from the glass and place them in the soil.
The only disadvantage with water germination is that you must be very careful when moving the sprouted seeds. This process is very delicate since the seeds are fragile. If you harm the seeds, you can kill the plant.
Germinating Seeds on Paper Towels
Germinating marijuana seeds on paper towels is a common way to sprout cannabis seeds. In some cases, the grower will use a cotton pad instead. The methods for germination using paper towels and cotton padding are very similar.
Step 1: Lay the Paper Towels on a Flat Surface – To germinate seeds using paper towels, you should lay paper towels on a countertop, then place some seeds on them. Next, cover the seeds using another towel.
Step 2: Moisten the Towels – Use a spray bottle to moisten the towels. Place the paper towels and seeds on a plate or in a bowl. Then cover the seeds with a face-down bowl or plate. Alternatively, you can place them in a plastic bag to ensure they are secure.
Step 3: Maintain the Temperature – Ensure room temperature is between 20 to 25°C (68 to 77°F). You will want to maintain this temperature. Also, you should wrap the seeds and place them in a dark place. You will want to keep the seeds away from direct wind and sunlight. Within 2-5 days, the seeds should start to show tiny roots. You can plant them when they reach about 5 millimeters (0.2 Inch) in length.
The paper towel method has some risks. This is because the seedlings might be destroyed during the unwrapping and potting stage. Also, the roots can become entangled in the towel and the roots of other seeds. So make sure you relocate the seeds before their roots get too long.
You can use your hands or some tweezers to move the seeds and place them in your medium of choice.

Other Popular Germination Methods
The abovementioned methods are some of the most popular ways of germinating marijuana seeds. However, they are not the only ways. For example, you can always use starter plugs or cubes.
These methods are straightforward. All you have to do is to put a seed into or onto the growing medium. Once you do this, add some water. Then you need to wait. After that, the seeds should begin to germinate. Just keep an eye that they don’t dry out.
These methods protect the plants from damage, mainly when transported to their final homes. However, as usual, you should exercise caution when using these methods.
Germinating Cannabis Seeds in Peat Pellets
This is a method of germinating seeds that will help to mitigate damage to the young roots. Peat pellets are made of decomposed vegetable matter. These pellets contain nutrients that the seedlings need to develop correctly. The pellets enlarge when you add water to them, forming a nutrient-rich container.
The peat pellets are optimized with a pH of 5.5. Therefore, you shouldn’t need to worry about any adjustments. However, remember to soak the pellets in warm water to prepare them for the seeds.
Once the roots appear, move the whole pellet into the medium, where it will continue growing. This method is not recommended for hydroponic setups. However, peat pellets are suitable for germination and can be used by beginners. They can also be used in cloning.
Planting the Germinated Cannabis Seeds
After the seeds have sprouted, they should be planted in the most suitable medium.
If you use a germination process that requires moving the sprouts, do so with a lot of care since the roots are very fragile. You don’t want to touch the root, or you can break it. The root may sustain this, but it can seriously hamper your plant’s growth. It can also send the plant into shock, which it may never recover from. It should also be placed half an inch to an inch deep in the growing medium. After positioning the germinated seed, cover it lightly and make sure the soil is moist. After one week, the seedling should emerge through the soil.
Some seeds emerge in a day or two, while others can take up to 10 days. If the waiting period exceeds ten days, your seed may not have survived.
If your seed is planted upside down, don’t panic, nature has a way of working things out. As long as you have not crowded the seedling, it should be able to correct itself. Give it some time and space and allow it to do this.
Cannabis Seeds versus Clones
For typical home growers, it is easier to obtain cannabis seeds than clones. Also, growing seeds produce more vigorous plants acclimated to the climate they are growing in.
Marijuana plants grown from seed are usually stronger than plants grown from clones. This is because they develop strong taproots. In cooler climates, you can plant your seeds directly in your garden. After the last frost, you will want to do this in mid to late spring.
It is better to germinate your seeds indoors if you grow them outside. This will allow the seeds a more extended germination period and also protect them from the worst of the early spring weather. Moreover, growing the plant indoors will enable the seedling access to plenty of light (primarily if you use a grow lamp). Then, transplant them outside or into an indoor pot when mature enough.

Is Lighting Important for Cannabis Germination?
Just like water, lighting is an essential requirement for germination. Light enables the plant to survive. In addition, it allows for the creation of sugars during photosynthesis. The plant will use these sugars to feed itself as it grows.
Light is also essential to the young plant. It also provides much-needed warmth. The plant will require warmth to help break through the shell and not die from the cold. Fluorescent bulbs with a color temperature of 6500K and a T5 output will help provide the seeds with the correct light.
Fluorescent bulbs are recommended because they take up very little power and don’t produce too much heat. You can adjust the position of the lights so that they are very close to the plants without causing them to suffer any damage. As soon as the first leaves emerge, you will need to ensure that your plants are receiving light.
You can use incandescent bulbs also. They will generate heat. You cannot use incandescent lights to provide the light necessary to grow your plants. However, they can be used to assist in germination.
You can use garden heating mats as an alternative to light as a heat source. These pads heat the seeds from underneath the container you are germinating in. Remember that once the plants start to grow, you will need an alternative heating method. Also, these pads will not produce enough warmth for larger plants.
Keep the soil at around 21 to 22°C (69 to 71°F). Seeds need a specific temperature range to germinate. If the temperature is too cold, they won’t germinate. Likewise, if the temperature is too hot, they won’t germinate.
It is better to have humid air when germinating seeds. Drier air is not that good for your seeds. Also, if the temperature in your germination growth starts to get too high, move the setup away from the lights. If it is too cold, move it towards the lights.
Final Thoughts
Germination is considered one of the most critical stages of cultivating cannabis. You will need to be careful with this stage. We have gone over some germination strategies that will help you achieve the best results possible. We think what works for you is the best way to do something. If you are like me, you prefer to do things most simply and naturally possible. Not just because it is easy but also because it most closely emulates natural growth. But something else may appeal to you. So get out there and see what works for you.
Germinating is the beginning of life for your cannabis plant, and it is essential to understand how it works.
This guide will discuss the different ways of germinating your marijuana seeds and some strategies to help you achieve the best results.
Why You Need to Germinate Cannabis Seeds Before Planting
Many different plants can germinate in the ground. However, cannabis seedlings can be fragile. Because of this, weed seeds should be germinated separately before planting. Immediately after the seeds have sprouted, they should be planted in a hydroponic setup, a soilless medium, or the soil.
During the planting process, you should ensure that the seeds are 2.5 cm (1 Inch) deep in whichever medium you choose and covered lightly.
After planting, you should wait one week for the seedling to start emerging from the soil. If the seed poked through the soil by the tenth day, it likely didn’t survive.
When to Germinate Your Cannabis Seeds
We recommend that you germinate your cannabis seeds when the hours of sunlight are long enough to allow for healthy growth.
In short, we recommend germinating your seeds in the spring when it is getting warmer and when the sun won’t disappear for long periods. You don’t need to follow a fixed calendar, although it can help. Instead, you can look outside your house and see when other plants are starting to sprout. Just make sure that good growing weather will be present for some time. Your plants should be getting about 12 hours of sunlight each day. You can help with this by making sure they have southern exposure.
This means ensuring your plants have access to the sky facing south. Now that we have a solid foundation of where to start let’s learn how to germinate your cannabis seeds.
How to Germinate Your Cannabis Seeds
Before we highlight the different methods of germinating marijuana, we need to understand what conditions the seeds need to germinate. The conditions include the following:
· Moisture – You need to ensure that the seeds are moist. You can soak cannabis seeds for between 20-30 hours. Do not oversoak them.
· Provide Peace– Don’t disturb the seeds; wait for the taproot to show up.
· Warmth– To assist with germination, keep the seeds warm. Make sure the environment is not too hot. Seeds can germinate in cooler temperatures, but the process takes a long time when it’s cold. You want to shoot between 20 to 25°C (68 to 77°F).
· Be Gentle– Be careful when taking care of the seeds; treat them gently as you move them. If possible, avoid touching the white root; this is the taproot and is fragile. It can easily snap off.
· Plant with the Pointed End Up– Make sure the pointed end is facing up when planting the seeds. This will ensure that the seedling does not waste energy trying to reorient itself.
· Plant About a Knuckle Deep – Don’t put the seeds too deep in the soil. You can place the seed about an inch under the soil’s surface.
Different Methods of Germinating Cannabis Seeds
The best germination method depends on the choice of the cultivator. Below are some of the common ways to germinate your cannabis seeds.
Germinating Seeds in the Soil
Perhaps the easiest way to germinate cannabis seeds. The soil acts as a protective barrier for the seeds. It is also good at retaining moisture. What steps should you take to germinate seeds in soil?
Step 1: Ensure You Use the Correct Soil Type – This is the first step. The soil should either be gently fertilized or a seed starter with a pH level of 6.
The soil should also contain enough nutrients and the right acidity to strengthen the young plants during the first two weeks. After that, refrain from adding more nutrients to the soil unless there is an absolute need. After that, you can cause your plant to go into the nutrient lock.
Step 2: Place the Soil in a Container and Use a Pencil to Create a Small Hole – Once the soil is in the pot, you can use a pencil to create a hole that is half an inch to an inch deep. Once the seed is in the soil, bury it in the soil. After this stage, please do not touch the seed because it is very fragile.
Step 3: Water the Soil – Carefully water the soil with a spray bottle and place your pots under a fluorescent lamp. Keep your seeds away from a window. The temperature swings that happen at a window can interfere with germination. You must ensure the temperature range is between 20 to 25°C (68 to 77°F).
Ensure that you monitor the soil daily to ensure that it is moist. After 4 to 7 days, small stems should be sprouting through the soil.
Once the seedling grows to 5 to 10 cm (2 to 4 inches) height, you can now transplant the cannabis to a larger pot with more room for the roots to spread out. This indicates that you have successfully germinated the seeds into young plants.
Germinating Seeds in Water
Germinating cannabis seeds in water is popular because it is faster. All you need to do is place your seeds in water and make adjustments as necessary.
As we stated earlier, germinating seeds require a balanced and ideal growing condition. For example, many water germinations require only 24 to 48 hours to ensure that the stems pop out of the seeds. However, some seeds can be soaked for up to a week.
Water germination can be fast because the seeds have all the water they need readily available. This allows the shell to be softened and to crack easily.
What do you need to do to germinate seeds in water?
Step 1: Fill a Glass with Tap Water and Leave It to Come to Room Temperature – Once you fill a glass with tap water, you should leave it in a warm room until it attains a temperature of at least 65 degrees Fahrenheit.
Step 2: Add Seeds to the Glass – Add 2 or 3 seeds to the glass and allow them to settle for some time. Then watch the glass for any changes. You can change the water to freshwater after every two days, but always make sure that it is at room temperature.
The seeds may start sprouting after two days, though some old seeds may take a week to sprout.
Step 3: Remove the Seeds from the Water – Once the seeds have sprouted, remove them from the glass and place them in the soil.
The only disadvantage with water germination is that you must be very careful when moving the sprouted seeds. This process is very delicate since the seeds are fragile. If you harm the seeds, you can kill the plant.
Germinating Seeds on Paper Towels
Germinating marijuana seeds on paper towels is a common way to sprout cannabis seeds. In some cases, the grower will use a cotton pad instead. The methods for germination using paper towels and cotton padding are very similar.
Step 1: Lay the Paper Towels on a Flat Surface – To germinate seeds using paper towels, you should lay paper towels on a countertop, then place some seeds on them. Next, cover the seeds using another towel.
Step 2: Moisten the Towels – Use a spray bottle to moisten the towels. Place the paper towels and seeds on a plate or in a bowl. Then cover the seeds with a face-down bowl or plate. Alternatively, you can place them in a plastic bag to ensure they are secure.
Step 3: Maintain the Temperature – Ensure room temperature is between 20 to 25°C (68 to 77°F). You will want to maintain this temperature. Also, you should wrap the seeds and place them in a dark place. You will want to keep the seeds away from direct wind and sunlight. Within 2-5 days, the seeds should start to show tiny roots. You can plant them when they reach about 5 millimeters (0.2 Inch) in length.
The paper towel method has some risks. This is because the seedlings might be destroyed during the unwrapping and potting stage. Also, the roots can become entangled in the towel and the roots of other seeds. So make sure you relocate the seeds before their roots get too long.
You can use your hands or some tweezers to move the seeds and place them in your medium of choice.
Other Popular Germination Methods
The abovementioned methods are some of the most popular ways of germinating marijuana seeds. However, they are not the only ways. For example, you can always use starter plugs or cubes.
These methods are straightforward. All you have to do is to put a seed into or onto the growing medium. Once you do this, add some water. Then you need to wait. After that, the seeds should begin to germinate. Just keep an eye that they don’t dry out.
These methods protect the plants from damage, mainly when transported to their final homes. However, as usual, you should exercise caution when using these methods.
Germinating Seeds in Peat Pellets
This is a method of germinating seeds that will help to mitigate damage to the young roots. Peat pellets are made of decomposed vegetable matter. These pellets contain nutrients that the seedlings need to develop correctly. The pellets enlarge when you add water to them, forming a nutrient-rich container.
The peat pellets are optimized with a pH of 5.5. Therefore, you shouldn’t need to worry about any adjustments. However, remember to soak the pellets in warm water to prepare them for the seeds.
Once the roots appear, move the whole pellet into the medium, where it will continue growing. This method is not recommended for hydroponic setups. However, peat pellets are suitable for germination and can be used by beginners. They can also be used in cloning.
Planting the Germinated Seeds
After the seeds have sprouted, they should be planted in the most suitable medium.
If you use a germination process that requires moving the sprouts, do so with a lot of care since the roots are very fragile. You don’t want to touch the root, or you can break it. The root may sustain this, but it can seriously hamper your plant’s growth. It can also send the plant into shock, which it may never recover from. It should also be placed half an inch to an inch deep in the growing medium. After positioning the germinated seed, cover it lightly and make sure the soil is moist. After one week, the seedling should emerge through the soil.
Some seeds emerge in a day or two, while others can take up to 10 days. If the waiting period exceeds ten days, your seed may not have survived.
If your seed is planted upside down, don’t panic, nature has a way of working things out. As long as you have not crowded the seedling, it should be able to correct itself. Give it some time and space and allow it to do this.
Cannabis Seeds versus Clones
For typical home growers, it is easier to obtain cannabis seeds than clones. Also, growing seeds produce more vigorous plants acclimated to the climate they are growing in.
Marijuana plants grown from seed are usually stronger than plants grown from clones. This is because they develop strong taproots. In cooler climates, you can plant your seeds directly in your garden. After the last frost, you will want to do this in mid to late spring.
It is better to germinate your seeds indoors if you grow them outside. This will allow the seeds a more extended germination period and also protect them from the worst of the early spring weather. Moreover, growing the plant indoors will enable the seedling access to plenty of light (primarily if you use a grow lamp). Then, transplant them outside or into an indoor pot when mature enough.
Is Lighting Important for Cannabis Germination?
Just like water, lighting is an essential requirement for germination. Light enables the plant to survive. In addition, it allows for the creation of sugars during photosynthesis. The plant will use these sugars to feed itself as it grows.
Light is also essential to the young plant. It also provides much-needed warmth. The plant will require warmth to help break through the shell and not die from the cold. Fluorescent bulbs with a color temperature of 6500K and a T5 output will help provide the seeds with the correct light.
Fluorescent bulbs are recommended because they take up very little power and don’t produce too much heat. You can adjust the position of the lights so that they are very close to the plants without causing them to suffer any damage. As soon as the first leaves emerge, you will need to ensure that your plants are receiving light.
You can use incandescent bulbs also. They will generate heat. You cannot use incandescent lights to provide the light necessary to grow your plants. However, they can be used to assist in germination.
You can use garden heating mats as an alternative to light as a heat source. These pads heat the seeds from underneath the container you are germinating in. Remember that once the plants start to grow, you will need an alternative heating method. Also, these pads will not produce enough warmth for larger plants.
Keep the soil at around 21 to 22°C (69 to 71°F). Seeds need a specific temperature range to germinate. If the temperature is too cold, they won’t germinate. Likewise, if the temperature is too hot, they won’t germinate.
It is better to have humid air when germinating seeds. Drier air is not that good for your seeds. Also, if the temperature in your germination growth starts to get too high, move the setup away from the lights. If it is too cold, move it towards the lights.
Final Thoughts
Germination is considered one of the most critical stages of cultivating cannabis. You will need to be careful with this stage. We have gone over some germination strategies that will help you achieve the best results possible. We think what works for you is the best way to do something. If you are like me, you prefer to do things most simply and naturally possible. Not just because it is easy but also because it most closely emulates natural growth. But something else may appeal to you. So get out there and see what works for you.

Cannabis Can Help A Sore Throat

Cannabis and the Authoritarian State

As cannabis consumer tastes evolve, industry must look beyond potency

Article: Early 2025 Empire State Psychedelic Policy Roundup

White House Finally Comments On Marijuana Industry

Stop Using Bat Poop to Fertilize Your Weed Plants Immediately, Here is Why…

The History Behind April Fool’s Day

Star signs and cannabis strains: April 2025 horoscopes

Does Comfort Food Actually Help

Connect to cannabis history with three legacy strains from Paradise Seeds

Distressed Cannabis Business Takeaways – Canna Law Blog™

United States: Alex Malyshev And Melinda Fellner Discuss The Intersection Of Tax And Cannabis In New Video Series – Part VI: Licensing (Video)

What you Need to Know

Drug Testing for Marijuana – The Joint Blog

NCIA Write About Their Equity Scholarship Program

It has been a wild news week – here’s how CBD and weed can help you relax

Cannabis, alcohol firm SNDL loses CA$372.4 million in 2022

A new April 20 cannabis contest includes a $40,000 purse

Your Go-To Source for Cannabis Logos and Designs

UArizona launches online cannabis compliance online course
-
 Cannabis News2 years ago
Distressed Cannabis Business Takeaways – Canna Law Blog™
-
 One-Hit Wonders2 years ago
United States: Alex Malyshev And Melinda Fellner Discuss The Intersection Of Tax And Cannabis In New Video Series – Part VI: Licensing (Video)
-
 Cannabis 1012 years ago
What you Need to Know
-
 drug testing1 year ago
Drug Testing for Marijuana – The Joint Blog
-
 Education2 years ago
NCIA Write About Their Equity Scholarship Program
-
 Cannabis2 years ago
It has been a wild news week – here’s how CBD and weed can help you relax
-
 Marijuana Business Daily2 years ago
Cannabis, alcohol firm SNDL loses CA$372.4 million in 2022
-
 California2 years ago
A new April 20 cannabis contest includes a $40,000 purse