General topics
Give Your Weed A Special Flavor With These Methods!
Published
2 months agoon
By
admin
There are three easy methods to flavor your marijuana and give it an extremely pleasing taste; before, during, and after harvesting. You may encounter challenges when trying to get your desired results. This article will guide you step by step on how to flavor your marijuana more easily, safely, and successfully!
Does flavoring weed make it taste good?
Why should I flavor my weed? Weed has its natural flavor. Many weed strains have been bred to produce flavors and aromas that mimic the taste of lemon, vanilla, mint, strawberry, grapefruit, blueberry, and so much more! However, if not, these strains may not give you the expected taste grown in the right conditions; you’ll get minimal notes of the flavor overwhelmed by the natural taste of weed. That’s why you need to flavor your cannabis and make it produce the best of its promised flavor or give it a new flavor of your preference!
We selected the best 3 methods for you to do so.

1. Flavoring weed before harvesting
If you want the strain you’ve planted to have a flavor you prefer, then you need to start preparations a few days before harvesting your weed.
According to our expert marijuana growers, preparations start 3-5 days before harvesting time. During this time, you need to stop watering your marijuana plants. Stopping this will lead the plant to extract extra mineral salts and other nutrients from the soil.
Although you can stop watering your crops for even 5 days or more before you start harvesting, you need to be very careful because that can harm your plants. They can dry up and finally die. So we recommend 3 to 5 days.
If your marijuana crops start to wither fast or show signs of wilting before the harvest day, you can add a little water to them. If you decide to do so, ensure you sprinkle the water evenly, so you’ll cover the whole plant.

When harvest day finally comes, mix extracts from your preferred food-grade or 15 milliliters of a mild solution into approximately 20 liters of clean water. The amount of clean water depends on the expected harvest. You can increase the number of liters of water if water liters if you expect
Now that your flavored mixture is ready, you should slowly and gently water it on your crops. Please be careful not to waste the solution on surface runoff.
Allow the crops to consume the solution for a few hours (roughly 3-5 hours) before you start to cut your weed.
By now, your weed has consumed water. First, they consumed the water from the soil for several weeks. Second, you had just watered them with a flavored solution a few hours before cutting them. Because of this, the weed is now moist. It would be best to spread the harvested plants evenly to avoid dampness. Ensure there is enough airflow among the crops to minimize mold formation. Keep the crops as separate as possible.
2. How to add flavor to weed during harvest
Sometimes, things may not go as planned. For example, you want to flavor your weed before harvesting, but somehow you don’t get around it. Don’t worry. You’re still in time to add flavor to your weed.

, Unlike the first step, which requires you to water the crops with a flavored mixture of 20 liters, you’ll now prepare a small amount of the solution and put it in a glass.
After this, you’ll cut a weed leaf and dip it inside the mixture. You don’t have to wait until the leaves are dry. A fresh leaf full of life is ideally the best for dipping inside the mixture contained in the glass. Why?
When the weed leaf is still alive, it has a high chance of drawing water from the glass up to the stalk and other parts of the weed.
You’ll need to allow the leaves for about seven days to settle inside the flavored water. In these seven days, the leaves will have drained all the solution from the glass.
Finally, remove the leaves from the solution, chop them to your preferred size, then dry the harvest as you usually do.
3. How to flavor weed after harvesting
Flavouring marijuana at a time when the leaves and the stalks seem to be withering and drying up seems like a hard one for many people. Nonetheless, there is nothing impossible about flavoring weed, even when it seems too late.
Even when the flowers are weak and jarred, you can still add flavor to this important crop.
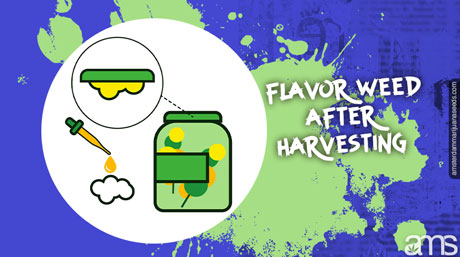
The first step towards adding flavor to harvested weed is to add essential oil or extract into the jar. How do I do that?
Once you’ve identified an essential oil or any other extract you prefer, you’ll need to soak cotton balls inside that extract. The next step is to attach the cotton ball to the lid of the jar. Make sure the cotton ball does not fold anywhere. Rather, it has to hang from the lid facing down.
When you hang the cotton balls, ensure they do not stretch and touch the weed buds. You must also ensure that there’s no excessive moisture inside the jar because excessive moisture causes mold, which will result in the weed rotting.
You can also minimize the chances of your weed rotting by adding several dried items into the jar. Some dried items you can add to your jar include flower petals, apple slices, and citrus peels. Alternatively, you can add marijuana spices such as cloves, cinnamon, and rosemary.
Final thoughts
It’s awesome to flavor your marijuana; in our opinion, it’s not done often enough. People think it’s hard to do, but the opposite is true. Whether it is before you harvest, during, or even after you have harvested. Therefore, it is no longer how to flavor marijuana or how to flavor weed, but a matter of when you want to flavor your weed!
FAQ
How to make weed taste like bubblegum?
To make your weed taste sweeter, like bubblegum, mix the food-grade bubblegum extract with some water and place your freshly cut buds in the mixture for a week, dry, and cure it. Then, place the dried buds in a jar, soak a cotton ball in a bubblegum extract and attach it to the lid facing downwards. This way, you have to sweeten the weed with a bubblegum flavor.
How to make weed taste like coffee?
To make your weed taste like coffee, it’s essential to ensure that the buds are fully cured and dried. Then keep them in a jar. After that, empty a giant tea bag, and put some coffee inside. Next, place the bag containing the coffee and keep it inside the jar containing the weed. No weed flavoring spray is needed.
How to flavor homemade gummies?
To flavor, your homemade gummies, get your favorite fruit juice and boil it under medium heat for 3 minutes. This enables the gelatin to set inside better. Stir the boiled juice and gelatin, then add the sweeteners according to your preference. You can then store the flavored gummies in an airtight container and keep them in a fridge. No weed flavoring drops are needed.
How to make weed taste better from a pipe?
You can make weed taste better from a pipe by adding your favorite fruit flavoring to the water pipe. Then, for a more enhanced taste, you can add ice cubes to that fruit-flavored water but be sure to clean the pipe well after use to avoid sugar from sticking.
How to make weed taste better from a bong?
Using flavored sparkling water can make your weed taste better from a bong. Some reputable brands, such as Nestle, manufacture their sparkling water using different flavors. Depending on your chosen flavor, rest assured that the undertones are nice as you inhale.
How to flavor old weed?
The best way to flavor old weed is to begin by moisturizing it. To moisturize old weed, peel off your favorite fruit (orange or mango) and place the peel in the jar containing the weed. The two shouldn’t come into contact with each other, though. After 3 hours of coverage, that weed will absorb some flavors.
How does weed flavor?
Weed flavors depend on their terpene synthase genes. For instance, a cannabis strain with limonene terpene synthase genes produces a lemon-like flavor. Weed that contains myrcene terpene genes, on the other hand, produces an earthy flavor. Other types of flavors include fruity and minty.
You may like
-


HHC vs. Delta 9: Differences & Similarities
-


DOJ Asks Federal Court To Deny Doctors’ Lawsuit Over Marijuana Rescheduling Hearing To Avoid ‘Undue Delay’
-


What Federally Illegal Drug Has Created Almost $10 Billion in Sales Tax Revenue for States in the Last 40 Months?
-


Three Wise Men Give Marijuana Strain Gift Suggestions
-


Tasmanian Hemp Assoc Bids Goodbye To Australian Hemp Council
-


Teen Marijuana Use Continues To Drop With Legalization
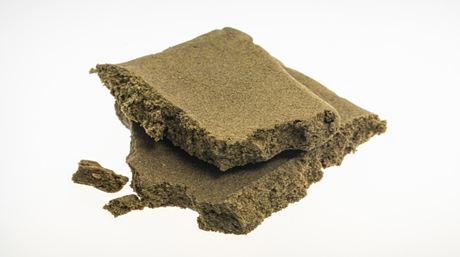
Many people often wonder how they can make cannabis hashish. Popularly shortened to hash, it is an Arabic name that means grass. Over countless years, this concentrate from the cannabis plant has been utilized by many cultures for its beneficial properties.
Today, the growing curiosity about how to make cannabis hash prompts us to come up with an ultimate guide on how the process can be done in a straightforward manner.
Producing hash requires separating cannabis bud trichomes from the other plant parts. In female cannabis plants, there are frosty white hairy-like structures. In this case, that’s what we refer to as trichomes. These parts are highly abundant in THC, which is why they are the most desired part of the plant. Remember that to come up with viable hashish, you must extract substantial amounts of THC.
Kief vs. hashish
Hashish doesn’t come merely from the separation of trichomes. The important factor at this point is kief. Kief is the raw material that aids in the production of hashish. When heat and pressure are applied to kief, hashish comes into existence.
Making kief into hash
From kief, it’s easy to come up with hash. There are two ways in which one can complete the process:
• Pollen pressing
• The heat and pressure method.
The pollen processing method
Pollen Processing involves placing kief in a press. Next, you apply firm pressure to make it moldable. By applying direct pressure to the kief, you will create a basic hash (really a kief puck). This method makes it easier to come up with a puck of hash.
However, this method has disadvantages. The flavors do not get a chance to develop, as there is no heat used in the process. The heat assists in developing and maintaining the flavors of the hash in its finished form. Heating and applying pressure to kief gives you a higher-quality hash.
The heat and pressure method
You can use the puck that you created above, or you can use cellophane to wrap kief and use a rolling pin to apply pressure and create a puck. Just keep gently applying pressure until the kief is at the density and shape that you want. You can continue to do this as long as you want. You can also let it sit for a day or two so that all of the flavors meld together. When you are ready, remove the cellophane.
Once you have created a kief puck using a pollen press, to do the heat and pressure method, you will need to gently heat the kief. You will want to wrap the puck in a wet paper towel. You will then wrap the kief in a wrap that can withstand being in a 93 – 137°C (200 – 280°F) oven. A good cooking parchment paper will be perfect for this application.
Place the parchment paper and its contents in an oven set somewhere between 93 – 137°C (200 – 280°F). Make sure that the contents do not spill out. Having a baking sheet handy would be very helpful here. Place the package in your oven for 5-10 minutes. Unwrap the package. Rewet your paper towel, re-press your puck using the method above, and then rewrap it in parchment paper. Place this in the oven again for 5-10 minutes. Repeat the process. You want to do this whole process at least three times. Let it cool overnight or by placing the product in your fridge or freezer.
The pressure and heat method will produce a superior hash.
Methods used in the production of hashish
There are other different methods used in coming up with hash. However, these ways give different potency levels.
It is also worth mentioning that different cannabis plants have different cannabinoid levels. That said, they can produce varied qualities of hash depending on the marijuana strain used. There are quite a few methods used to make cannabis hash. Nonetheless, we are going to give the three most used and cheap to try at home.
1. Finger production method
This could be described as the easiest method for producing hash. As one harvests ganja from the cannabis plants, there may be instances where it sticks to the palms and the fingers.
The method involves placing a can or jar and rubbing your hands and fingers together over the can so that it collects the parts of the buds that stick to your hands. This can then be used to produce hash by rubbing your hands together vigorously. The heat and pressure produced during rubbing aid in combining the mixture into hash. However, this type of hash is described as having low quality. There may also be contamination coming from sweat and dirt on your hands.
The obtained hash may have off-flavors and unpredictable effects, which is a negative.
2. Silkscreen
This method involves sieving cannabis trichomes through a silk screen. Depending on your preference, you can opt to make your silkscreen or purchase one. Either way, note that the cannabis plant parts must be trimmed into very tiny sizes through this screen.
That said, you also need to ensure that you see the trichomes and collect them painstakingly. The finer the silkscreens that you use, the higher the probability of coming up with finely produced hashish.
One can opt to use the remains to sieve them further. However, the kief obtained from the get-go usually has mostly potent hashish. Depending on the amount of hash needed, a single silkscreen is under most circumstances sufficient to come up with a substantial amount of hash.
3. Blender method
The blender method relies heavily on probability. The colder the trichomes, the easier it gets to separate them from the rest of the cannabis plant parts. Ice is a crucial ingredient in this method. Using this method involves mixing the cannabis plant matter, water, and ice into a blender.
Switching on the blender aids in separating the iced plant matter to get the trichomes. That becomes evident after switching off the blender. The trichomes sink, making it easy to obtain them promptly.
A sieve can then get used. The trichomes penetrate easily, which is why they pass through the sieve with water while the rest of the plant parts remain in the sieve.
Letting the trichomes and water mixture cool for 30 minutes afterward helps the trichomes form a layer at the bottom. However, one ought to be careful because slight disturbance to the trichomes can lead to unnecessary impurities. The trichomes layer can then get placed in a freezer for ten minutes.
In summary
Making hash is a sure way to make trichomes usable in a unique way. Now that you have the info necessary to come up with these concentrates, the ball is in your court.
The marijuana strains you use to extract the trichomes play an essential role in the overall effects obtained after using hashish. The better the strain you use, the better your hash will be.
Follow the method of your choice and enjoy your hash to the fullest!
General topics
How To Make Hash Or Hashish, Expert Tips!
Published
7 days agoon
December 14, 2024By
admin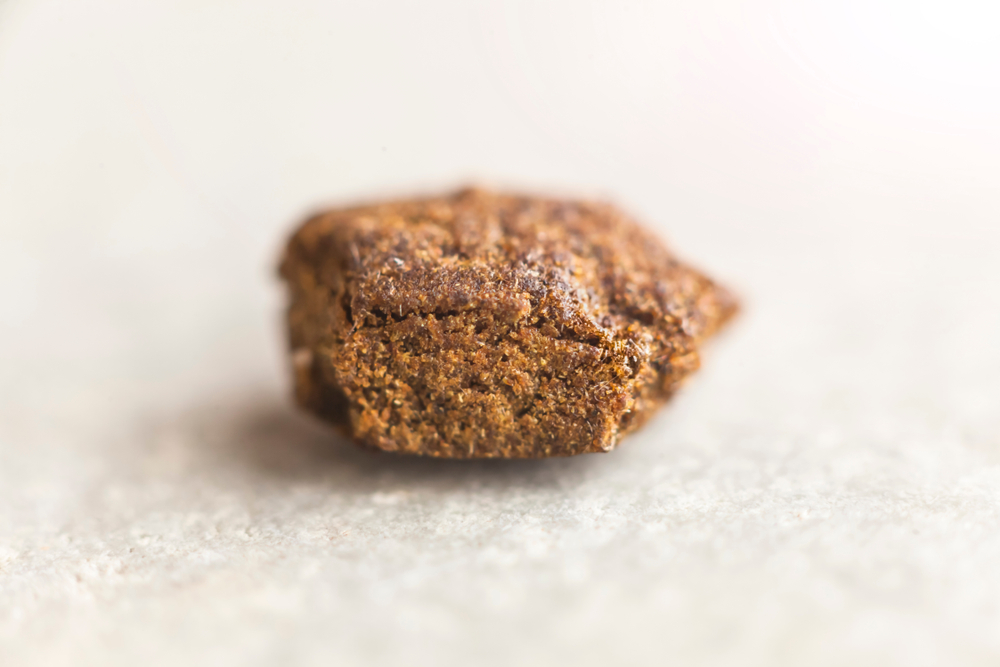
Hashish is a cannabis concentrate. It is wonderful stuff that you can crumble and put in a joint or smoke in a bowl. You can buy it from a dealer, but did you know that you can also make it relatively easily yourself? You don’t need that much at all. There is even a method that requires no tools at all, just your hands! Read on and make your own hash! In this article we’ll discuss two methods, namely making hash using a sieve and making hash using a blender.
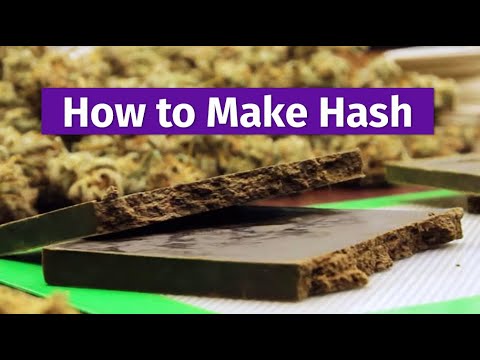
Make hashish with a sieve
There are different ways to make hashish. For example, you can roll your plant material under your hands. Because you press hard and roll, the trichomes stick to your hands. A sticky layer will remain on your hands, and if you carefully scrape it off, you will have hash!
Rolling is a simple method because you don’t need anything for it. Well, of course, you need plant material. You can use stems, leaves, and flower tops for it. In fact, everything that remains after harvesting still has trichomes. There are trichomes on almost all parts of a weed plant. Sometimes there aren’t that many, but by rolling everything under your hands, enough sticks. Suppose you don’t like this method, for example, because you don’t want to get your hands dirty, there are many more ways to make hash. So read on, and discover other ways that might be of interest to you. Keep in mind that every way to make hash produces a different kind of hash. A certain method influences the structure, for example, the hash may end up being a bit dry or very sticky. And how strong the hashish is can differ. But that is just the fun. With every method you use, the end product is about the same, since it falls into the hashish category. Yet there are differences in the final product that make it interesting again. Certainly, if you make it yourself, you can vary nicely. That way you learn what you like best. Anyway, we want to teach you a method here that is very simple. The only thing you need for it is a sieve. This method is also called ‘flat screening’. Use a strainer that you can easily hold in your hand, the smaller the holes, the better and purer your final product will be. We assume that you are looking for quality, not quantity!
It is best to first put your weed in the freezer for a while. That will help to get the trichomes off your weed plant better. When you have done that, remove the plant material from the freezer. Make sure you have a clean work table or surface. Put the plant material on the sieve and rub it very carefully back and forth. By rubbing the plant material remains on the sieve and the trichomes fall through the fine holes of the sieve. The trichomes fall on the surface under the sieve. Continue to sift for a while, until no more trichomes fall and the plant material is ‘finished’.
Making hashish in a blender
Of all the ways to make hashish, this is perhaps the coolest. And it is not only very fun to do, but it is also very simple. You probably have all the materials for this method at home. You need a blender and a strainer (sieve) for it. Are you ready to make your own fresh, wonderfully smelling, homemade hashish? Here we go!
Put all the cutting residues that you have left after pruning or harvesting in a blender. Now fill the blender with water so that all the plant material is just covered with water. Wait, don’t start mixing right away. We appreciate your enthusiasm! But ice must first be added. Fill the blender completely with ice. Now it’s time to mix. First do it a bit quietly, so that the ice can crush, and then turn the blender knob all the way to high-speed mode, and mix for a minute at the highest setting. You now get a kind of green soup, a bit of a slimy mixture. Now take the sieve and keep it above a jug or a pot. Pour the green mixture through the sieve into the jug and let it rest for about an hour. You now see something very nice happening: the trichomes form on the bottom. If you want to see this, you must take a glass can. Then you can see it all happen. Now comes a precise job, which you have to handle carefully. Drain part of the water, but watch out, make sure you don’t wash away the trichomes because you want them! Now fill the pot again with very cold water and let it rest for 10 minutes. Drain part of the water again and be careful not to wash away the trichomes. You have to be patient now, and not make it easy for yourself. Just wait and restrain yourself for a moment! For good quality hashish, you have to repeat this process about 6 times.
We will now make real hashish
Did you do all this? Beautiful! Then we will now make real hashish. Start by carefully draining as much water as possible from the jug (or pot, depending on what you use). So don’t rinse the trichomes away, otherwise, you can start over again, and you will have better things to do! Now grab a filter. A coffee filter works best. Carefully pour the solution left in the jug through the coffee filter. Now all the water is washed away and a sticky mass remains in the filter. Tadaaa, there is your homemade hash! Congratulations! First, gently squeeze the filter to remove even more water, pressing the hashish slightly. You can now let it dry and then smoke it in a bowl or joint, just what you like best. It is not necessary to first heat the hash or compress it even further. Enjoy!
Cannabis FAQ
Expert Lighting Tips For Successful Indoor Growing Weed
Published
4 weeks agoon
November 22, 2024By
admin
Cultivating Your Green Haven Year-Round
As the cold weather approaches and outdoor growers retreat indoors to continue their cultivation throughout the winter, the importance of choosing the right lighting for indoor growing becomes paramount. With a myriad of illumination options available, it’s easy to feel overwhelmed. But fear not, for we are here to guide you through the process, helping you create a thriving indoor garden that will yield bountiful results throughout the year.

Illuminate the Path to Successful Indoor Growing Weed
When it comes to indoor cultivation, lighting is undeniably one of the most crucial factors to consider. Not only does lighting play a vital role in manipulating the natural light cycles of marijuana plants, but it also serves as, the catalyst for photosynthesis—the process by which plants create their own, nourishment. Within the leaves of cannabis plants, chlorophyll acts as a light-absorbing pigment, harnessing light energy to convert water and carbon dioxide into food sugar.
The process of photosynthesis is directly influenced by the color, duration, and intensity of light received by the plant. By strategically altering these factors, you have the power to impact your plant’s food production. Cool blue and warm orange are examples of illumination colors that enhance a plant’s ability to generate sustenance. During the summer months, cool light is most beneficial, promoting dense and well-shaped growth. In contrast, warm-colored light during the fall harvest months induces the development of vibrant flowers. In essence, cool colors stimulate growth, while warm colors act as catalysts for flowering.
Embracing Darkness: The Role of Light Cycles
Beyond light color, the duration of light exposure your cannabis plant receives is of utmost importance. By adhering to specific light cycles, you can ensure optimal growth and flowering. During the growth phase, it is recommended to provide your young plants with 18 hours of light and 6 hours of uninterrupted darkness. This extended period of light exposure fuels vigorous vegetative growth. However, once the plant is ready to flower, adjusting the light cycle to 12 hours of light and 12 hours of darkness triggers the flowering process.
The flexibility of indoor cultivation allows you to customize the light cycle based on your preferences and the needs of your plants. This is especially beneficial during the winter months when maintaining a consistent temperature is challenging. By utilizing the ability to leave the lights on during the night and off during the day, you can create a more stable environment, minimizing temperature fluctuations and providing a nurturing space for your plants.
Choosing the Right Lamps: Illuminating Your Indoor Oasis
Selecting the appropriate lamps for your indoor grow room requires careful consideration of various factors. Firstly, assess the amount of light intensity required for your plants’ growth stage. Secondly, consider the size of your grow room, as this will determine the number and placement of lamps needed. It is essential to evaluate the electrical capabilities of the room to ensure that the chosen lamps can be adequately powered. Additionally, contemplate the preferred light color that aligns with the specific growth stage and desired outcomes. Lastly, establish a budget and compare the prices of different illumination options, keeping in mind that lighting systems are long-term investments that can incur higher costs due to their power consumption.
Fluorescent lamps with a broad color spectrum are particularly beneficial for seedlings that have not yet developed large leaves. These lamps provide ample light and support the initial stages of growth.
Indoor growers seeking maximum intensity per watt would benefit from high-pressure sodium lamps (HPS). Known for their efficiency and cost-effectiveness, HPS lamps emit a warm orange glow, which triggers plant hormones that facilitate bud development and flowering. While HPS lamps excel at providing warm light, they are less proficient in emitting cool blue light. Consequently, they are best suited for the flowering stage of growth. If you were to use an HPS bulb for seedlings, it is advisable to keep the lamps at a lower height (approximately 80 cm/31.50 inches) to encourage rapid horizontal growth. Early pruning can also help control plant height and prevent excessive stretching.
On the other hand, metal halide lamps (MH) are highly efficient and serve as an excellent primary light source for indoor growers. Emitting one of the brightest cool lights available, MH lamps are ideal for promoting foliage growth and cultivating robust plants. With an average lifespan of 10,000 hours, MH lamps retain their glow for an extended period. However, it is important to note that over time, the energy they emit within the blue range diminishes. Therefore, regular assessment and potential replacement of MH lamps are necessary to maintain optimal illumination conditions.
Expert Tips for Successful Indoor Growing Weed
To ensure the success of your indoor cultivation journey, consider the following tips:
- Maintain Adequate Distance: Pay close attention to the proximity of your plants to the light source. If the lamps are too close, they may cause light burn and damage your precious foliage. Strive to maintain a safe distance between the lamps and plants to avoid such undesirable outcomes.
- Achieve Balance: Provide all your plants with a consistent and equal amount of light. Avoid overcrowding, as taller plants may overshadow their smaller counterparts, depriving them of much-needed light. To overcome this challenge, consider using bins or adjustable platforms to elevate smaller plants closer to the light source, ensuring equitable light distribution.
- Cultivate a Year-Round Bliss: Embrace the advantages of indoor cultivation, relishing a year-round supply of your favorite buds. Although setting up your indoor oasis may seem initially daunting, the rewards will be reaped one bud at a time. With careful attention to illumination, you can create an optimal environment for your plants to thrive regardless of the season.
In conclusion, selecting the ideal illumination system for indoor growing is a decision that warrants thoughtful consideration. By understanding the profound impact of light color, cycle duration, and intensity on your plants, you can make informed choices that maximize yield potential. Whether you opt for fluorescent lamps, high-pressure sodium lamps (HPS), or metal halide lamps (MH), remember to strike a balance and provide optimal conditions for your plants to thrive. Embrace the joys of indoor cultivation and revel in the delights of a bountiful harvest, regardless of the season.

HHC vs. Delta 9: Differences & Similarities
DOJ Asks Federal Court To Deny Doctors’ Lawsuit Over Marijuana Rescheduling Hearing To Avoid ‘Undue Delay’

What Federally Illegal Drug Has Created Almost $10 Billion in Sales Tax Revenue for States in the Last 40 Months?

Three Wise Men Give Marijuana Strain Gift Suggestions

Tasmanian Hemp Assoc Bids Goodbye To Australian Hemp Council

Teen Marijuana Use Continues To Drop With Legalization

The Best Cocktails To Make You Feel Festive

Cannabis predictions for 2025: Low prices, high taxes, and hash

Oregon Cannabis: State of the State (2024)

Are MSOs Just Big Pharma on Steriods?

Distressed Cannabis Business Takeaways – Canna Law Blog™

United States: Alex Malyshev And Melinda Fellner Discuss The Intersection Of Tax And Cannabis In New Video Series – Part VI: Licensing (Video)

What you Need to Know

Drug Testing for Marijuana – The Joint Blog

NCIA Write About Their Equity Scholarship Program

It has been a wild news week – here’s how CBD and weed can help you relax

Cannabis, alcohol firm SNDL loses CA$372.4 million in 2022

A new April 20 cannabis contest includes a $40,000 purse

Your Go-To Source for Cannabis Logos and Designs

UArizona launches online cannabis compliance online course
Trending
-

 Cannabis News2 years ago
Distressed Cannabis Business Takeaways – Canna Law Blog™
-

 One-Hit Wonders2 years ago
United States: Alex Malyshev And Melinda Fellner Discuss The Intersection Of Tax And Cannabis In New Video Series – Part VI: Licensing (Video)
-

 Cannabis 1012 years ago
What you Need to Know
-

 drug testing1 year ago
Drug Testing for Marijuana – The Joint Blog
-

 Education2 years ago
NCIA Write About Their Equity Scholarship Program
-

 Cannabis2 years ago
It has been a wild news week – here’s how CBD and weed can help you relax
-

 Marijuana Business Daily2 years ago
Cannabis, alcohol firm SNDL loses CA$372.4 million in 2022
-
 California2 years ago
A new April 20 cannabis contest includes a $40,000 purse


