

- Magnifying tools are a must-have if you want to know when to harvest marijuana. The good thing is you probably already have some of these around before you start growing marijuana. Here are the most popular ones:
- Jeweler’s loupe: this is one of the oldest tools used for this purpose and is therefore cheap and requires fewer technical skills. It is small and easy to carry around. Most jewelers’ loupes have 10X magnification, which is good enough for observing when to harvest weed. However, if you do not have sharp eyes, get a higher magnification.
- Handheld Magnifying Glass: at the risk of looking like a scientist from back in the day, get a handheld magnifier. It is better than a jeweler’s loupe, but carrying around and observing a plant is exhausting. Please familiarize yourself with how to use it before you attempt to gauge the maturity of your plant.
- Phone camera: almost everyone has a phone with a camera fitted with zooming capabilities. The better the resolution of your camera, the more accurate your observation. All you need to do when using your phone’s camera as a magnifying tool is to take a lot of pictures when the light is at its best. Go through the pictures afterward, zooming in on the different parts of your plant to see if any changes indicate maturity.
- Digital microscope: not only are they used by modern scientists, but weed growers can also use them! A digital microscope is the best tool for observing the maturity of your marijuana plant. It provides good lighting and excellent magnification and allows for storing images. This way, you can take pictures of your plant at different stages and compare how it looks as it matures. A digital microscope is more expensive than the other methods mentioned in this list and will need you to invest in a laptop (if you do not have one), but the payoff is worth it.
Cannabis FAQ
Harvesting Marijuana, How And When, Expert Breeder Guide

Table of contents
When can I harvest marijuana?

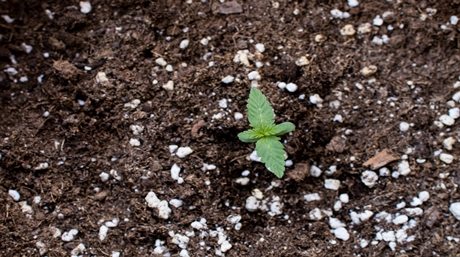
We are glad that you are here with us and have been growing cannabis. Now want to know when is the right time to harvest cannabis. The moment to reap what you have sown, the reward of your hard work, a labor of love, we hope.
Cannabis cultivation is not just watering cannabis plants. Many factors influence the growth and development of your plants. Luckily your experience and familiarity with the cannabis plants will grow too. I know a couple of master growers who have developed a sixth sense for the plant. They can almost predict the future while looking at a fan leaf and know the optimal harvest time to a tee creating the most gorgeous and powerful buds. (#lifegoals)
So keeping a close eye on your cannabis plants and knowing what to look for can make all the difference in determining the right time to harvest!
Monitor the entire plant and check the lower buds. Are they not too low, so they don’t get wet from the irrigation system? Learn to read the leaves and check the underside, as some monsters hide under the fan leaves. If you care for your cannabis plant, check in daily or once in a few days to develop a routine that you can follow to the letter. This will give you an overview to see if something is off and where / what to look. Practice makes perfect!
Don’t be afraid to investigate further; if something is off but can’t find it straight away, cut up a large fan leaf to inspect it thoroughly. Like the buds, you can sample buds to look for evidence of insects, mold, or bud rot. Better safe than sorry; if you catch a “plague” on time, you can control the damage to just a few plants, Saving your harvest!
The naked eye is not always good enough for a good inspection. So get a nice magnifying glass, and while you are at it, a lab coat too. You will not only see more but look very professional while doing so.
When is the best time to harvest cannabis plants?
The answer may vary depending on who you ask, but most experts agree that the ideal time to harvest is when 50-70% of the cannabis trichomes are ready.
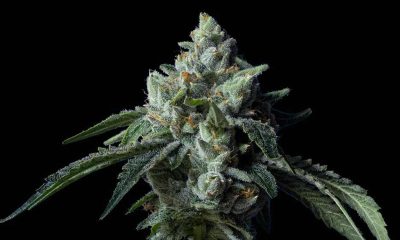
What do trichomes look like when ready to harvest?
Some mature trichomes are completely yellow; a few can remain milky white, while others have amber trichomes. You must wait until 70% of the clear trichomes have turned into solid amber trichomes to obtain higher amounts of CBD & THC. It’s the time when many growers harvest their cannabis plants.
The curing process
The curing stage of the harvested cannabis plant is an art form that growers have perfected over the years. The goal of curing is to preserve the potency and flavor of the buds while reducing the risk of mold or pest infestation.
The most important step in drying cannabis is carefully controlling humidity and temperature levels. If the buds are too dry, they will lose their potency and flavor. They will be susceptible to mold and pests if they are too moist. The ideal relative humidity for curing cannabis is between 60-65%. The buds should also be stored in a dark, airtight container such as a mason jar. The jars should be opened daily to allow the buds to “breathe”. Depending on the desired results, the curing process can take anywhere from two weeks to two months. By taking the time, and we can not emphasize that enough, hasting now when you have invested 10 to 12 weeks already is no gain. Take your time to cure your harvest; this way, you be sure that your Cannabis buds are of the highest quality.
Marijuana plant anatomy
Just in case you do not know it yet, here is a summary of the anatomy of the whole plant so you know which parts to focus on when determining harvest time.
Fan leaves
The fan leaves of a weed plant are so conspicuous that they have become the universal symbol for weed. What the layman does not know, however, is that the leaves contain deficient levels of THC.
THC
They can provide good indicators for the plant’s maturity, but they are mostly thrown out after trimming.
Stem
This part of the plant contains more THC than the leaf. For this reason, the stem of a cannabis plant is used as an additive for concentrates and tinctures.
Flower or bud
This is inarguably the most important part of a marijuana plant. Most farmers harvest it, which is the best indicator of when to harvest cannabis. Especially in the final days, keep a close eye on the cannabis flowers as bud rot can occur quickly.
Pistil
This is the female part of a flower and can be easily identified. The pistil of the marijuana plant is a red or orange hair-like feature that emerges from the flower. While the pistil does not contain any THC, it plays a big role in determining when to harvest marijuana.
Sugar leaves
, Unlike fan leaves, the sugar leaves of a weed plant have a high THC concentration. You can identify them easily since they grow out of the flower bud, with only the tips peeking through to the outside. They are normally not smoked since they have a plant-like test, but there are many other things they can be used for.
Trichomes
Trichomes are the tiny crystals on the leaves and buds that contain the plant’s cannabinoids. They are sticky and contain the highest levels of THC. They are also the best indicators of when to harvest marijuana.
How to observe marijuana plant maturity
CBN and THC levels
As we have seen above, the trichomes of a marijuana plant produce the highest amount of THC. The color of the trichomes can determine the amount contained at any time. There reaches a point where the trichomes produce the maximum amount of THC, and this is when the plant is at its peak potency. The THC level is very psychoactive and provides energy to the user.
Since the plant is constantly exposed to the sun and air, the level of THC in the trichomes breaks down after peak potency. UV rays and oxygen break down THC to cannabinol (CBN). CBN is a good sedative and produces a soothing, relaxing effect on the user. The many benefits of CBN include helping with pain, which is what many people with cancer or chronic pain are prescribed. The upside or downside of CBN is that it does not have psychoactive effects. Most growers do not let their weed reach the CBN levels regardless of all of its benefits.
When to harvest cannabis to get THC
THC (tetrahydrocannabinol) is a chemical found in marijuana that causes much of the ‘high’ associated with the plant. Since most users want this high, many farmers wait until their plants are ripe with THC before they harvest marijuana plants.
To know when to harvest cannabis plants with high levels of THC, you must pay attention to the trichomes in flowers. The little ball at the top of a trichome is where all the cannabis goodness is located. You can easily see the changes in this area using a microscope. Here are the things to look out for:
- The buds are still developing when the trichomes are clear. Take care that you look at different buds on the plant since the ones on the top tend to mature faster. Even when your trichomes are clear, you should constantly monitor them since changes appear quickly.
- For many Indica strains, harvest time is when you notice cloudy or opaque trichomes, then your plant is mature. At this stage, the trichomes have produced all the THC they can and will not make any more trichomes. Remember, trichomes on different flowers mature at different rates, so you can remove the developed ones and let the slower ones reach maturity.
- When you notice amber or brownish trichomes, the trichomes cannot produce more THC, and she is ready for harvest! Leaving the plant for too long leads to a breakdown of THC into CBN, which has a soothing effect. When the plants reach 30% amber and 70% cloudy trichomes, this is the optimum time to start harvesting many strains of marijuana, including Sativa hybrids.
- When your trichomes are fully amber, your plant is too mature.
When to harvest weed based on the effects
Since different harvest times give different effects to the user, when to harvest cannabis should depend on what kind of weed effect you desire. Here is a summary of when to harvest based on the different kinds of high:
- Relaxing high: harvest when the trichomes are 70-90% cloudy.
- Energetic high: harvest when the trichomes are 50% clear and 50% cloudy.
- Euphoric high: when the trichomes are 50-70% cloudy.
Another way you can determine when to harvest cannabis for the different effects depends on the pistil color.
- Euphoric high: the pistils should be around 60-70% dark and curling.
- Relaxing high: the pistils should be around 70-90% dark and curling.
Other indicators of when to harvest marijuana
While potency is the biggest determinant of when to harvest weed, other factors should decide when to harvest easier for you. Here are a few:
Flowering time: this is going to depend on the strain you have planted. Marijuana plants mature at different rates, so it is important to check each plant individually.
- Indica strains can be harvested 8 weeks after flowering.
- Sativa strains can be harvested between 10 to 12 weeks after flowering.
- Autoflowers are ready to harvest ten weeks after the transition from seedling to a bud.
Pistils: as we saw earlier, the pistils play a big role in determining when to harvest marijuana. In a healthy weed plant nearing maturity, the pistils stick right out of the body and are white. When the plant is ready for harvesting, the pistils curl back toward the flower and turn dark.
- 50-70% brown indicates a young harvest with a light taste.
- 70-90% dark indicates a ripe harvest with a potent taste.
- 90-100% indicates a late harvest with a sharp taste.
Remember, not all the pistils turn dark at the same time. To maximize your harvest, you can harvest those ready and leave the rest to continue maturing.
Trichomes plus the Pistil: while looking at either the trichomes or the pistil can independently give you good results, however, combining these methods will give you the most accurate indicators of when to harvest marijuana. Sometimes the pistils remain white even as the trichomes turn cloudy. Other times the pistils start curling while the trichomes remain clear. You will get the most potent THC when both these parts start changing. So instead of depending on just one method, combine these two to determine when to harvest weed.
Extra tips for harvesting marijuana
Here are some tried and tested rules of thumb that will ensure you get better results when determining when to harvest marijuana:
- The harvest window starts when the plant is not growing more or new white hairs or pistils, and nearly half of the pistils have started to darken and curl in.
- If the pistils are almost sticking out, but the trichomes are still translucent, the plant is too young and unprepared for harvesting. Consider this harvest time if you want to lower your bud potency. Keep in mind that you will get a lower yield at this point too.
- The highest level of THC is reached when most trichomes have turned cloudy. Remember to use a microscope or jeweler’s loupe to observe the trichomes. Cloudy trichomes have the highest THC levels and have more psychoactive and euphoric effects.
- The harvest window passes once the trichomes start withering or turning grey. Weed harvested at this stage will act more as a sedative and will not have any psychoactive effects. To get the best weed, harvest within four weeks after the beginning of the harvest window.
- Some weed strains, like the Haze and Sativa strains, never turn amber. You will know when your plans are ready for harvest once almost all their trichomes have turned white or cloudy.
- To get the ‘couch lock‘ or sedating effect of weed, harvest when it is toward the end of the harvest period. At this time, the trichomes will be darker.
How to speed up harvesting
We are not a fan of this but understand that sometimes there’s not enough time to let nature take its course! The good thing is that there are ways to speed up the harvesting time without sacrificing yields and quality. Let us look at some of them.
- Fewer Hours of Light in the Flowering phase: You can change the amount of light you allow your plants to get after they start flowering. The amount of light should depend on the strain you planted. Sativa and Haze strains, for example, can mature well without a lot of light. Restricting the amount of light helps the buds mature faster.
- Get a Quick-Finishing Strain: if you want a quick harvest, get one of the various auto-flowering strains available. These grow up independent of light availability, which is perfect for places that do not get a lot of sunlight. Auto-flowering strains can be ready for harvest within 3 months of planting.
- 24 Hours of Light a Day in Vegetative Stage: a weed plant grows through several life stages, and the vegetative stage comes right before the flowering stage. To get a shorter harvesting period, you can expose your plant to light for 24 hours throughout the vegetative stage. This makes the plant mature and gets to the flowering stage faster.
- Initiate the Flowering phase Earlier: You can change your light schedule so that your seedlings make buds immediately. This is an inefficient way of growing your weed, but it does speed up the growth process. Before flowering them, wait just a bit to ensure you get a satisfactory amount of bud.
- Grow Indoors: this method gives you maximum control over how your plants will grow, how big they will get, and what they will yield at harvest. Using potting plants or a greenhouse is a good way to ensure all this control.
- Use Correct Nutrients for the Correct Stage: a marijuana plant requires different nutrients as it goes through the different growth stages. The astute farmer will familiarize themselves with the nutrient requirements and either buy them as the plant grows or hand-mix them depending on their needs. Feeding the plant correctly will reduce the overall time before harvest.
- React Quickly to Problems: like other plants, weed plants can get pest infestations or experience illnesses like too many nutrients. Pay close attention to your plants and note every problem that arises, no matter how small. Reacting quickly also saves you from dealing with out-of-control problems further on. The more attention you give to your plant, the faster you can harvest.
How to harvest a cannabis plant step by step
- Set the working place first.
- Clean your tools with gloves or rubber when you touch the plants.
- Based on plant length, it can take up to one hour.
- Install the branches into a cardboard bag. Break them into small twigs and buds. The buds’ length and the drying area’s humidity determine how big or small they should be.
To sum up… The future of weed is in your hands. It’s time to cultivate!
We started with a plan to create the best cannabis seeds and haven’t stopped since. Our focus on quality has paid off in spades for our customers who appreciate high-quality products that are both affordable as well as feminized – meaning they’ll only produce one strain per seed! It’s been an exciting journey building up this business, but it would be nothing without you guys, so thank you for becoming part of the cannabis community.
Cannabis cultivation is a craft. There are many strains, some easy to grow, others more difficult- but it’s worth the effort! Learning to read the plant, knowing when it’s ready for harvest. Watching as your plant grows thick, dense buds and produces those milky white trichomes. Honing your craft and growing your marijuana gives an extra kick once the moment has come, and you can enjoy your homegrown weed. Your skillset will ultimately determine the size, the high, and weight of your cannabis buds.
Frequently asked questions
Should I harvest top buds first?
Several plants grow from top to bottom or from the outside. For the first kind, the flowers mature more quickly than the inside flowers hidden in sunlight on the outside. Immediately after the outer buds have been harvested, the internal branches are opened to sunlight and might benefit from this in their final growth.
What is the difference between marijuana and cannabis?
People around the country have started using the medical name cannabis and ditching the “street name” marijuana. These names refer to the same plant, and there are no differences.
How long does it take to grow a cannabis plant?
On average, cannabis matures after about eight or nine weeks of blooming; however, the maturity interval can differ between strains and the circumstances where your plants grow.
How much should I spend on cannabis harvesting tools?
Most tools are your “garden variety” (pun intended!) tools of cutters and scissors. The lifespan depends on how well you clean and takes care of them. I would estimate a 2-man harvesting job; you would be spending a maximum of $50,- on tools. If you’re harvesting for a longer period or more frequently, investing in a decent chair is welcome! Trimming buds to perfection is a pain in the ass enough!
Pruning the plant?
Pruning is an important part of cannabis growing. When growing with limited space, you want the plant to receive as much light as possible and not waste energy growing the branches and fan leaves in the shade. Be gentle; small plants can take a heavy blow from this and might not recover from the bisection.


Discover Cannabis and CO2
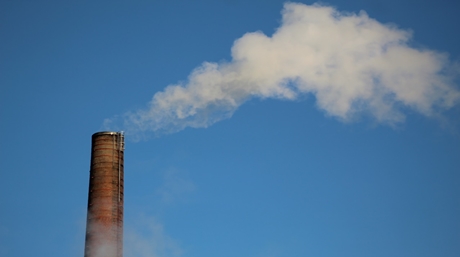
Did you know that your plants can be harmed if they don’t get an adequate supply of CO2? Or that an excessive supply of carbon dioxide can potentially be harmful to your marijuana plants? Carbon dioxide is a crucial aspect of marijuana cultivation that can hinder or permanently halt the progress of plant growth. When it comes to supplying your plants with additional carbon dioxide, there are certain factors you need to keep in mind. In this piece “Cannabis and CO2” we will share ways to optimize CO2 levels for cannabis growth.

Why is carbon dioxide essential for cannabis cultivation?
It is essential to ensure that your plants receive a carbon dioxide level above 250 parts per million (ppm). Any CO2 level below this measure can pose immense risk to them. On the other hand, exposing your plants to dangerously high levels of carbon dioxide can be lethal. But why is carbon dioxide essential for cannabis cultivation? It enables plants to complete the process of photosynthesis. Photosynthesis is the conversion of carbon dioxide into energy in plants. As the name and formula imply, CO2 consists of one carbon atom and two oxygen atoms. This is significant because plants require 17 essential elements to grow and reproduce, and hydrogen, carbon, and oxygen make up 95% of a plant’s dry weight.
Many farmers suggest that adding CO2 to the cultivation room could improve yields by up to 20%. However, this guide will show you how to optimize carbon dioxide levels for better weed growth and excellent results.
How to introduce additional CO2 to your garden
There are several methods to add carbon dioxide to your garden. However, many of these methods do not guarantee controlled delivery of the desired PPM. Therefore, we recommend investing in reliable equipment to ensure proper CO2 supplementation.
CO2 generators
CO2 generators offer an effective way to improve the carbon dioxide levels in your plants. These products, resembling outdoor heaters, burn propane or natural gas to produce carbon dioxide. They also emit heat, making them suitable for larger spaces and climate-controlled enclosures.
Compressed CO2
Compressed CO2, stored in metal tanks like propane cylinders or scuba tanks, can be delivered to your plants through emitters. Unlike generating carbon dioxide on your own, compressed carbon dioxide is produced at a factory, eliminating concerns about heat generation. This makes compressed CO2 an excellent choice for small-scale growers.
What does carbon dioxide do for your cannabis plants?
Optimizing carbon dioxide levels for your plants will result in increased growth speed and higher yields. With accelerated growth, you can enjoy bountiful harvests every year, resulting in bigger and better yields without experiencing dry periods. When carbon dioxide is used properly, it increases the moisture content in your plants and enhances their resilience. This enables plants to withstand higher temperatures than they normally would without drying out quickly. As a result, your plants will thrive in hotter conditions, leading to improved growth.

Why use CO2 in cannabis cultivation?
There are two primary benefits of using CO2 in your marijuana plants: faster growth and greater yield. Additionally, plants store a certain amount of moisture and energy in their leaves, and carbon dioxide helps release that energy, allowing plants to blossom. Most cultivators agree that unlocking this stored energy can lead to a 20-30% increase in yield, along with a relative growth speed increase of at least 15%.
What do you need to know before adding CO2 to your cannabis plants?
Adding CO2 will increase the humidity of your cannabis garden, creating a more moist environment. However, higher moisture levels can also increase the risk of fungus and rot. Moreover, uncontrolled release of carbon dioxide can create a toxic environment for both your cannabis plants and yourself. A CO2 level of about 2000 ppm can harm your plants, and levels higher than that can be unsafe for animals and humans to breathe. It’s important to remember that a quantity below 250 ppm will harm your plants.
Since carbon dioxide is heavier than oxygen, it needs to rain down on your plants. Therefore, it’s necessary to regulate carbon dioxide levels to maximize its benefits without sacrificing the oxygen your plants require, and vice versa. In a nutshell, carbon dioxide supplementation will lead to bigger, improved, and higher annual yields.
Cultivating Your Green Haven Year-Round
As the cold weather approaches and outdoor growers retreat indoors to continue their cultivation throughout the winter, the importance of choosing the right lighting for indoor growing becomes paramount. With a myriad of illumination options available, it’s easy to feel overwhelmed. But fear not, for we are here to guide you through the process, helping you create a thriving indoor garden that will yield bountiful results throughout the year.

Illuminate the Path to Successful Indoor Growing Weed
When it comes to indoor cultivation, lighting is undeniably one of the most crucial factors to consider. Not only does lighting play a vital role in manipulating the natural light cycles of marijuana plants, but it also serves as, the catalyst for photosynthesis—the process by which plants create their own, nourishment. Within the leaves of cannabis plants, chlorophyll acts as a light-absorbing pigment, harnessing light energy to convert water and carbon dioxide into food sugar.
The process of photosynthesis is directly influenced by the color, duration, and intensity of light received by the plant. By strategically altering these factors, you have the power to impact your plant’s food production. Cool blue and warm orange are examples of illumination colors that enhance a plant’s ability to generate sustenance. During the summer months, cool light is most beneficial, promoting dense and well-shaped growth. In contrast, warm-colored light during the fall harvest months induces the development of vibrant flowers. In essence, cool colors stimulate growth, while warm colors act as catalysts for flowering.
Embracing Darkness: The Role of Light Cycles
Beyond light color, the duration of light exposure your cannabis plant receives is of utmost importance. By adhering to specific light cycles, you can ensure optimal growth and flowering. During the growth phase, it is recommended to provide your young plants with 18 hours of light and 6 hours of uninterrupted darkness. This extended period of light exposure fuels vigorous vegetative growth. However, once the plant is ready to flower, adjusting the light cycle to 12 hours of light and 12 hours of darkness triggers the flowering process.
The flexibility of indoor cultivation allows you to customize the light cycle based on your preferences and the needs of your plants. This is especially beneficial during the winter months when maintaining a consistent temperature is challenging. By utilizing the ability to leave the lights on during the night and off during the day, you can create a more stable environment, minimizing temperature fluctuations and providing a nurturing space for your plants.
Choosing the Right Lamps: Illuminating Your Indoor Oasis
Selecting the appropriate lamps for your indoor grow room requires careful consideration of various factors. Firstly, assess the amount of light intensity required for your plants’ growth stage. Secondly, consider the size of your grow room, as this will determine the number and placement of lamps needed. It is essential to evaluate the electrical capabilities of the room to ensure that the chosen lamps can be adequately powered. Additionally, contemplate the preferred light color that aligns with the specific growth stage and desired outcomes. Lastly, establish a budget and compare the prices of different illumination options, keeping in mind that lighting systems are long-term investments that can incur higher costs due to their power consumption.
Fluorescent lamps with a broad color spectrum are particularly beneficial for seedlings that have not yet developed large leaves. These lamps provide ample light and support the initial stages of growth.
Indoor growers seeking maximum intensity per watt would benefit from high-pressure sodium lamps (HPS). Known for their efficiency and cost-effectiveness, HPS lamps emit a warm orange glow, which triggers plant hormones that facilitate bud development and flowering. While HPS lamps excel at providing warm light, they are less proficient in emitting cool blue light. Consequently, they are best suited for the flowering stage of growth. If you were to use an HPS bulb for seedlings, it is advisable to keep the lamps at a lower height (approximately 80 cm/31.50 inches) to encourage rapid horizontal growth. Early pruning can also help control plant height and prevent excessive stretching.
On the other hand, metal halide lamps (MH) are highly efficient and serve as an excellent primary light source for indoor growers. Emitting one of the brightest cool lights available, MH lamps are ideal for promoting foliage growth and cultivating robust plants. With an average lifespan of 10,000 hours, MH lamps retain their glow for an extended period. However, it is important to note that over time, the energy they emit within the blue range diminishes. Therefore, regular assessment and potential replacement of MH lamps are necessary to maintain optimal illumination conditions.
Expert Tips for Successful Indoor Growing Weed
To ensure the success of your indoor cultivation journey, consider the following tips:
- Maintain Adequate Distance: Pay close attention to the proximity of your plants to the light source. If the lamps are too close, they may cause light burn and damage your precious foliage. Strive to maintain a safe distance between the lamps and plants to avoid such undesirable outcomes.
- Achieve Balance: Provide all your plants with a consistent and equal amount of light. Avoid overcrowding, as taller plants may overshadow their smaller counterparts, depriving them of much-needed light. To overcome this challenge, consider using bins or adjustable platforms to elevate smaller plants closer to the light source, ensuring equitable light distribution.
- Cultivate a Year-Round Bliss: Embrace the advantages of indoor cultivation, relishing a year-round supply of your favorite buds. Although setting up your indoor oasis may seem initially daunting, the rewards will be reaped one bud at a time. With careful attention to illumination, you can create an optimal environment for your plants to thrive regardless of the season.
In conclusion, selecting the ideal illumination system for indoor growing is a decision that warrants thoughtful consideration. By understanding the profound impact of light color, cycle duration, and intensity on your plants, you can make informed choices that maximize yield potential. Whether you opt for fluorescent lamps, high-pressure sodium lamps (HPS), or metal halide lamps (MH), remember to strike a balance and provide optimal conditions for your plants to thrive. Embrace the joys of indoor cultivation and revel in the delights of a bountiful harvest, regardless of the season.
As the cold weather approaches and outdoor growers retreat indoors to continue their cultivation throughout the winter, the importance of choosing the right lighting for indoor growing becomes paramount. With a myriad of lighting options available, it’s easy to feel overwhelmed. But fear not, for we are here to guide you through the process, helping you create a thriving indoor garden that will yield bountiful results throughout the year.
Lighting: Illuminating the Path to Successful Indoor Growth
When it comes to indoor cultivation, lighting is undeniably one of the most crucial factors to consider. Not only does lighting play a vital role in manipulating the natural light cycles of marijuana plants, but it also serves as the catalyst for photosynthesis—the process by which plants create their own nourishment. Within the leaves of cannabis plants, chlorophyll acts as a light-absorbing pigment, harnessing light energy to convert water and carbon dioxide into food sugar.
The process of photosynthesis is directly influenced by the color, duration, and intensity of light received by the plant. By strategically altering these factors, you have the power to impact your plant’s food production. Cool blue and warm orange are examples of light colors that enhance a plant’s ability to generate sustenance. During the summer months, cool light is most beneficial, promoting dense and well-shaped growth. In contrast, warm-colored light during the fall harvest months induces the development of vibrant flowers. In essence, cool colors stimulate growth, while warm colors act as catalysts for flowering.
Embracing Darkness: The Role of Light Cycles
Beyond light color, the duration of light exposure your cannabis plant receives is of utmost importance. By adhering to specific light cycles, you can ensure optimal growth and flowering. During the growth phase, it is recommended to provide your young plants with 18 hours of light and 6 hours of uninterrupted darkness. This extended period of light exposure fuels vigorous vegetative growth. However, once the plant is ready to flower, adjusting the light cycle to 12 hours of light and 12 hours of darkness triggers the flowering process.
The flexibility of indoor cultivation allows you to customize the light cycle based on your preferences and the needs of your plants. This is especially beneficial during the winter months when maintaining a consistent temperature is challenging. By utilizing the ability to leave the lights on during the night and off during the day, you can create a more stable environment, minimizing temperature fluctuations and providing a nurturing space for your plants.
Choosing the Right Lights: Illuminating Your Indoor Oasis
Selecting the appropriate lights for your indoor grow room requires careful consideration of various factors. Firstly, assess the amount of light intensity required for your plants’ growth stage. Secondly, consider the size of your grow room, as this will determine the number and placement of lights needed. It is essential to evaluate the electrical capabilities of the room to ensure that the chosen lights can be adequately powered. Additionally, contemplate the preferred light color that aligns with the specific growth stage and desired outcomes. Lastly, establish a budget and compare the prices of different lighting options, keeping in mind that lighting systems are long-term investments that can incur higher costs due to their power consumption.
Fluorescent lights with a broad color spectrum are particularly beneficial for seedlings that have not yet developed large leaves. These lights provide ample light and support the initial stages of growth.
Indoor growers seeking maximum intensity per watt would benefit from high-pressure sodium lamps (HPS). Known for their efficiency and cost-effectiveness, HPS lights emit a warm orange glow, which triggers plant hormones that facilitate bud development and flowering. While HPS lights excel at providing warm light, they are less proficient in emitting cool blue light. Consequently, they are best suited for the flowering stage of growth. If you were to use an HPS bulb for seedlings, it is advisable to keep the lights at a lower height (approximately 80 cm/31.50 inches) to encourage rapid horizontal growth. Early pruning can also help control plant height and prevent excessive stretching.
On the other hand, metal halide lights (MH) are highly efficient and serve as an excellent primary light source for indoor growers. Emitting one of the brightest cool lights available, MH lights are ideal for promoting foliage growth and cultivating robust plants. With an average lifespan of 10,000 hours, MH lights retain their glow for an extended period. However, it is important to note that over time, the energy they emit within the blue range diminishes. Therefore, regular assessment and potential replacement of MH lights are necessary to maintain optimal lighting conditions.
Expert Tips for Successful Indoor Growing
To ensure the success of your indoor cultivation journey, consider the following tips:
- Maintain Adequate Distance: Pay close attention to the proximity of your plants to the light source. If the lights are too close, they may cause light burn and damage your precious foliage. Strive to maintain a safe distance between the lights and plants to avoid such undesirable outcomes.
- Achieve Balance: Provide all your plants with a consistent and equal amount of light. Avoid overcrowding, as taller plants may overshadow their smaller counterparts, depriving them of much-needed light. To overcome this challenge, consider using bins or adjustable platforms to elevate smaller plants closer to the light source, ensuring equitable light distribution.
- Cultivate Year-Round Bliss: Embrace the advantages of indoor cultivation, relishing a year-round supply of your favorite buds. Although setting up your indoor oasis may seem initially daunting, the rewards will be reaped one bud at a time. With careful attention to lighting, you can create an optimal environment for your plants to thrive regardless of the season.
In conclusion, selecting the ideal lighting system for indoor growing is a decision that warrants thoughtful consideration. By understanding the profound impact of light color, cycle duration, and intensity on your plants, you can make informed choices that maximize yield potential. Whether you opt for fluorescent lights, high-pressure sodium lamps (HPS), or metal halide lights (MH), remember to strike a balance and provide optimal conditions for your plants to thrive. Embrace the joys of indoor cultivation and revel in the delights of a bountiful harvest, regardless of the season.

Cannabis12 hours ago
White House Finally Comments On Marijuana Industry

Cannabis News14 hours ago
Stop Using Bat Poop to Fertilize Your Weed Plants Immediately, Here is Why…

april fools15 hours ago
The History Behind April Fool’s Day

adult-use cannabis16 hours ago
Star signs and cannabis strains: April 2025 horoscopes

comfort food1 day ago
Does Comfort Food Actually Help

Durga Mata1 day ago
Connect to cannabis history with three legacy strains from Paradise Seeds

Cannabis1 day ago
This State’s Cannabis Revenue Keeps Pouring In

Impact2 days ago
Major Bloom: Cultivating community, creativity, and cannabis in Worcester

Marijuana Business Daily2 days ago
How a Colorado operator stumbled onto ‘blueprint for laundering marijuana’

Bust of the Day2 days ago
Northern Ireland: Man charged after £425,000 worth of cannabis seized

Cannabis News2 years ago
Distressed Cannabis Business Takeaways – Canna Law Blog™

One-Hit Wonders2 years ago
United States: Alex Malyshev And Melinda Fellner Discuss The Intersection Of Tax And Cannabis In New Video Series – Part VI: Licensing (Video)

Cannabis 1012 years ago
What you Need to Know

drug testing1 year ago
Drug Testing for Marijuana – The Joint Blog

Education2 years ago
NCIA Write About Their Equity Scholarship Program

Cannabis2 years ago
It has been a wild news week – here’s how CBD and weed can help you relax

Marijuana Business Daily2 years ago
Cannabis, alcohol firm SNDL loses CA$372.4 million in 2022

California2 years ago
A new April 20 cannabis contest includes a $40,000 purse

Uncategorized2 years ago
Your Go-To Source for Cannabis Logos and Designs

Education2 years ago
UArizona launches online cannabis compliance online course
-
 Cannabis News2 years ago
Distressed Cannabis Business Takeaways – Canna Law Blog™
-
 One-Hit Wonders2 years ago
United States: Alex Malyshev And Melinda Fellner Discuss The Intersection Of Tax And Cannabis In New Video Series – Part VI: Licensing (Video)
-
 Cannabis 1012 years ago
What you Need to Know
-
 drug testing1 year ago
Drug Testing for Marijuana – The Joint Blog
-
 Education2 years ago
NCIA Write About Their Equity Scholarship Program
-
 Cannabis2 years ago
It has been a wild news week – here’s how CBD and weed can help you relax
-
 Marijuana Business Daily2 years ago
Cannabis, alcohol firm SNDL loses CA$372.4 million in 2022
-
 California2 years ago
A new April 20 cannabis contest includes a $40,000 purse