

General topics
Create Your Own Cannabis Infused Capsules Easily

Making cannabis capsules is one of the many enjoyable practices marijuana lovers can enjoy daily. However, a few weed users want to know how to make cannabis oil capsules. If you are one of those that ask how to make cannabis capsules at home, consider this article to be your ultimate guide.
Let’s look at the recipe below.

Canna caps recipe
If you want your cannabis-infused capsules to look amazing, you need the following materials and tools:
- Approximately 7-15 grams of dried cannabis. You must ensure the cannabis is ground and dry. Alternatively, you can use ground trim or kief
- ½ teaspoon of soy lecithin
- ¼ -½ of cooking oil. If possible, use an extra organic virgin
- Approximately 50 gelatin capsules. These capsules need to be empty
- 10mm syringe
- Capsule filling machine
- 1 glass bowl
- 1 cooking pot (must have a lid)
- 1 baking tray
- 1 rubber band
- 1 small bowl
- 1 spatula
- A piece of cheesecloth
- A parchment paper (1 sheet)

Instructions on how to make cannabis oil capsules
Now that you have the canna caps recipe ready, it is time you know how to use everything you have just assembled. Follow these instructions to make your homemade cannabis-infused capsules:
- The first step towards making homemade infused capsules is preheating your oven. Ensure the oven does not exceed 225 degrees Fahrenheit.
- Cover the baking sheet using aluminum foil. Doing this will prevent the cannabis from sticking to the baking sheet. If you use the sheet without aluminum foil, it will be difficult to remove the cannabis afterward.
- Ensure you have at least 5.5 grams of small cannabis buds. There is no harm in reducing or increasing the number of cannabis buds a little.
- To ensure the cannabis buds or trim cook evenly, you need to grind them. You can use a manual grinder or a food processor for fine grinding. If you opt for a food processor, do not exceed 5 to 8 seconds of grinding.
- Evenly spread the ground cannabis trim on the baking sheet you put aluminum foil on in step 1 above.
- Put everything on the baking sheet in your oven. The oven should not be preheated for any time over 60 minutes.
- As the ingredients heat in the oven, plug in the crock-pot. Although it will turn on immediately if you flip the switch, the crock-pot will take minutes before it finally heats up completely.
- Measure and pour a ¼ cup of coconut or pure virgin oil into the crock pot. Make sure to heat the crock-pot and the bud at the same time. At this time, your concoction should have an intense aroma.

- Remove the mixture you placed in the oven to grind it again. This second grinding aims to ensure that the grind is fine. Again, you can grind the cannabis manually or use a food processor. If you decide to use the latter, you must grind for at least 20 seconds.
- Now that you have the finely-ground cannabis, add it to the preheated crock-pot. Ensure the cooking oil you put into the crock-pot is enough for the contents to submerge.
- The eleventh step to make cannabis capsules is to stir the ingredients until they blend well.
- Let the mixture cook for at least 3 hours. Some people prefer the mixture to cook the whole night, but research shows that even 3 hours of cooking in a crock pot produces a better product. Also, cooking the mixture for a long time does not necessarily increase potency. Be sure to stir the mixture frequently for the first hour.
- Set up the capping machine using the instructions at the back of the container. As you may know, most cap-filling machines are usually equipped with tampers. Thanks to the tampers, you can pack your caps with various materials. However, since you are not using dry herb but liquid cannabis, you may not need a tamper.
- Following the instructions in the letter, put in place 50 capsules inside the capping machine. To ensure you don’t lose any caps, all tops should be fixed to the containers.
- Cut a section of cheesecloth. When cutting the cheesecloth, ensure it is two times the size of your microwave’s safe container. That way, you will not lose any ingredients later.

- Fold the cheesecloth in half. The aim is to ensure you attain double thickness. Place the folded cheesecloth above the container. It would be best to hold the cheesecloth in place using a rubber band. Remember that you will need this cheesecloth to be fixed firmly so you can strain your oil mixture.
- Unplug your crock pot from the socket and let the mixture rest for about 20 minutes, which is enough time to cool.
- Pour the contents of the crock-pot into the cheesecloth. Do not worry if the contents are hard and dry. If they take the latter form, you can use a spatula to remove the contents from the cheesecloth.
- Cut off the rubber band. If you want to use the rubber band in the future, you can untie it gently without losing the contents on the cheesecloth.
- Bundle up all the contents and squeeze off extra oil. Remove all the oil that may be in the contents of the cheesecloth so that the contents are as dry as possible. It would be best to be careful because the oil is still hot. Alternatively, you can let the contents on the cheesecloth drain themselves by placing the cheesecloth on a mesh colander. This will take longer
- Throw away the used cheesecloth.
- Using the syringe, suck as much cannabis-laden oil.

- Fill each capsule to the brim.
- If the syringe blocks, you can try to unblock it while still warm or fresh, but if the problem persists, you will need to replace it.
- Close up the caps that you’ve filled up with cannabis oil.
- Put the filled caps inside a refrigerator. Every time you want to eat the caps, go to the fridge and eat as much as you want without necessarily thawing. Don’t worry when you see the cold caps turning lighter in color. It is because the coconut oil is solidifying.

Final thoughts
Your quest to make canna caps is satisfied. You can choose to eat your cannabis-infused capsules cold straight from the refrigerator. You can also get them out of the fridge for a few hours for the coconut oil to melt, after which you can eat them. I hope you have enjoyed our guide on making Cannabis Infused Capsules.
FREQUENTLY ASKED QUESTIONS:
1. What are cannabis capsules, and how are they made?
- Cannabis capsules, also known as canna caps, are edible capsules filled with cannabis-infused oil. They are made by grinding cannabis, decarboxylating it in an oven, and then cooking it with coconut oil in a crock pot before filling the mixture into gelatin capsules.
2. Can I use any type of cooking oil for making cannabis capsules?
- While you can use various types of cooking oils, extra virgin coconut oil is recommended due to its high-fat content, which helps better absorb the cannabinoids.
3. How should I store my cannabis capsules?
- Cannabis capsules should be stored in the refrigerator to maintain their potency and prevent the coconut oil from melting. You can consume them straight from the fridge or let them warm to room temperature before use.


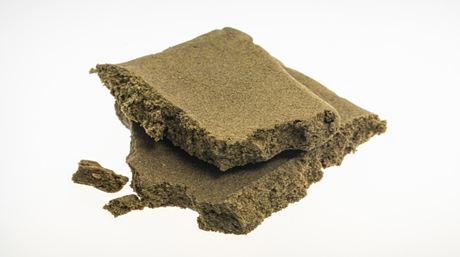
Hashish is a cannabis concentrate. It is wonderful stuff that you can crumble and put in a joint or smoke in a bowl. You can buy it from a dealer, but did you know that you can also make it relatively easily yourself? You don’t need that much at all. There is even a method that requires no tools at all, just your hands! Read on and make your own hash! In this article we’ll discuss two methods, namely making hash using a sieve and making hash using a blender.

Make hashish with a sieve
There are different ways to make hashish. For example, you can roll your plant material under your hands. Because you press hard and roll, the trichomes stick to your hands. A sticky layer will remain on your hands, and if you carefully scrape it off, you will have hash!
Rolling is a simple method because you don’t need anything for it. Well, of course, you need plant material. You can use stems, leaves, and flower tops for it. In fact, everything that remains after harvesting still has trichomes. There are trichomes on almost all parts of a weed plant. Sometimes there aren’t that many, but by rolling everything under your hands, enough sticks. Suppose you don’t like this method, for example, because you don’t want to get your hands dirty, there are many more ways to make hash. So read on, and discover other ways that might be of interest to you. Keep in mind that every way to make hash produces a different kind of hash. A certain method influences the structure, for example, the hash may end up being a bit dry or very sticky. And how strong the hashish is can differ. But that is just the fun. With every method you use, the end product is about the same, since it falls into the hashish category. Yet there are differences in the final product that make it interesting again. Certainly, if you make it yourself, you can vary nicely. That way you learn what you like best. Anyway, we want to teach you a method here that is very simple. The only thing you need for it is a sieve. This method is also called ‘flat screening’. Use a strainer that you can easily hold in your hand, the smaller the holes, the better and purer your final product will be. We assume that you are looking for quality, not quantity!
It is best to first put your weed in the freezer for a while. That will help to get the trichomes off your weed plant better. When you have done that, remove the plant material from the freezer. Make sure you have a clean work table or surface. Put the plant material on the sieve and rub it very carefully back and forth. By rubbing the plant material remains on the sieve and the trichomes fall through the fine holes of the sieve. The trichomes fall on the surface under the sieve. Continue to sift for a while, until no more trichomes fall and the plant material is ‘finished’.
Making hashish in a blender
Of all the ways to make hashish, this is perhaps the coolest. And it is not only very fun to do, but it is also very simple. You probably have all the materials for this method at home. You need a blender and a strainer (sieve) for it. Are you ready to make your own fresh, wonderfully smelling, homemade hashish? Here we go!
Put all the cutting residues that you have left after pruning or harvesting in a blender. Now fill the blender with water so that all the plant material is just covered with water. Wait, don’t start mixing right away. We appreciate your enthusiasm! But ice must first be added. Fill the blender completely with ice. Now it’s time to mix. First do it a bit quietly, so that the ice can crush, and then turn the blender knob all the way to high-speed mode, and mix for a minute at the highest setting. You now get a kind of green soup, a bit of a slimy mixture. Now take the sieve and keep it above a jug or a pot. Pour the green mixture through the sieve into the jug and let it rest for about an hour. You now see something very nice happening: the trichomes form on the bottom. If you want to see this, you must take a glass can. Then you can see it all happen. Now comes a precise job, which you have to handle carefully. Drain part of the water, but watch out, make sure you don’t wash away the trichomes because you want them! Now fill the pot again with very cold water and let it rest for 10 minutes. Drain part of the water again and be careful not to wash away the trichomes. You have to be patient now, and not make it easy for yourself. Just wait and restrain yourself for a moment! For good quality hashish, you have to repeat this process about 6 times.
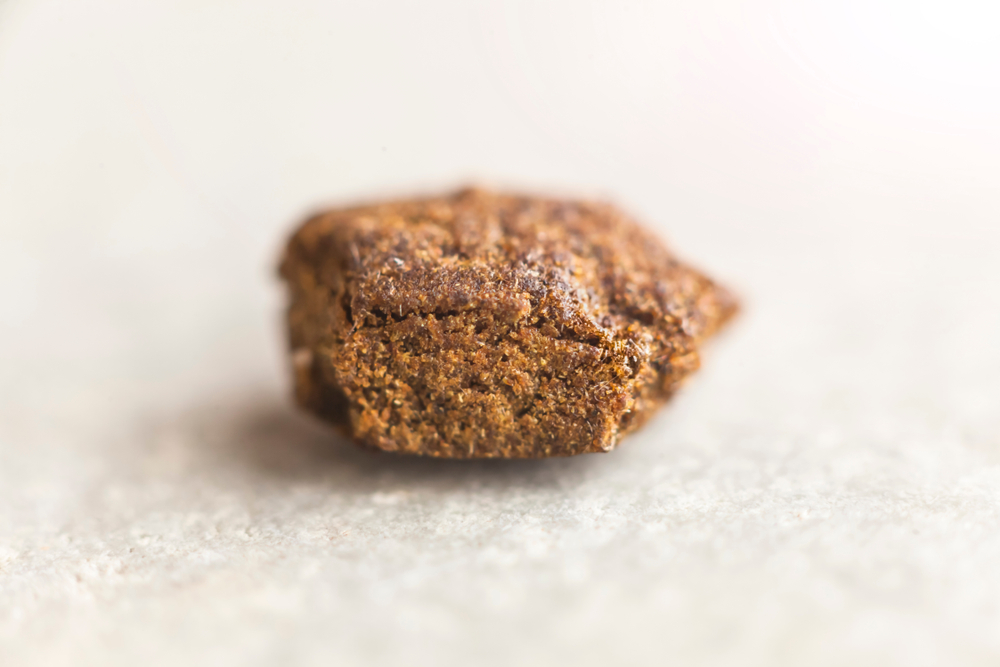
We will now make real hashish
Did you do all this? Beautiful! Then we will now make real hashish. Start by carefully draining as much water as possible from the jug (or pot, depending on what you use). So don’t rinse the trichomes away, otherwise, you can start over again, and you will have better things to do! Now grab a filter. A coffee filter works best. Carefully pour the solution left in the jug through the coffee filter. Now all the water is washed away and a sticky mass remains in the filter. Tadaaa, there is your homemade hash! Congratulations! First, gently squeeze the filter to remove even more water, pressing the hashish slightly. You can now let it dry and then smoke it in a bowl or joint, just what you like best. It is not necessary to first heat the hash or compress it even further. Enjoy!
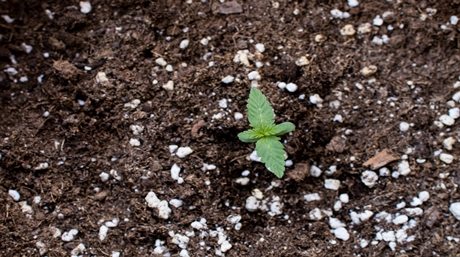
Cultivating Your Green Haven Year-Round
As the cold weather approaches and outdoor growers retreat indoors to continue their cultivation throughout the winter, the importance of choosing the right lighting for indoor growing becomes paramount. With a myriad of illumination options available, it’s easy to feel overwhelmed. But fear not, for we are here to guide you through the process, helping you create a thriving indoor garden that will yield bountiful results throughout the year.

Illuminate the Path to Successful Indoor Growing Weed
When it comes to indoor cultivation, lighting is undeniably one of the most crucial factors to consider. Not only does lighting play a vital role in manipulating the natural light cycles of marijuana plants, but it also serves as, the catalyst for photosynthesis—the process by which plants create their own, nourishment. Within the leaves of cannabis plants, chlorophyll acts as a light-absorbing pigment, harnessing light energy to convert water and carbon dioxide into food sugar.
The process of photosynthesis is directly influenced by the color, duration, and intensity of light received by the plant. By strategically altering these factors, you have the power to impact your plant’s food production. Cool blue and warm orange are examples of illumination colors that enhance a plant’s ability to generate sustenance. During the summer months, cool light is most beneficial, promoting dense and well-shaped growth. In contrast, warm-colored light during the fall harvest months induces the development of vibrant flowers. In essence, cool colors stimulate growth, while warm colors act as catalysts for flowering.
Embracing Darkness: The Role of Light Cycles
Beyond light color, the duration of light exposure your cannabis plant receives is of utmost importance. By adhering to specific light cycles, you can ensure optimal growth and flowering. During the growth phase, it is recommended to provide your young plants with 18 hours of light and 6 hours of uninterrupted darkness. This extended period of light exposure fuels vigorous vegetative growth. However, once the plant is ready to flower, adjusting the light cycle to 12 hours of light and 12 hours of darkness triggers the flowering process.
The flexibility of indoor cultivation allows you to customize the light cycle based on your preferences and the needs of your plants. This is especially beneficial during the winter months when maintaining a consistent temperature is challenging. By utilizing the ability to leave the lights on during the night and off during the day, you can create a more stable environment, minimizing temperature fluctuations and providing a nurturing space for your plants.
Choosing the Right Lamps: Illuminating Your Indoor Oasis
Selecting the appropriate lamps for your indoor grow room requires careful consideration of various factors. Firstly, assess the amount of light intensity required for your plants’ growth stage. Secondly, consider the size of your grow room, as this will determine the number and placement of lamps needed. It is essential to evaluate the electrical capabilities of the room to ensure that the chosen lamps can be adequately powered. Additionally, contemplate the preferred light color that aligns with the specific growth stage and desired outcomes. Lastly, establish a budget and compare the prices of different illumination options, keeping in mind that lighting systems are long-term investments that can incur higher costs due to their power consumption.
Fluorescent lamps with a broad color spectrum are particularly beneficial for seedlings that have not yet developed large leaves. These lamps provide ample light and support the initial stages of growth.
Indoor growers seeking maximum intensity per watt would benefit from high-pressure sodium lamps (HPS). Known for their efficiency and cost-effectiveness, HPS lamps emit a warm orange glow, which triggers plant hormones that facilitate bud development and flowering. While HPS lamps excel at providing warm light, they are less proficient in emitting cool blue light. Consequently, they are best suited for the flowering stage of growth. If you were to use an HPS bulb for seedlings, it is advisable to keep the lamps at a lower height (approximately 80 cm/31.50 inches) to encourage rapid horizontal growth. Early pruning can also help control plant height and prevent excessive stretching.
On the other hand, metal halide lamps (MH) are highly efficient and serve as an excellent primary light source for indoor growers. Emitting one of the brightest cool lights available, MH lamps are ideal for promoting foliage growth and cultivating robust plants. With an average lifespan of 10,000 hours, MH lamps retain their glow for an extended period. However, it is important to note that over time, the energy they emit within the blue range diminishes. Therefore, regular assessment and potential replacement of MH lamps are necessary to maintain optimal illumination conditions.
Expert Tips for Successful Indoor Growing Weed
To ensure the success of your indoor cultivation journey, consider the following tips:
- Maintain Adequate Distance: Pay close attention to the proximity of your plants to the light source. If the lamps are too close, they may cause light burn and damage your precious foliage. Strive to maintain a safe distance between the lamps and plants to avoid such undesirable outcomes.
- Achieve Balance: Provide all your plants with a consistent and equal amount of light. Avoid overcrowding, as taller plants may overshadow their smaller counterparts, depriving them of much-needed light. To overcome this challenge, consider using bins or adjustable platforms to elevate smaller plants closer to the light source, ensuring equitable light distribution.
- Cultivate a Year-Round Bliss: Embrace the advantages of indoor cultivation, relishing a year-round supply of your favorite buds. Although setting up your indoor oasis may seem initially daunting, the rewards will be reaped one bud at a time. With careful attention to illumination, you can create an optimal environment for your plants to thrive regardless of the season.
In conclusion, selecting the ideal illumination system for indoor growing is a decision that warrants thoughtful consideration. By understanding the profound impact of light color, cycle duration, and intensity on your plants, you can make informed choices that maximize yield potential. Whether you opt for fluorescent lamps, high-pressure sodium lamps (HPS), or metal halide lamps (MH), remember to strike a balance and provide optimal conditions for your plants to thrive. Embrace the joys of indoor cultivation and revel in the delights of a bountiful harvest, regardless of the season.

Cannabis Can Help A Sore Throat

Cannabis and the Authoritarian State

As cannabis consumer tastes evolve, industry must look beyond potency

Article: Early 2025 Empire State Psychedelic Policy Roundup

White House Finally Comments On Marijuana Industry

Stop Using Bat Poop to Fertilize Your Weed Plants Immediately, Here is Why…

The History Behind April Fool’s Day

Star signs and cannabis strains: April 2025 horoscopes

Does Comfort Food Actually Help

Connect to cannabis history with three legacy strains from Paradise Seeds

Distressed Cannabis Business Takeaways – Canna Law Blog™

United States: Alex Malyshev And Melinda Fellner Discuss The Intersection Of Tax And Cannabis In New Video Series – Part VI: Licensing (Video)

What you Need to Know

Drug Testing for Marijuana – The Joint Blog

NCIA Write About Their Equity Scholarship Program

It has been a wild news week – here’s how CBD and weed can help you relax

Cannabis, alcohol firm SNDL loses CA$372.4 million in 2022

A new April 20 cannabis contest includes a $40,000 purse

Your Go-To Source for Cannabis Logos and Designs

UArizona launches online cannabis compliance online course
-
 Cannabis News2 years ago
Distressed Cannabis Business Takeaways – Canna Law Blog™
-
 One-Hit Wonders2 years ago
United States: Alex Malyshev And Melinda Fellner Discuss The Intersection Of Tax And Cannabis In New Video Series – Part VI: Licensing (Video)
-
 Cannabis 1012 years ago
What you Need to Know
-
 drug testing1 year ago
Drug Testing for Marijuana – The Joint Blog
-
 Education2 years ago
NCIA Write About Their Equity Scholarship Program
-
 Cannabis2 years ago
It has been a wild news week – here’s how CBD and weed can help you relax
-
 Marijuana Business Daily2 years ago
Cannabis, alcohol firm SNDL loses CA$372.4 million in 2022
-
 California2 years ago
A new April 20 cannabis contest includes a $40,000 purse