marijuana growing
flushing weed plants
Published
7 months agoon
By
admin
As an ardent cannabis cultivator who has dedicated his life to perfecting the art of growing marijuana, I’ve come to appreciate the subtleties that make the difference between a good crop and an exceptional one. One such subtlety is the practice of “flushing” weed plants, a simple yet crucial step that can significantly enhance the quality of your buds. Flushing, when done correctly, can result in smoother, purer, and more flavorful smoke.
What is Flushing?
Flushing is the process of feeding your cannabis plants with pure water—without any added nutrients—for a certain period. The goal of flushing is to remove excess nutrients from the plant and the growing medium. The primary reason for this practice is to improve the quality of your buds. Over time, salts from the nutrients can build up within the plant and the growing medium, potentially leading to a harsher smoke and a less pure flavor.

When to Flush Weed Plants
The timing of when to flush your cannabis plants depends largely on the life cycle of the plant and the circumstances of your grow. There are three main instances when flushing may be necessary: before harvest when changing nutrients, and when your plants show signs of nutrient lockout.
Flushing Before Harvest
The most common time to flush weed plants is in the run-up to harvest. This is done to ensure that the harvested buds are free from excess nutrients, leading to a cleaner, smoother smoke. When smoked, buds that have been flushed properly tend to produce white ash, indicative of clean, properly cured buds. In contrast, buds that haven’t been flushed correctly tend to produce black ash and can often crackle and spark due to leftover nutrients. Generally, growers start flushing their plants around two weeks before the anticipated harvest date.
Flushing When Changing Nutrients
Another situation where you might need to flush your plants is when transitioning from the vegetative to the flowering stage of growth. In this scenario, flushing helps to reset the growing medium, preparing the plants to absorb a new suite of nutrients essential for blooming.
Flushing During Nutrient Lockout
Finally, flushing is a recommended course of action if your cannabis plants are experiencing nutrient lockout—a situation where the plants can’t absorb the nutrients they need. Nutrient lockout can be caused by incorrect pH levels, over-fertilization, or a buildup of salts from the nutrients. Flushing can help to restore balance, allowing your plants to uptake nutrients properly once again.

Flushing as a Beginner: The Importance of Routine Flushing
As a beginner in the cannabis cultivation journey, one of the most common concerns is overfeeding your plants with nutrients. It’s understandable; you want your plants to thrive and produce high-quality buds, and it might seem counterintuitive to deny them nutrients. However, similar to how overeating can harm humans, overnutrition can negatively impact your plants, leading to nutrient lockout or toxicities.
To prevent this issue, novice growers should consider routine flushing, approximately once every two weeks. Regular flushing allows the plants to utilize stored nutrients and helps maintain the balance in the soil. It also prevents nutrient buildup, which can potentially harm your plants. It’s a precautionary measure that helps keep your plants healthy and your soil in prime condition for optimum growth.
While this might seem a bit daunting at first, remember that every master gardener started as a novice. With patience, consistent care, and a bit of trial and error, you’ll find the right rhythm that best suits your plants and your gardening style. Your commitment to learning and adapting is what will set you apart as an outstanding cannabis grower.

The Art of Flushing in Different Mediums
The process of flushing varies depending on your growing medium. Let’s take a look at the specific needs for the three most common mediums: soil, coco coir, and hydroponics.
Soil: This medium requires a significant amount of water to ensure a thorough flush, roughly three times the volume of the pot. The goal is to run enough water through the soil to drain out the bottom, taking any excess nutrients with it.
Coco Coir: Coco coir retains fewer nutrients compared to soil, so the flushing process is quicker. You will need about twice the volume of the pot of water for an effective flush. Always remember to pH balance your water to avoid inducing nutrient lockouts.
Hydroponics: Hydroponic systems are the easiest to flush since nutrients are immediately available to the plants. Simply replace the nutrient solution with pH-balanced water and let it circulate for a day or two.

Common Misconceptions About Flushing
One common misconception is that flushing starves the plant, harming its overall health and yield. This isn’t true. When done correctly, flushing merely allows the plant to use up stored nutrients. This can even lead to a final burst of growth, known as the ‘flushing effect’.
Another myth is that you don’t need to flush when using organic nutrients. While it’s true that organic nutrients are less likely to cause nutrient lockouts or toxicities, they can still accumulate over time and may need to be flushed out.
Lastly, some growers believe flushing will clear any disease or pest infestation. Unfortunately, this isn’t the case. Flushing targets nutrient build-up and won’t effectively combat pests or diseases, which should be handled separately.

Conclusion: Flushing – An Integral Step for Exceptional Harvest
The art of flushing is often underrated, yet it holds great potential in transforming your cannabis cultivation journey. With proper flushing, your plants can produce cleaner, smoother, and more flavorful buds – a quality that sets apart an exceptional harvest from a merely good one. Mastering the technique of flushing might take some time and practice, but its impact on the quality of your yield is worth the effort.
Remember, as a passionate gardener, the pursuit of excellence doesn’t stop. There is always something new to learn, a technique to master, or a strain to cultivate. Keep exploring, keep learning, and keep growing. Whether you’re a novice or an expert grower, the world of cannabis cultivation offers endless opportunities to improve and experiment.
Want to dive deeper into the world of cannabis cultivation? Check out our blog for more insightful articles or browse through our extensive range of top-quality seeds. Happy growing!
FAQ
1. What is flushing in cannabis cultivation?
Flushing in cannabis cultivation refers to the process of feeding plants with pure water without any added nutrients for a specific period. The purpose of flushing is to remove excess nutrients from the plant and growing medium, ultimately enhancing the quality of buds.
2. When should I flush my weed plants?
The timing of flushing depends on specific circumstances, but there are three main instances when flushing may be necessary. Firstly, it is common to flush weed plants before harvest to ensure the harvested buds are free from excess nutrients, resulting in a cleaner and smoother smoke. Secondly, flushing is recommended when transitioning from the vegetative to the flowering stage of growth. Lastly, if your cannabis plants experience nutrient lockout, flushing can help restore balance and proper nutrient absorption.
3. Are there misconceptions about flushing in cannabis cultivation?
Yes, there are a few common misconceptions about flushing. Some growers believe that flushing starves the plant and harms its health and yield, but when done correctly, flushing merely allows the plant to use up stored nutrients. Additionally, it is a myth that flushing is unnecessary when using organic nutrients. Even with organic nutrients, flushing may still be required to prevent nutrient accumulation. Lastly, flushing does not clear disease or pest infestations; it primarily addresses nutrient build-up, and pest or disease control should be handled separately.
Disclaimer: This content is meant for educational purposes only. It has been compiled with research from external sources. it is not meant to substitute any medical or legal advice. Please see your local laws for the legality of cannabis use.
You may like
-


This State’s Cannabis Revenue Keeps Pouring In
-


Major Bloom: Cultivating community, creativity, and cannabis in Worcester
-


How a Colorado operator stumbled onto ‘blueprint for laundering marijuana’
-


Northern Ireland: Man charged after £425,000 worth of cannabis seized
-


Getting THC Edibles in Your Edible Arrangement?
-


Is Cannabis Legal in California Right Now?
Cannabis
Cannabis And Co2 – How To Increase Your Yield
Published
3 months agoon
December 27, 2024By
admin
Discover Cannabis and CO2
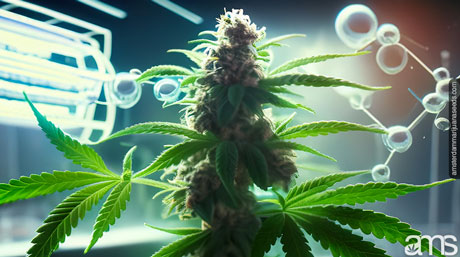
Did you know that your plants can be harmed if they don’t get an adequate supply of CO2? Or that an excessive supply of carbon dioxide can potentially be harmful to your marijuana plants? Carbon dioxide is a crucial aspect of marijuana cultivation that can hinder or permanently halt the progress of plant growth. When it comes to supplying your plants with additional carbon dioxide, there are certain factors you need to keep in mind. In this piece “Cannabis and CO2” we will share ways to optimize CO2 levels for cannabis growth.
Why is carbon dioxide essential for cannabis cultivation?
It is essential to ensure that your plants receive a carbon dioxide level above 250 parts per million (ppm). Any CO2 level below this measure can pose immense risk to them. On the other hand, exposing your plants to dangerously high levels of carbon dioxide can be lethal. But why is carbon dioxide essential for cannabis cultivation? It enables plants to complete the process of photosynthesis. Photosynthesis is the conversion of carbon dioxide into energy in plants. As the name and formula imply, CO2 consists of one carbon atom and two oxygen atoms. This is significant because plants require 17 essential elements to grow and reproduce, and hydrogen, carbon, and oxygen make up 95% of a plant’s dry weight.
Many farmers suggest that adding CO2 to the cultivation room could improve yields by up to 20%. However, this guide will show you how to optimize carbon dioxide levels for better weed growth and excellent results.
How to introduce additional CO2 to your garden
There are several methods to add carbon dioxide to your garden. However, many of these methods do not guarantee controlled delivery of the desired PPM. Therefore, we recommend investing in reliable equipment to ensure proper CO2 supplementation.
CO2 generators
CO2 generators offer an effective way to improve the carbon dioxide levels in your plants. These products, resembling outdoor heaters, burn propane or natural gas to produce carbon dioxide. They also emit heat, making them suitable for larger spaces and climate-controlled enclosures.
Compressed CO2
Compressed CO2, stored in metal tanks like propane cylinders or scuba tanks, can be delivered to your plants through emitters. Unlike generating carbon dioxide on your own, compressed carbon dioxide is produced at a factory, eliminating concerns about heat generation. This makes compressed CO2 an excellent choice for small-scale growers.
What does carbon dioxide do for your cannabis plants?
Optimizing carbon dioxide levels for your plants will result in increased growth speed and higher yields. With accelerated growth, you can enjoy bountiful harvests every year, resulting in bigger and better yields without experiencing dry periods. When carbon dioxide is used properly, it increases the moisture content in your plants and enhances their resilience. This enables plants to withstand higher temperatures than they normally would without drying out quickly. As a result, your plants will thrive in hotter conditions, leading to improved growth.

Why use CO2 in cannabis cultivation?
There are two primary benefits of using CO2 in your marijuana plants: faster growth and greater yield. Additionally, plants store a certain amount of moisture and energy in their leaves, and carbon dioxide helps release that energy, allowing plants to blossom. Most cultivators agree that unlocking this stored energy can lead to a 20-30% increase in yield, along with a relative growth speed increase of at least 15%.
What do you need to know before adding CO2 to your cannabis plants?
Adding CO2 will increase the humidity of your cannabis garden, creating a more moist environment. However, higher moisture levels can also increase the risk of fungus and rot. Moreover, uncontrolled release of carbon dioxide can create a toxic environment for both your cannabis plants and yourself. A CO2 level of about 2000 ppm can harm your plants, and levels higher than that can be unsafe for animals and humans to breathe. It’s important to remember that a quantity below 250 ppm will harm your plants.
Since carbon dioxide is heavier than oxygen, it needs to rain down on your plants. Therefore, it’s necessary to regulate carbon dioxide levels to maximize its benefits without sacrificing the oxygen your plants require, and vice versa. In a nutshell, carbon dioxide supplementation will lead to bigger, improved, and higher annual yields.
Cannabis Seeds
Compare Indica Vs Sativa: Differences And Benefits Explained
Published
4 months agoon
December 11, 2024By
admin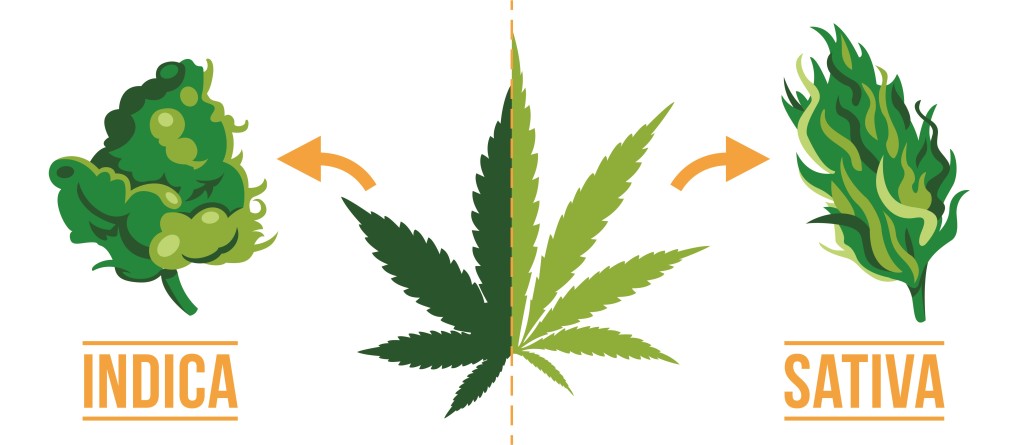
Indica vs Sativa
Who would have thought that in marijuana there are different types of plants with completely different effects and benefits? The origin, the climate, the effects, and the physical characteristics are crucial in order, to differentiate the type of plant that you are going to use either in the clinical, pharmaceutical, or recreational field, as well as to know between Cannabis Sativa and Cannabis Indica in order, to be able to make the best selection of seeds according to your needs.

Marijuana is a well-known plant for its mind and body effects and it’s split into two main types: Sativa and Indica. Even though they come from the same family and have similar ingredients, they’re different in how they look and what they do when you use them. Let’s break it down simply:
What the plants look like:
Indica: This plant is short and looks like a bush with wide leaves. It grows well in cooler and mountainous areas.
Sativa: This one is tall and thin, with skinny, pointed leaves, kind of like a young pine tree. It likes hot and humid places.
How they make you feel:
Indica: It chills you out and can make you sleepy, like when you’re getting cozy in bed after a long day.
Sativa: It energizes you and wakes up your mind, great for when you need to do things that require imagination or when you’re hanging out with friends.
To put it simply: if you want to relax, go for Indica. If you want to be more alert and active, go for sativa. We’ll explain more about this soon so you can better understand how each one affects people differently.
The two subspecies of marijuana represent different adaptations to different climates. Sativa originates from the jungles of equatorial regions such as Thailand, Cambodia, Jamaica, Colombia, and Mexico, places that enjoy long hours of sunshine and constant light throughout the year. The Indica variety, on the other hand, comes from the Hindu Kush region, a vast mountain range of more than 800 kilometers that stretches from Afghanistan to China and is characterized by a very cold climate.
Climatic and physical characteristics
Cannabis Sativa is known for its ability to adapt to the heat of tropical climates, being resistant to low temperatures and showing an effective ability to prevent the growth of fungi commonly associated with humidity. Indicas, on the other hand, originate from mountainous climates, which enables them to withstand climatic challenges such as wind, rain, and frost.
Morphology and appearance:
Morphology of Cannabis Sativa
Cannabis Sativa plants, are distinguished by their unique morphology and appearance, which tend to be taller and more slender, with long, thin leaves, differentiating them from other marijuana species such as Indica and Ruderalis. The following points highlight the main morphological and appearance characteristics of Sativa:
- Height and Structure: Cannabis sativa plants are typically tall and slender, with some varieties reaching heights of up to 20 feet (about 6 meters) under optimal conditions. They have a more open structure compared to the bushier Cannabis indica, allowing for greater light penetration throughout the plant.
- Leaves: The leaves of Cannabis sativa are characteristically long and narrow with a light green color. They possess serrated edges and are composed of slender leaflets that are spread far apart. The number of leaflets can vary, usually between 5 to 13 per leaf.
- Branching: Sativa plants have less dense branching compared to their indica counterparts, with branches extending outward and upward, giving the plant an airy appearance. This less compact structure is beneficial for air circulation and can help in reducing the risk of mold and fungal diseases in humid environments.
- Flowers (Buds): The flowers of Cannabis sativa are elongated and less dense than those of indica plants. They tend to be more “fluffy” or airy and can appear on the plant as spaced, apart clusters. The flowering period for sativa strains is generally longer, often taking between 10 to 16 weeks to fully mature.
- Trichomes: While both sativa and indica plants produce trichomes (the resinous glands containing cannabinoids), the concentration and distribution can vary. Sativa plants typically have a high concentration of trichomes on the flowers and surrounding foliage, contributing to their potent therapeutic and psychoactive properties.
- Root System: Cannabis sativa plants develop a deep taproot system, which enables them to access water from deeper soil layers. This characteristic is beneficial for plants growing in arid conditions, allowing them to thrive where other plants might not.
- Growth Pattern and Maturation: Sativa strains usually have a longer vegetative growth phase, which contributes to their tall stature. Their extended flowering time requires patience but can result in high yields of marijuana flowers.
Cannabis sativa strains are often associated with a cerebral, uplifting high, attributed to their higher concentration of THC in comparison to CBD. This makes them particularly popular for daytime use. The distinct morphology and appearance of sativa not only contribute to its cultivation requirements but also influence its effects and applications, making it a fav
Morphology of Cannabis Indica
Cannabis Indica plants have distinctive morphological traits, shorter and more compact appearance, with wider and denser leaves, traits that differentiate from Sativa and Ruderalis. The main characteristics of Indica are described below:
- Height and Structure: Cannabis indica plants are generally shorter and bushier than their sativa counterparts, typically reaching heights of 2 to 4 feet (about 0.6 to 1.2 meters). They have a compact, dense structure, which makes them well-suited for indoor cultivation.
- Leaves: The leaves of Cannabis indica are broad and dark green, with fewer but wider leaflets compared to sativa plants. Indica leaves often have between 7 to 9 leaflets, which are closer together, giving the leaf a fuller appearance.
- Branching: Indica plants have dense branching, with closer internodal spaces. This compact growth habit results in a bushy appearance and contributes to their ability to produce more buds in a smaller space.
- Flowers (Buds): The buds of Cannabis indica plants are typically dense, thick, and bulky, clustering around the plant’s nodes. Due to the plant’s compact nature, these buds are often heavier and more resinous than those of sativa strains, leading to higher yields per square foot in controlled environments.
- Trichomes: Cannabis indica plants are known for their abundant trichome production, which covers the buds and surrounding foliage in a thick layer of crystalline resin. This resin is rich in cannabinoids like THC and CBD, making indica strains highly potent.
- Root System: Indica plants have a more spread-out root system compared to the deep taproot of sativa plants. This characteristic makes them more adaptable to various growing mediums and efficient in nutrient uptake from the soil.
- Growth Pattern and Maturation: Cannabis indica strains have a shorter vegetative growth phase and a faster flowering cycle than sativa strains, often maturing in 6 to 8 weeks. This quick turnaround makes them attractive to cultivators looking for a fast crop.
- Effects: Indica strains are traditionally associated with a sedative, body-centric effect, often referred to as a “body high.” This makes them popular for evening use, providing relaxation and aiding in sleep.
The morphology and appearance of Cannabis indica are not just significant for identification; they also have practical implications for cultivation and use. The compact, dense growth of indica plants makes them particularly suited for indoor or space-constrained environments. Their potent, resinous buds are favored for their strong therapeutic effects, offering relief from pain, anxiety, insomnia, and more.
Chemical and Psychoactive Composition
Both subspecies contain a variety of chemical compounds, but the proportions of these compounds can vary.
Cannabis Sativa: Sativas tend to have higher levels of tetrahydrocannabinol (THC), the compound responsible for the psychoactive effects. They may also contain significant amounts of cannabidiol (CBD), which has health properties, but in lower proportions than THC.
Cannabis Indica: Indicas generally have slightly lower THC levels than Sativas, but can still be potent. They tend to have a more balanced ratio of THC and CBD, which can result in a more relaxing and sedative effect.
When it comes to psychoactive effects, it is important to remember that although both Sativa and Indica contain THC, the effects and reactions vary greatly depending on the type of plant.
So which strain is right for me? Amsterdam Marijuana Seeds can tell you:
Sativa is known for its properties that induce a state of euphoria and greater sociability compared to the Indica variety. This sub-species enhances perception, intensifying the appreciation of colors and sounds while stimulating creativity and thinking. Sativa is used to relieve stress, anxiety, depression, nausea, migraines, and as an appetite stimulant, among other wellness benefits.
On the other hand, Indica, known for its relaxing and sedative properties, is highly effective in the treatment of insomnia and a variety of conditions. It is widely used to alleviate neuromuscular disorders such as tremors and, spasms, and to combat chronic pain. It is also a valuable option for reducing anxiety and stress and stimulating appetite in patients who need it.
Alternative uses
Cannabis Sativa: Sativas are often used to treat depression, anxiety and to improve mood. They can also be useful in treating attention deficit disorder and stimulating appetite.
Cannabis Indica: Indicas are preferred for the treatment of chronic pain, insomnia, anxiety and to relax tense muscles. They are also commonly used to treat gastrointestinal disorders.
It is important to note that due to hybridisation and genetic variability of marijuana strains, classification as sativa or indica is not always accurate. In addition, individual experience with these subspecies may vary between individuals and specific strains.
Sativa and Indica are two subspecies with marked differences in morphology, chemical composition, psychoactive effects, and alternative uses. The choice between one or the other depends on the personal preferences and therapeutic needs of each individual.
Cannabis Seeds
Marijuana Seed Varieties For Cultivation
Published
4 months agoon
December 8, 2024By
admin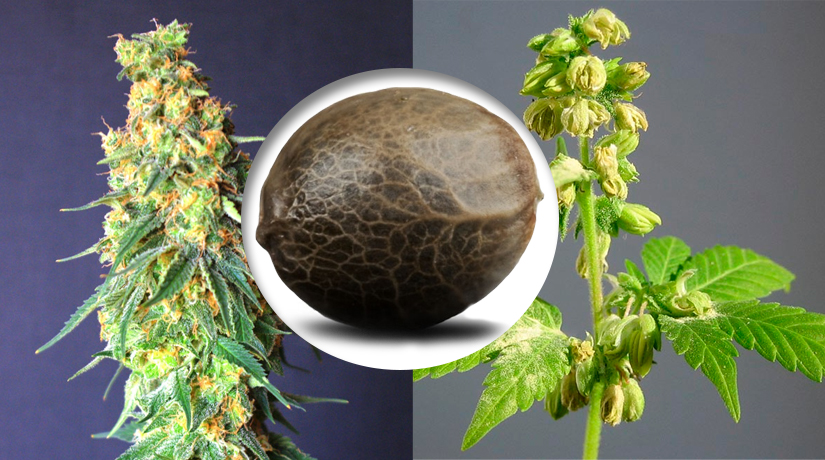
CBD Seeds
CBD marijuana seeds share characteristics with feminized, regular, or autoflowering varieties, but are distinguished by their higher CBD content compared to conventional varieties. Additionally, in many cases, the aim is to minimize the THC level so that they can be used for medicinal purposes.
However, these seeds never contain the adequate concentration of THC for use in legal CBD product production, which currently must be below 0.2%. For this purpose, hemp seeds are used. Despite this, CBD marijuana seed varieties still offer more relaxing and stress-relieving effects than other varieties.
Hemp Seeds
Unlike CBD seeds, hemp seeds always contain THC levels below 0.2%, ensuring a predominance of CBD. Also known as industrial hemp, this variety is used for CBD extraction and the production of therapeutic products. However, the CBD levels obtained from hemp never reach those achieved with CBD seeds.
Hemp seeds are not only used for obtaining cannabidiol but also for extracting strong fibers used in various industries, such as textile, paper, insulation, rope manufacturing, fuel, paints, cosmetics, among others. Additionally, hemp seeds are edible and can be consumed as oil, whole, raw, toasted, or ground into flour.
Fast Version Seeds
Like CBD marijuana seeds, Fast Version seeds have similar characteristics to regular or feminized varieties, but their life cycle is shorter than usual, allowing for harvesting before the first October frosts.
Indeed, many of these types of seeds can be combined. Sativa, indica, hybrid, or ruderalis varieties can be presented in feminized, regular, autoflowering, or Fast Version forms. Hemp seeds, on the other hand, belong to the sativa group.

This State’s Cannabis Revenue Keeps Pouring In

Major Bloom: Cultivating community, creativity, and cannabis in Worcester

How a Colorado operator stumbled onto ‘blueprint for laundering marijuana’

Northern Ireland: Man charged after £425,000 worth of cannabis seized

Getting THC Edibles in Your Edible Arrangement?

Is Cannabis Legal in California Right Now?

Germany: Trial against operator of Trier cannabis vending machine discontinued

The best energizing THC gummies of 2025 by Leafly

Mixed Messages From The Feds About Cannabis

Humboldt County extends deadline to pay marijuana cultivation taxes

Distressed Cannabis Business Takeaways – Canna Law Blog™

United States: Alex Malyshev And Melinda Fellner Discuss The Intersection Of Tax And Cannabis In New Video Series – Part VI: Licensing (Video)

What you Need to Know

Drug Testing for Marijuana – The Joint Blog

NCIA Write About Their Equity Scholarship Program

It has been a wild news week – here’s how CBD and weed can help you relax

Cannabis, alcohol firm SNDL loses CA$372.4 million in 2022

A new April 20 cannabis contest includes a $40,000 purse

Your Go-To Source for Cannabis Logos and Designs

UArizona launches online cannabis compliance online course
Trending
-

 Cannabis News2 years ago
Distressed Cannabis Business Takeaways – Canna Law Blog™
-

 One-Hit Wonders2 years ago
United States: Alex Malyshev And Melinda Fellner Discuss The Intersection Of Tax And Cannabis In New Video Series – Part VI: Licensing (Video)
-

 Cannabis 1012 years ago
What you Need to Know
-

 drug testing1 year ago
Drug Testing for Marijuana – The Joint Blog
-

 Education2 years ago
NCIA Write About Their Equity Scholarship Program
-

 Cannabis2 years ago
It has been a wild news week – here’s how CBD and weed can help you relax
-

 Marijuana Business Daily2 years ago
Cannabis, alcohol firm SNDL loses CA$372.4 million in 2022
-
 California2 years ago
A new April 20 cannabis contest includes a $40,000 purse


