

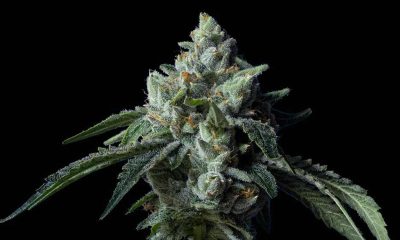
marijuana growing
Open Soil Vs Plant Pots
Introduction:
Cannabis cultivation has gained considerable attention in recent years, thanks to its increasing legalization and therapeutic potential. While many growers focus on lighting, nutrients, and watering techniques, the significance of the root system is often overlooked. The root system plays a crucial role in supporting the plant’s overall health, growth, and nutrient absorption. In this article, we will explore the root system of the pot plant and delve into the differences between growing in open soil versus using various types of plant pots, such as large pots, small pots, round pots, square pots, and even felt pots.
Understanding the Cannabis Root System:
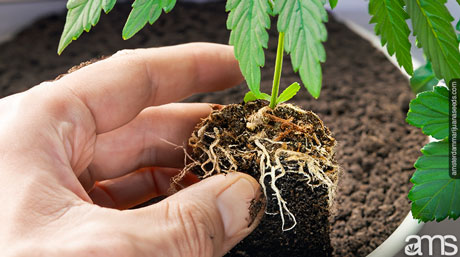
The root system of the marijuana plant is a complex and intricate network that plays a fundamental role in its growth and overall well-being. A deeper understanding of the root system can help growers optimize cultivation practices and achieve healthier and more productive plants.
The taproot system of cannabis consists of a central main root known as the taproot, which grows vertically downward into the soil. From the taproot, numerous lateral roots branch out horizontally, extending and exploring the surrounding soil. These lateral roots form a dense fibrous network, which is responsible for water and nutrient absorption.

One key advantage of the taproot system is its ability to reach deeper into the soil profile, accessing nutrients and moisture sources that may not be readily available to plants with shallower root systems. The taproot acts as an anchor, providing stability to the plant and allowing it to withstand environmental stressors such as wind and heavy rainfall.
Open Soil Weed Cultivation:
Growing cannabis directly in open soil offers several advantages for the development of a robust root system. In open soil, weed plants have the freedom to spread their roots as far as they need to, enabling the establishment of a strong foundation and maximizing nutrient absorption.
One of the primary benefits of open soil cultivation is the ability of the roots to explore a larger volume of soil. This exploration leads to increased access to essential nutrients and water sources, resulting in improved overall plant health. The plants can tap into deeper layers of soil, where vital nutrients may be more abundant.
Furthermore, open soil provides excellent drainage properties, allowing excess water to escape easily. Proper drainage prevents waterlogging, which can suffocate the roots and lead to root rot. The presence of oxygen in the soil is crucial for root respiration, and open soil allows for better aeration, promoting healthy root development.
In open soil, beneficial soil microbes and organisms play a vital role in the breakdown of organic matter, releasing nutrients in a form that plants can readily absorb. These microbes contribute to the creation of a healthy soil ecosystem, fostering symbiotic relationships with the roots and enhancing nutrient availability.
Additionally, open soil cultivation allows for a more natural expression of the cannabis plant’s genetic potential. The unrestricted growth of roots provides the plant with the space it needs to develop to its fullest. This can result in potentially higher yields and improved terpene profiles, as the plant is able to fully express its genetic traits without the constraints of container cultivation.
It is important to note that open soil cultivation requires careful consideration of the soil composition and preparation. Proper soil testing and amendment can ensure that the necessary nutrients are available in the soil to support healthy root development. Organic matter, such as compost or well-rotted manure, can be incorporated into the soil to enhance its fertility and structure.
Overall, open soil cultivation offers numerous benefits for cannabis plants, particularly when it comes to root system development. The ability of the roots to explore a larger volume of soil, access deeper nutrient sources, and interact with beneficial soil organisms contributes to overall plant health and productivity. By providing an optimal growing environment through open soil cultivation, growers can lay the foundation for thriving marijuana plants.
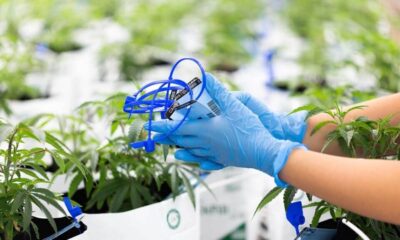
Plant Pot Cannabis Cultivation:
While open soil cultivation offers several advantages, growing cannabis in plant pots has gained popularity due to its versatility and ease of management. Let’s explore the differences between large pots, small pots, round pots, square pots, and even felt pots:
- Large Pots: Large pots provide ample space for the roots to spread, allowing for better nutrient absorption and overall plant health. The increased soil volume helps maintain stability and reduces the risk of nutrient deficiencies or waterlogging. It is particularly beneficial for larger cannabis varieties with extensive root systems. The larger size of these pots also offers more room for organic matter, such as compost or beneficial microbes, which can enhance soil fertility and promote healthy root development. Furthermore, large pots provide a buffer against rapid changes in environmental conditions, such as temperature fluctuations, ensuring a more stable growing environment for weed plants.
- Small Pots: Small pots are suitable for limited growing spaces and indoor cultivation. However, they restrict root expansion and may necessitate more frequent watering and nutrient supplementation. The limited soil volume can lead to stunted growth and hinder the plant’s ability to reach its full potential. To overcome these limitations, growers using small pots can employ techniques like frequent fertigation (the combination of fertilization and irrigation) to ensure the plants receive adequate nutrients. Additionally, optimizing the soil composition by adding organic matter and using well-draining substrates can improve moisture retention and nutrient availability in small pots. Careful attention to plant care and monitoring is crucial in maximizing the performance of pot plants in small pots.
- Round Pots: Round pots allow for even root distribution and encourage a more natural root growth pattern. The absence of corners eliminates the possibility of root binding, ensuring the plant can access nutrients and water evenly. The circular shape of round pots promotes a balanced distribution of lateral roots, preventing overcrowding and enhancing nutrient uptake efficiency. Additionally, round pots facilitate better airflow around the root zone, reducing the risk of excess moisture and root diseases. The uniform distribution of roots in round pots also contributes to better stability and minimizes the risk of toppling, especially when plants become top-heavy during the flowering stage.
- Square Pots: Square pots are preferred by some growers as they make efficient use of space, allowing for easy organization and maximizing the number of plants per square meter. However, they can promote root circling if not managed properly. When the roots reach the corners of square pots, they may begin to circle around the container, potentially affecting nutrient uptake and overall plant health. To mitigate this issue, growers should regularly inspect the root system and transplant the plants to larger containers when necessary. Additionally, employing techniques like root pruning by trimming the circling roots before transplanting can encourage a more outward growth pattern and prevent root-binding issues. By maintaining proper root management, square pots can be an effective option for optimizing space utilization in cannabis cultivation.
- Felt Pots: Felt pots, also known as fabric pots or smart pots, have gained popularity among marijuana cultivators. These porous containers promote air pruning, which stimulates the growth of lateral roots, prevents root circling, and encourages a more fibrous root system. The breathable fabric allows for better air exchange and oxygenation of the root zone, facilitating root respiration and nutrient uptake. The enhanced drainage offered by felt pots reduces the risk of overwatering, preventing waterlogged conditions that can lead to root rot. The fibrous nature of the fabric also acts as a natural barrier against root-bound growth, enabling healthier and more extensive root development. Moreover, felt pots can be beneficial in outdoor settings as they allow for better temperature regulation, preventing overheating of the root zone during hot weather.
Conclusion:
The root system of the weed plant is a critical element in achieving healthy and productive growth. While open soil cultivation allows for unrestricted root expansion and natural expression of genetic potential, plant pots provide flexibility, particularly in constrained spaces. Large pots offer ample room for roots to thrive, round pots promote even root distribution, square pots optimize space utilization, and felt pots encourage air pruning and better drainage. Each method has its own advantages and considerations, and growers should choose the approach that aligns with their specific circumstances, available space, and desired outcomes. Ultimately, understanding and nurturing the root system is vital to unlocking the full potential of cannabis cultivation. By providing the right conditions for root growth, growers can ensure healthy plants and maximize yield and quality.
Frequently Asked Questions
What are the advantages of open soil cultivation for cannabis plants?
Open soil cultivation offers several advantages for cannabis plants. The unrestricted growth of roots allows them to explore a larger volume of soil, access deeper nutrient sources, and interact with beneficial soil organisms. This leads to improved overall plant health, increased nutrient absorption, and potentially higher yields. Open soil also provides excellent drainage properties, prevents waterlogging, and promotes healthy root development.
What are the benefits of using large pots for cannabis cultivation?
Large pots provide ample space for the roots to spread, allowing for better nutrient absorption and overall plant health. The increased soil volume helps maintain stability and reduces the risk of nutrient deficiencies or waterlogging. Large pots also offer more room for organic matter and beneficial microbes, enhancing soil fertility and promoting healthy root development. Additionally, large pots provide a buffer against environmental fluctuations, ensuring a more stable growing environment for pot plants.
How do round pots benefit cannabis plants’ root growth?
Round pots promote even root distribution and encourage a more natural root growth pattern. The absence of corners eliminates the possibility of root binding and allows the plant to access nutrients and water evenly. The circular shape of round pots promotes a balanced distribution of lateral roots, prevents overcrowding, and enhances nutrient uptake efficiency. Round pots also facilitate better airflow around the root zone, reducing the risk of excess moisture and root diseases.


Discover Cannabis and CO2
Did you know that your plants can be harmed if they don’t get an adequate supply of CO2? Or that an excessive supply of carbon dioxide can potentially be harmful to your marijuana plants? Carbon dioxide is a crucial aspect of marijuana cultivation that can hinder or permanently halt the progress of plant growth. When it comes to supplying your plants with additional carbon dioxide, there are certain factors you need to keep in mind. In this piece “Cannabis and CO2” we will share ways to optimize CO2 levels for cannabis growth.

Why is carbon dioxide essential for cannabis cultivation?
It is essential to ensure that your plants receive a carbon dioxide level above 250 parts per million (ppm). Any CO2 level below this measure can pose immense risk to them. On the other hand, exposing your plants to dangerously high levels of carbon dioxide can be lethal. But why is carbon dioxide essential for cannabis cultivation? It enables plants to complete the process of photosynthesis. Photosynthesis is the conversion of carbon dioxide into energy in plants. As the name and formula imply, CO2 consists of one carbon atom and two oxygen atoms. This is significant because plants require 17 essential elements to grow and reproduce, and hydrogen, carbon, and oxygen make up 95% of a plant’s dry weight.
Many farmers suggest that adding CO2 to the cultivation room could improve yields by up to 20%. However, this guide will show you how to optimize carbon dioxide levels for better weed growth and excellent results.
How to introduce additional CO2 to your garden
There are several methods to add carbon dioxide to your garden. However, many of these methods do not guarantee controlled delivery of the desired PPM. Therefore, we recommend investing in reliable equipment to ensure proper CO2 supplementation.
CO2 generators
CO2 generators offer an effective way to improve the carbon dioxide levels in your plants. These products, resembling outdoor heaters, burn propane or natural gas to produce carbon dioxide. They also emit heat, making them suitable for larger spaces and climate-controlled enclosures.
Compressed CO2
Compressed CO2, stored in metal tanks like propane cylinders or scuba tanks, can be delivered to your plants through emitters. Unlike generating carbon dioxide on your own, compressed carbon dioxide is produced at a factory, eliminating concerns about heat generation. This makes compressed CO2 an excellent choice for small-scale growers.
What does carbon dioxide do for your cannabis plants?
Optimizing carbon dioxide levels for your plants will result in increased growth speed and higher yields. With accelerated growth, you can enjoy bountiful harvests every year, resulting in bigger and better yields without experiencing dry periods. When carbon dioxide is used properly, it increases the moisture content in your plants and enhances their resilience. This enables plants to withstand higher temperatures than they normally would without drying out quickly. As a result, your plants will thrive in hotter conditions, leading to improved growth.

Why use CO2 in cannabis cultivation?
There are two primary benefits of using CO2 in your marijuana plants: faster growth and greater yield. Additionally, plants store a certain amount of moisture and energy in their leaves, and carbon dioxide helps release that energy, allowing plants to blossom. Most cultivators agree that unlocking this stored energy can lead to a 20-30% increase in yield, along with a relative growth speed increase of at least 15%.
What do you need to know before adding CO2 to your cannabis plants?
Adding CO2 will increase the humidity of your cannabis garden, creating a more moist environment. However, higher moisture levels can also increase the risk of fungus and rot. Moreover, uncontrolled release of carbon dioxide can create a toxic environment for both your cannabis plants and yourself. A CO2 level of about 2000 ppm can harm your plants, and levels higher than that can be unsafe for animals and humans to breathe. It’s important to remember that a quantity below 250 ppm will harm your plants.
Since carbon dioxide is heavier than oxygen, it needs to rain down on your plants. Therefore, it’s necessary to regulate carbon dioxide levels to maximize its benefits without sacrificing the oxygen your plants require, and vice versa. In a nutshell, carbon dioxide supplementation will lead to bigger, improved, and higher annual yields.
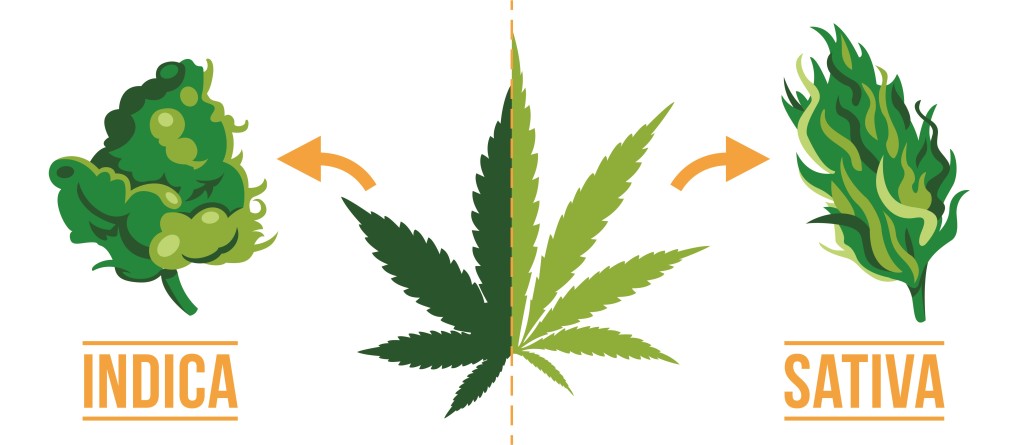
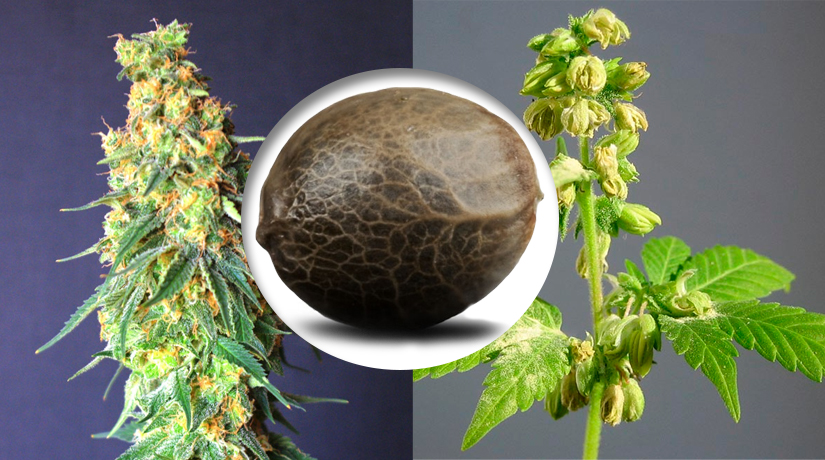
Indica vs Sativa
Who would have thought that in marijuana there are different types of plants with completely different effects and benefits? The origin, the climate, the effects, and the physical characteristics are crucial in order, to differentiate the type of plant that you are going to use either in the clinical, pharmaceutical, or recreational field, as well as to know between Cannabis Sativa and Cannabis Indica in order, to be able to make the best selection of seeds according to your needs.

Marijuana is a well-known plant for its mind and body effects and it’s split into two main types: Sativa and Indica. Even though they come from the same family and have similar ingredients, they’re different in how they look and what they do when you use them. Let’s break it down simply:
What the plants look like:
Indica: This plant is short and looks like a bush with wide leaves. It grows well in cooler and mountainous areas.
Sativa: This one is tall and thin, with skinny, pointed leaves, kind of like a young pine tree. It likes hot and humid places.
How they make you feel:
Indica: It chills you out and can make you sleepy, like when you’re getting cozy in bed after a long day.
Sativa: It energizes you and wakes up your mind, great for when you need to do things that require imagination or when you’re hanging out with friends.
To put it simply: if you want to relax, go for Indica. If you want to be more alert and active, go for sativa. We’ll explain more about this soon so you can better understand how each one affects people differently.
The two subspecies of marijuana represent different adaptations to different climates. Sativa originates from the jungles of equatorial regions such as Thailand, Cambodia, Jamaica, Colombia, and Mexico, places that enjoy long hours of sunshine and constant light throughout the year. The Indica variety, on the other hand, comes from the Hindu Kush region, a vast mountain range of more than 800 kilometers that stretches from Afghanistan to China and is characterized by a very cold climate.
Climatic and physical characteristics
Cannabis Sativa is known for its ability to adapt to the heat of tropical climates, being resistant to low temperatures and showing an effective ability to prevent the growth of fungi commonly associated with humidity. Indicas, on the other hand, originate from mountainous climates, which enables them to withstand climatic challenges such as wind, rain, and frost.
Morphology and appearance:
Morphology of Cannabis Sativa
Cannabis Sativa plants, are distinguished by their unique morphology and appearance, which tend to be taller and more slender, with long, thin leaves, differentiating them from other marijuana species such as Indica and Ruderalis. The following points highlight the main morphological and appearance characteristics of Sativa:
- Height and Structure: Cannabis sativa plants are typically tall and slender, with some varieties reaching heights of up to 20 feet (about 6 meters) under optimal conditions. They have a more open structure compared to the bushier Cannabis indica, allowing for greater light penetration throughout the plant.
- Leaves: The leaves of Cannabis sativa are characteristically long and narrow with a light green color. They possess serrated edges and are composed of slender leaflets that are spread far apart. The number of leaflets can vary, usually between 5 to 13 per leaf.
- Branching: Sativa plants have less dense branching compared to their indica counterparts, with branches extending outward and upward, giving the plant an airy appearance. This less compact structure is beneficial for air circulation and can help in reducing the risk of mold and fungal diseases in humid environments.
- Flowers (Buds): The flowers of Cannabis sativa are elongated and less dense than those of indica plants. They tend to be more “fluffy” or airy and can appear on the plant as spaced, apart clusters. The flowering period for sativa strains is generally longer, often taking between 10 to 16 weeks to fully mature.
- Trichomes: While both sativa and indica plants produce trichomes (the resinous glands containing cannabinoids), the concentration and distribution can vary. Sativa plants typically have a high concentration of trichomes on the flowers and surrounding foliage, contributing to their potent therapeutic and psychoactive properties.
- Root System: Cannabis sativa plants develop a deep taproot system, which enables them to access water from deeper soil layers. This characteristic is beneficial for plants growing in arid conditions, allowing them to thrive where other plants might not.
- Growth Pattern and Maturation: Sativa strains usually have a longer vegetative growth phase, which contributes to their tall stature. Their extended flowering time requires patience but can result in high yields of marijuana flowers.
Cannabis sativa strains are often associated with a cerebral, uplifting high, attributed to their higher concentration of THC in comparison to CBD. This makes them particularly popular for daytime use. The distinct morphology and appearance of sativa not only contribute to its cultivation requirements but also influence its effects and applications, making it a fav
Morphology of Cannabis Indica
Cannabis Indica plants have distinctive morphological traits, shorter and more compact appearance, with wider and denser leaves, traits that differentiate from Sativa and Ruderalis. The main characteristics of Indica are described below:
- Height and Structure: Cannabis indica plants are generally shorter and bushier than their sativa counterparts, typically reaching heights of 2 to 4 feet (about 0.6 to 1.2 meters). They have a compact, dense structure, which makes them well-suited for indoor cultivation.
- Leaves: The leaves of Cannabis indica are broad and dark green, with fewer but wider leaflets compared to sativa plants. Indica leaves often have between 7 to 9 leaflets, which are closer together, giving the leaf a fuller appearance.
- Branching: Indica plants have dense branching, with closer internodal spaces. This compact growth habit results in a bushy appearance and contributes to their ability to produce more buds in a smaller space.
- Flowers (Buds): The buds of Cannabis indica plants are typically dense, thick, and bulky, clustering around the plant’s nodes. Due to the plant’s compact nature, these buds are often heavier and more resinous than those of sativa strains, leading to higher yields per square foot in controlled environments.
- Trichomes: Cannabis indica plants are known for their abundant trichome production, which covers the buds and surrounding foliage in a thick layer of crystalline resin. This resin is rich in cannabinoids like THC and CBD, making indica strains highly potent.
- Root System: Indica plants have a more spread-out root system compared to the deep taproot of sativa plants. This characteristic makes them more adaptable to various growing mediums and efficient in nutrient uptake from the soil.
- Growth Pattern and Maturation: Cannabis indica strains have a shorter vegetative growth phase and a faster flowering cycle than sativa strains, often maturing in 6 to 8 weeks. This quick turnaround makes them attractive to cultivators looking for a fast crop.
- Effects: Indica strains are traditionally associated with a sedative, body-centric effect, often referred to as a “body high.” This makes them popular for evening use, providing relaxation and aiding in sleep.
The morphology and appearance of Cannabis indica are not just significant for identification; they also have practical implications for cultivation and use. The compact, dense growth of indica plants makes them particularly suited for indoor or space-constrained environments. Their potent, resinous buds are favored for their strong therapeutic effects, offering relief from pain, anxiety, insomnia, and more.
Chemical and Psychoactive Composition
Both subspecies contain a variety of chemical compounds, but the proportions of these compounds can vary.
Cannabis Sativa: Sativas tend to have higher levels of tetrahydrocannabinol (THC), the compound responsible for the psychoactive effects. They may also contain significant amounts of cannabidiol (CBD), which has health properties, but in lower proportions than THC.
Cannabis Indica: Indicas generally have slightly lower THC levels than Sativas, but can still be potent. They tend to have a more balanced ratio of THC and CBD, which can result in a more relaxing and sedative effect.
When it comes to psychoactive effects, it is important to remember that although both Sativa and Indica contain THC, the effects and reactions vary greatly depending on the type of plant.
So which strain is right for me? Amsterdam Marijuana Seeds can tell you:
Sativa is known for its properties that induce a state of euphoria and greater sociability compared to the Indica variety. This sub-species enhances perception, intensifying the appreciation of colors and sounds while stimulating creativity and thinking. Sativa is used to relieve stress, anxiety, depression, nausea, migraines, and as an appetite stimulant, among other wellness benefits.
On the other hand, Indica, known for its relaxing and sedative properties, is highly effective in the treatment of insomnia and a variety of conditions. It is widely used to alleviate neuromuscular disorders such as tremors and, spasms, and to combat chronic pain. It is also a valuable option for reducing anxiety and stress and stimulating appetite in patients who need it.
Alternative uses
Cannabis Sativa: Sativas are often used to treat depression, anxiety and to improve mood. They can also be useful in treating attention deficit disorder and stimulating appetite.
Cannabis Indica: Indicas are preferred for the treatment of chronic pain, insomnia, anxiety and to relax tense muscles. They are also commonly used to treat gastrointestinal disorders.
It is important to note that due to hybridisation and genetic variability of marijuana strains, classification as sativa or indica is not always accurate. In addition, individual experience with these subspecies may vary between individuals and specific strains.
Sativa and Indica are two subspecies with marked differences in morphology, chemical composition, psychoactive effects, and alternative uses. The choice between one or the other depends on the personal preferences and therapeutic needs of each individual.

Does Comfort Food Actually Help

Connect to cannabis history with three legacy strains from Paradise Seeds

This State’s Cannabis Revenue Keeps Pouring In

Major Bloom: Cultivating community, creativity, and cannabis in Worcester

How a Colorado operator stumbled onto ‘blueprint for laundering marijuana’

Northern Ireland: Man charged after £425,000 worth of cannabis seized

Getting THC Edibles in Your Edible Arrangement?

Is Cannabis Legal in California Right Now?
Germany: Trial against operator of Trier cannabis vending machine discontinued

The best energizing THC gummies of 2025 by Leafly

Distressed Cannabis Business Takeaways – Canna Law Blog™

United States: Alex Malyshev And Melinda Fellner Discuss The Intersection Of Tax And Cannabis In New Video Series – Part VI: Licensing (Video)

What you Need to Know

Drug Testing for Marijuana – The Joint Blog

NCIA Write About Their Equity Scholarship Program

It has been a wild news week – here’s how CBD and weed can help you relax

Cannabis, alcohol firm SNDL loses CA$372.4 million in 2022

A new April 20 cannabis contest includes a $40,000 purse

Your Go-To Source for Cannabis Logos and Designs

UArizona launches online cannabis compliance online course
-
 Cannabis News2 years ago
Distressed Cannabis Business Takeaways – Canna Law Blog™
-
 One-Hit Wonders2 years ago
United States: Alex Malyshev And Melinda Fellner Discuss The Intersection Of Tax And Cannabis In New Video Series – Part VI: Licensing (Video)
-
 Cannabis 1012 years ago
What you Need to Know
-
 drug testing1 year ago
Drug Testing for Marijuana – The Joint Blog
-
 Education2 years ago
NCIA Write About Their Equity Scholarship Program
-
 Cannabis2 years ago
It has been a wild news week – here’s how CBD and weed can help you relax
-
 Marijuana Business Daily2 years ago
Cannabis, alcohol firm SNDL loses CA$372.4 million in 2022
-
 California2 years ago
A new April 20 cannabis contest includes a $40,000 purse