

Cannabis News
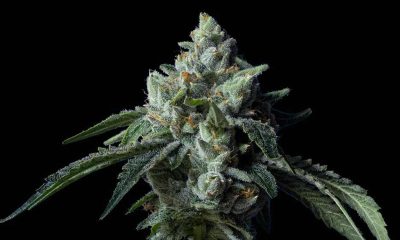
Flash Frozen Weed? – The Guide to Fresh Frozen Cannabis
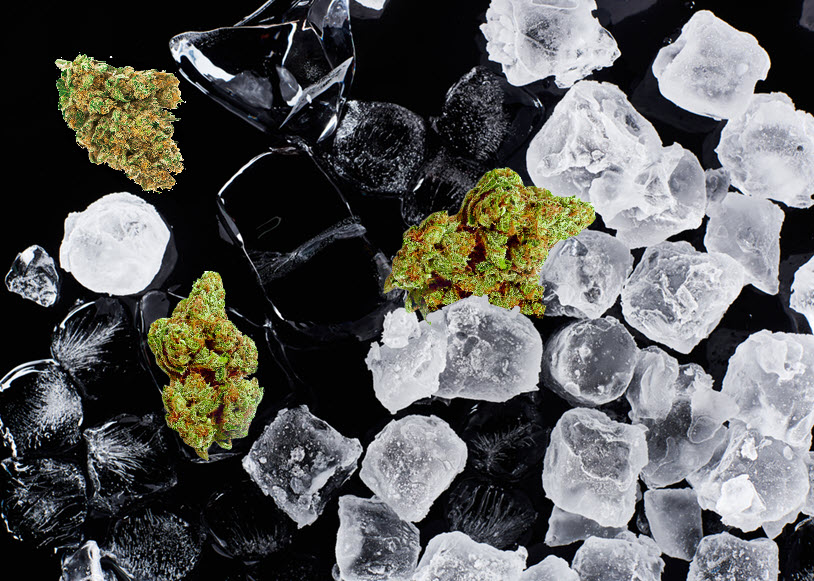
Understandably, storing your newly harvested cannabis in the freezer may seem strange or even dangerous. But did you know that some leading cannabis growers freeze their buds right after harvest? Discover how this process can elevate your yield quality.
What someone told you to chill your cannabis? It sounds unconventional, right? But read on. By placing your freshly harvested buds in airtight bags and sticking them in the freezer, you skip the time-consuming drying and curing process. And you get to keep the precious terpene and cannabinoid profiles intact, leading to top-notch cannabis extracts.
Is it possible to freeze cannabis?
Believe it or not, cannabis can be frozen, just like any other product. But why go through the extra effort? You might think it’s just a matter of preservation, but dried and cured buds can last for over a year, although the THC potency decreases with time.
The real reason for freezing weed is to create top-notch extracts. By locking in the fragile cannabinoid and terpene profiles of freshly harvested buds, the freezing process sets the stage for premium extract production. This safeguards these volatile compounds and maximizes their presence in the final product.
Why Freeze Weed?
We’ve established that freezing cannabis is a huge advantage for commercial growers and home cultivators. By bypassing the curing and drying process, growers can enjoy the results of their hard work much sooner. But that’s not all – this fresh frozen approach also safeguards vital cannabis compounds like terpenes and cannabinoids. After all, these components make growing weed worth it in the first place!
Unlike cannabinoids, terpenes are delicate, volatile hydrocarbons that can quickly deteriorate after harvest. They’re sensitive to even small temperature changes and light and oxygen exposure. The conventional drying and curing process, which takes a minimum of one month, often subjects buds to conditions that harm the terpene profile. On the other hand, cannabinoids are slightly more stable but still suffer from the same environmental factors.
Terpenes play a significant role in the distinct aroma, flavor, and overall experience of each cannabis cultivar. They’re also directly involved in the psychoactive effect, with some even impacting the endocannabinoid system, which is affected by THC and CBD. The entourage effect theory suggests that these fragrant compounds may enhance the effects of specific cannabinoids, making them more potent.
By freezing cannabis, you minimize exposure to conditions that could alter its phytochemical makeup. Quickly harvesting the buds and placing them into a sub-zero environment safeguards these precious compounds before extraction.
What is needed to make fresh, frozen marijuana?
Getting started with fresh frozen weed is a breeze and doesn’t require much work or specialized equipment. The basic setup can be done with items commonly found in most households. But, if you want to achieve the best results, you can invest in some additional equipment. Here’s a list of what you’ll need:
-
Fresh buds: Opt for the freshest flowers possible and aim to freeze them on the same day of harvest.
-
Scissors: Cut the buds from the plants and trim away the sugar leaves with scissors. You can use regular kitchen scissors or invest in ergonomically curved trimming scissors.
-
Freezer: Clear out space in your freezer to make room for your weed. You don’t need anything fancy unless you plan on freezing large quantities.
-
Plastic bags: Pack the buds into food-grade plastic bags like turkey bags.
-
Vacuum sealer (optional): Vacuum sealing your flowers before freezing is unnecessary, but it can improve results. These machines remove air from bags, allowing you to store more weed in a smaller space while excluding oxygen, which can cause terpene degradation.
How to Freeze Weed
Let’s get started on the journey of fresh, frozen weed! To preserve the potency of your terpenes, follow these simple steps using the necessary supplies.
Step 1: Careful Harvesting
The big day is here! Set aside some time to focus solely on harvesting. Use sharp scissors to clip buds from stems and place them in a convenient container. Be delicate in handling the flowers, preserving the trichomes. Grab the stems instead to avoid sticky fingers and to lose precious resin. Consider wearing disposable gloves for added comfort.
Step 2: Start Trimming
After you’ve harvested your buds, it’s time to trim away any excess sugar leaves. This can be done carefully with scissors, snipping off the small leaves surrounding the flowers and collecting them in a separate container. Don’t let these little extras go to waste – you can use them to make kief or even a potent sugar leaf tea.
Step 3: Package Your Buds
Time to prepare your buds for the freezer! Place each trimmed flower into a food-grade plastic bag, filling it to about 75% capacity. Gently press out as much air as possible before sealing the bag with a clip or a knot. For an extra layer of protection, consider using a vacuum sealer. This device removes the air and ensures your buds are securely packaged and ready for freezing.
Step 4: Chill Time!
It’s finally time to store your freshly trimmed buds. All you have to do is place the bags of cannabis into your freezer, ensuring the temperature stays at a chilly -18°C. So long as you’ve packaged your buds properly, they should be good to go for as long as you need them. Enjoy the convenience of having frozen flowers ready to use at a moment’s notice!
Step 5: Allow Time to Chill
The hardest final step is waiting. Give your buds the time they need to freeze completely. It takes at least 24 hours, so be patient. Avoid opening the freezer or handling the bags too much to preserve the quality of your fresh frozen weed.
What to avoid when making fresh, frozen cannabis?
Fresh frozen weed can only be successful if you avoid common pitfalls. To ensure your trichomes stay intact, here are a few things to keep in mind:
-
Be gentle: Avoid shaking or dropping the bags when removing your frozen buds from the freezer. Trichomes are delicate, so handle them with care!
-
Use immediately: Only take out the frozen buds when you plan to use them immediately. Thawing them for too long will harm the precious phytochemicals.
-
Don’t rush: You can’t press fresh frozen weed, as it’s full of water. First, make bubble hash before making any packed products.
-
Check for airtightness: Small holes in vacuum bags can cause problems, exposing the buds to oxygen. Check your bags for any defects before using them. Stay chilly to achieve maximum potency!
Conclusion
Fresh frozen weed is the ultimate way to preserve the potency and flavor of your cannabis buds. By following the simple steps outlined above, you can ensure that your weed stays fresh, fragrant, and ready to use whenever you’re craving a delicious and potent smoke. So, gather your supplies, get harvesting, and let’s get frosty! Whether you’re looking to create top-notch concentrates, enjoy a flavorful vape, or have a solid stash for later, the sky’s the limit when it comes to fresh frozen weed. Stay frosty and get ready to get blazed!
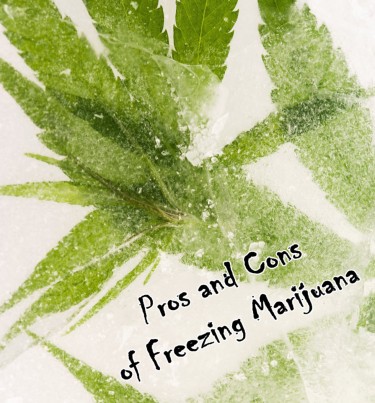
THE PROS AND CONS OF FREEZING YOUR CANNABIS, READ ON..


Since the dawn of civilization, humans have had an insatiable appetite for altering their consciousness. From the ancient Sumerians writing about beer to the shamanic use of psychedelics in the Americas, our relationship with drugs is as old as humanity itself. It’s woven so deeply into the fabric of human society that virtually every major religion and legal system has attempted to regulate, control, or outright ban various substances.
For the past century, governments worldwide have been chasing the pipe dream of a “drug-free society.” The War on Drugs, launched in the 1970s, promised to rid the world of the scourge of drug abuse. Yet, here we are fifty years later, with more drugs, more potent substances, and more problems than ever before.
History has taught us an undeniable lesson: prohibition doesn’t work. As long as there’s demand, supply will always find a way. The only real achievements of prohibition have been to enrich criminal organizations and grant governments unprecedented powers over their citizens’ personal choices. From Al Capone during alcohol prohibition to modern-day cartels, we’ve seen this story play out time and time again.
But what if I told you that the most dangerous drug isn’t what you think it is? If you stopped random people on the street and asked them to name the most harmful substance, you’d likely hear responses like “heroin,” “crack,” or “meth.” However, a fascinating study by Professor David Nutt and his colleagues reveals a far different reality.
Today, we’ll dive into this groundbreaking research that challenged conventional wisdom about drug dangers. We’ll explore why current drug scheduling might be completely backward, and how legalization, rather than prohibition, could actually make drug use safer through proper regulation and quality control.
The results might surprise you – and they certainly surprised many in the scientific and political communities when they were first published. Let’s take a closer look at what the data really tells us about drug dangers in our society.
When it comes to drug research and policy, few names carry as much weight as Professor David Nutt. As a neuropsychopharmacologist specializing in the research of drugs affecting the brain, including addiction, anxiety, and sleep, Nutt has dedicated his career to understanding how various substances impact human health and society.
His credentials are impeccable: Fellow of the Royal College of Physicians, Royal College of Psychiatrists, and the Academy of Medical Sciences. He’s held prestigious positions at Imperial College London, the University of Bristol, and the University of Oxford. As a former chairman of the UK’s Advisory Council on the Misuse of Drugs (ACMD), he was literally the government’s top drug advisor – until controversy struck.
In 2009, Nutt was famously dismissed from his position by Home Secretary Alan Johnson for speaking scientific truth to power. His offense? Publishing research showing that alcohol and tobacco were more harmful than many illegal drugs, including LSD, ecstasy, and cannabis. Johnson claimed Nutt had “crossed the line from science to policy,” essentially admitting that evidence-based research took a backseat to political agendas.
The dismissal sparked outrage in the scientific community. Multiple ACMD members resigned in protest, including Dr. Les King and Marion Walker. Even the government’s own Chief Scientific Adviser, John Beddington, sided with Nutt, stating “the scientific evidence is absolutely clear cut. I would agree with it.”
Rather than back down, Nutt doubled down on his commitment to evidence-based drug policy by founding Drug Science, an independent scientific committee providing objective information about drugs. His dedication to scientific truth earned him the 2013 John Maddox Prize for “promoting sound science and evidence on a matter of public interest, whilst facing difficulty or hostility in doing so.”
The controversy highlighted a crucial point: drug policy should be based on scientific evidence, not political convenience. As Nutt himself wrote in The Lancet: “The repeated claims by Gordon Brown’s government that it had scientific evidence that trumped that of the ACMD and the acknowledgment that it was only interested in scientific evidence that supported its political aims was a cynical misuse of scientific evidence.”
Needless to say, David Nutt is someone who knows his stuff. His groundbreaking research into drug harms provides us with an unbiased, evidence-based assessment of how different substances affect both individuals and society. When we look at his findings, we’re not seeing political spin or moral panic – we’re seeing cold, hard data analyzed by one of the world’s foremost experts in the field.
Now, let’s take a look at what his research actually revealed about drug dangers in our society…
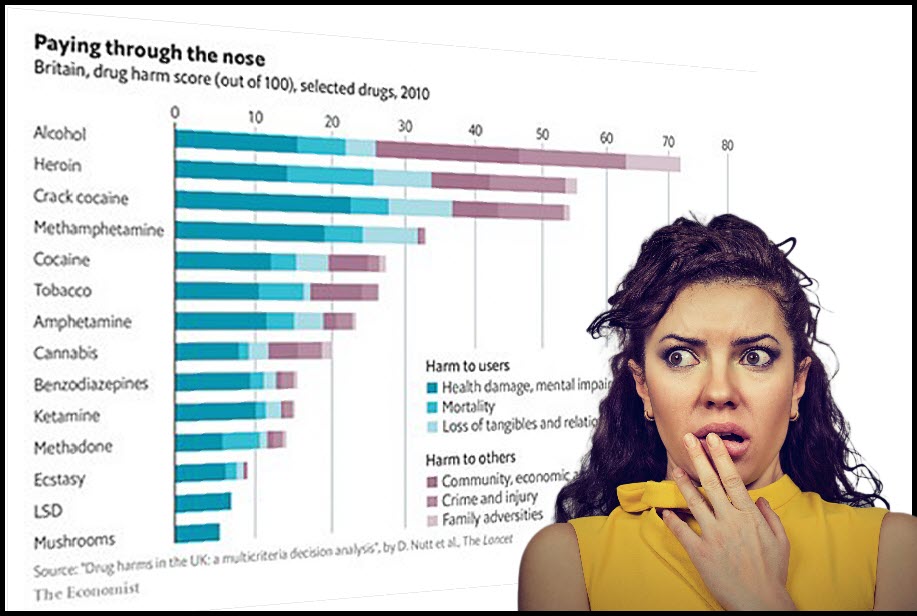
Professor Nutt’s groundbreaking study, published in The Lancet, aimed to create an evidence-based ranking of drug harms in the UK. Unlike previous approaches that relied on political assumptions or moral panic, Nutt and his team developed a comprehensive multicriteria decision analysis (MCDA) to evaluate 20 different drugs based on 16 specific harm criteria.
The methodology was rigorous. Nine criteria focused on direct harm to the user, including mortality, physical damage, and addiction potential. The remaining seven examined broader societal impacts like crime, economic costs, and family disruption. Each criterion was weighted to reflect its relative importance, allowing for a nuanced understanding of both personal and societal harms.
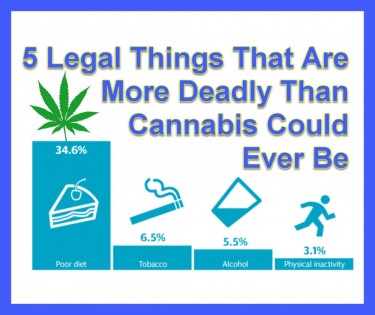
The results were shocking – and flew in the face of conventional drug classification systems. Alcohol emerged as the most harmful drug overall, scoring a staggering 72 out of 100 points. This was significantly higher than heroin (55) and crack cocaine (54), two substances generally considered among the most dangerous. When looking specifically at harm to others, alcohol’s dominance was even more pronounced, scoring nearly three times higher than crack cocaine.
What makes this finding particularly striking is the legal status of these substances. Alcohol, despite being the most harmful drug by a significant margin, remains widely available and culturally celebrated. Meanwhile, less harmful substances like psychedelics (LSD scored 7, mushrooms scored 6) are classified as Schedule I drugs, carrying severe legal penalties for possession or use.
Nutt’s recommendations based on these findings were clear: our drug laws need serious revision. The current classification system, he argued, bears little relationship to actual drug harms. Instead of basing drug policy on scientific evidence, we’ve created a system that criminalizes less harmful substances while normalizing the use of more dangerous ones.
Perhaps most importantly, Nutt’s research highlighted that harm reduction strategies should focus more on alcohol than currently illegal drugs. As he pointed out, if we’re genuinely interested in reducing drug-related harm to society, we should be more concerned about Friday night at the pub than about someone taking mushrooms in their living room.
The implications are profound. We’ve built entire legal and social frameworks around drug classifications that don’t reflect reality. Billions are spent enforcing laws against substances that, according to the data, pose relatively minimal risks to society. Meanwhile, alcohol – a drug that causes massive social harm through violence, health impacts, and family disruption – remains virtually unquestioned as a cornerstone of social life.
Now, with this understanding of Professor Nutt’s work, we must ask ourselves: isn’t it time to renegotiate our societal relationship with mind-altering substances? Can we justify maintaining the current system when it’s so clearly at odds with scientific evidence? As we’ll explore next, perhaps the path forward lies not in doubling down on failed prohibition policies, but in developing a more rational, evidence-based approach to drug regulation…
There’s a profound irony in our society’s relationship with drugs: one of the substances classified as Schedule I – DMT – is produced naturally in our own bodies. As Terence McKenna famously quipped, “Everybody’s holding.” This endogenous psychedelic, dubbed “the spirit molecule,” isn’t just some recreational chemical – recent research suggests it may be fundamental to our perception of reality itself. Rather than simply causing hallucinations, DMT might actually help stabilize our baseline consciousness, with additional doses allowing us to “break through” these perceptual barriers.
But this isn’t about DMT specifically. It’s about the absurdity of criminalizing a substance our bodies naturally produce while celebrating alcohol – a drug that, according to Professor Nutt’s research, causes more societal harm than heroin or crack cocaine. You can’t watch a football game without being bombarded by beer commercials, yet people sit in prison cells for possessing substances that are demonstrably less harmful.
As we approach another presidential election, both candidates have suddenly discovered their support for cannabis reform, despite long histories of opposition. But why stop at cannabis? Nutt’s research shows that psychedelics like LSD and psilocybin mushrooms pose even less risk to society than marijuana. We’ve spent half a century fighting to legalize one relatively benign plant while maintaining prohibition on substances that could potentially revolutionize mental health treatment.
The evidence is clear: legalization works. Even without full nationwide legalization, cannabis use among youth has declined in states with legal markets. Why? Because regulated markets require ID checks, while drug dealers don’t care about age verification. Legal markets also ensure product quality, generate tax revenue, and create legitimate jobs – all while undermining criminal enterprises.
When Professor Nutt presented scientific evidence challenging the established narrative about drug dangers, he wasn’t celebrated for his rigorous research – he was fired. This tells us everything we need to know about the real motivations behind drug prohibition. It was never about public health or safety; it was about control and profit.
The pharmaceutical industry has effectively captured the entire drug market, turning prohibition into their private monopoly. They’ve spent decades funding politicians, shaping media narratives, and influencing medical education. The result? A system where dangerous but profitable drugs are pushed through legal channels while safer alternatives remain criminalized.
The true danger isn’t any particular substance – it’s the unholy alliance between Big Pharma and government power. Perhaps Professor Nutt’s harm assessment missed the most addictive and destructive drug of all: Power. It’s the one substance corporate executives and politicians can’t seem to get enough of, and their addiction has shaped drug policy for generations.
It’s time to admit that the “war on drugs” was never about protecting public health – it was about protecting profits and power. The science is clear. The evidence is overwhelming. The only question that remains is: how many more lives must be ruined before we finally embrace a rational, evidence-based approach to drug policy?
5 THINGS WAY WORSE THAN CANNABIS, READ ON…
Cannabis News
If The FDA Approves It, 5 Million Depressed Americans Could Benefit From a New Psychedelic Therapy

With millions of people around the world suffering from depression, it’s a seriously worrying condition that affects countless families and societies as a whole.
It’s also still so highly stigmatized, hindering people from seeking help, a proper diagnosis, and treatment. And for those who do get treated, recovery may be futile. That’s because depression is so multifaceted – and it is such a complex condition. There are several social, familial, environmental, and biological factors at play at any given time. In addition, factors such as genetics, trauma, stress, and substance use also play a role.
When it comes to treating depression, responses are highly individual too. A medication and dosage that works well for some, may not work as well for others. Additionally, individuals with co-existing conditions including PTSD and anxiety, or people with specific genetic differences and brain chemistry, will respond differently to pharmaceutical medications. Even those who do respond, may find it takes a long time to work – and antidepression medications are notorious for their harmful side effects.
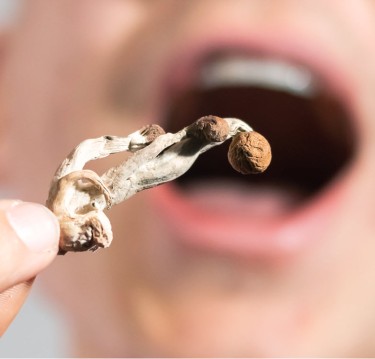
Enter: Psychedelic Mushrooms For Depression
Over the last few years, psychedelic drugs have become increasingly popular for their ability to effectively manage treatment-resistant mental health disorders including depression. Thanks to a growing acceptance of the therapeutic potential of psychedelics, individuals suffering from depression now have more hope than ever with a safe, natural choice.
And while there are many popular psychedelics to choose from, it’s none other than the psilocybin magic mushrooms which are the most famous of all. It’s also the most well-researched out of all other psychedelics whne it comes to depression, and there is a solid body of research proving its efficacy for treatment-resistant depression.
During a recent study from Emory University, UC Berkeley, and the University of Wisconsin-Madison, investigators sought out to better understand the demand for psilocybin therapy focusing on depression in the United States. The researchers analyzed data on the prevalence of depression, which were taken from national polls. From this data, they determined that roughly 5 million Americans would meet the criteria for psilocybin therapy if it were ever to be approved.
“Our findings suggest that if the FDA gives the green light, psilocybin-assisted therapy has the potential to help millions of American who suffer from depression,” explained Syed Fayzan Rab, the study’s lead author and an Emory MD candidate in a press release. “This underscores the importance of understanding the practical realities of rolling out this novel treatment on a large scale,” he said. The figures are also based on the FDA’s inclusion criteria taking into consideration factors such as regional variation, insurance coverage, and variability.
“While our analysis is a crucial first step, we’ve only scratched the surface in understanding the true public health impact psilocybin therapy may have,” explained Charles Raison, one of the study’s collaborators. Raison is also a lead researcher for one of the biggest clinical trials studying psilocybin therapy for depression. “Ultimately, the realizable potential of this treatment rests in the hands of regulatory bodies, policymakers, insurers, and the healthcare community at large,” he added.
“It’s our hope that these findings spur productive discussions and proactive preparations to optimize the benefit to patients while minimizing unintended consequences,” he said.
Why Psilocybin-Assisted Therapy Is Promising
There are many ways one can medicate with psilocybin. Some cosmonauts who already have had previous experience with recreational or spiritual use of psychedelics may feel confident enough to engage in psilocybin therapy through standard dosing or microdosing; there are several well-established protocols that one can utilize to do so safely without supervision of a medical professional.
However, for individuals who suffer from severe and treatment-resistant depression, psilocybin-assisted therapy may be the better route. It involves the administration of psychedelics (in this case, psilocybin mushrooms) under the supervision of a medical professional. Basically, it’s like replacing conventional antidepressant drugs with psilocybin mushrooms; in either case you’d be monitored by your doctor and you can participate in psychotherapy sessions with them while taking the drug.
Psilocybin Even More Effective Than Antidepressants?
Not only is there an increasingly solid body of research proving the efficacy of magic mushrooms, but now the studies also say that they’re safer and more effective than antidepressants. And when you combine it with the fact that it has little to no side effects, who wouldn’t want to take psilocybin magic mushrooms for depression?
A recent study demonstrated just this.
Researchers at the Centre for Psychedelic Research at Imperial College in London found that taking magic mushrooms were more successful at treating depression compared to the widely prescribed SSRI antidepressants. For the study, they focused on escitalopram, an SSRI antidepressant, and psilocybin.
“This is important because improving connectedness and having greater meaning in life can significantly enhance a person’s quality of life and long-term mental health,” explained David Erritzoe, the study’s co-first author and a clinical director at the Imperial College in London.
“The study suggests that psilocybin therapy might be a more holistic treatment option for depression, addressing both the symptoms of depression and overall well-being. This could make a substantial difference in the overall happiness and daily activities of those suffering from depression, providing a more joined-up approach to mental health treatment,” Erritzoe added.
The study’s authors also reported that the patients who were in psilocybin therapy reported better outcomes compared to those who were being treated with escitalopram.
Conclusion
There’s no doubt that psilocybin therapy already helps so many people with depression and other mental health conditions – imagine if the FDA approved psilocybin-assisted therapy? We hope this is the kind of medical and regulatory breakthrough we can look forward to in the near future – stay tuned!
PSYCHEDELICS FOR DEPRESSION BEGINS, READ BELOW…


Daylight saving time ends next weekend. This is how to prepare for the potential health effects.

4 killed in fiery two-car crash in Thornton

Pedestrian killed in fatal Denver crash

Broncos vs. Panthers: Live updates and highlights from the NFL Week 8 game

Keeler: CU Buffs QB Shedeur Sanders torched Cincinnati while battling a bad leg and flu bug. So where’s the Heisman Trophy love?

Colorado Big Brothers, Big Sisters guides kids, combats “epidemic of loneliness”

Westminster nonprofit Growing Home pivots to prevent families from becoming homeless

What’s the Most Dangerous Drug on the Market?

In The Haze: Candid Thoughts From a Girl’s Trip To The Woods Cannabis Lounge

User Insights On Cannabis Use

Distressed Cannabis Business Takeaways – Canna Law Blog™

United States: Alex Malyshev And Melinda Fellner Discuss The Intersection Of Tax And Cannabis In New Video Series – Part VI: Licensing (Video)

What you Need to Know

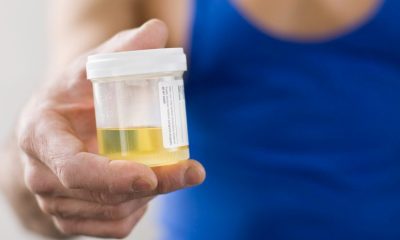
Drug Testing for Marijuana – The Joint Blog

NCIA Write About Their Equity Scholarship Program

It has been a wild news week – here’s how CBD and weed can help you relax

Cannabis, alcohol firm SNDL loses CA$372.4 million in 2022

A new April 20 cannabis contest includes a $40,000 purse

Your Go-To Source for Cannabis Logos and Designs

UArizona launches online cannabis compliance online course
-
 Cannabis News2 years ago
Distressed Cannabis Business Takeaways – Canna Law Blog™
-
 One-Hit Wonders2 years ago
United States: Alex Malyshev And Melinda Fellner Discuss The Intersection Of Tax And Cannabis In New Video Series – Part VI: Licensing (Video)
-
 Cannabis 1012 years ago
What you Need to Know
-
 drug testing10 months ago
Drug Testing for Marijuana – The Joint Blog
-
 Education2 years ago
NCIA Write About Their Equity Scholarship Program
-
 Cannabis2 years ago
It has been a wild news week – here’s how CBD and weed can help you relax
-
 Marijuana Business Daily2 years ago
Cannabis, alcohol firm SNDL loses CA$372.4 million in 2022
-
 California2 years ago
A new April 20 cannabis contest includes a $40,000 purse