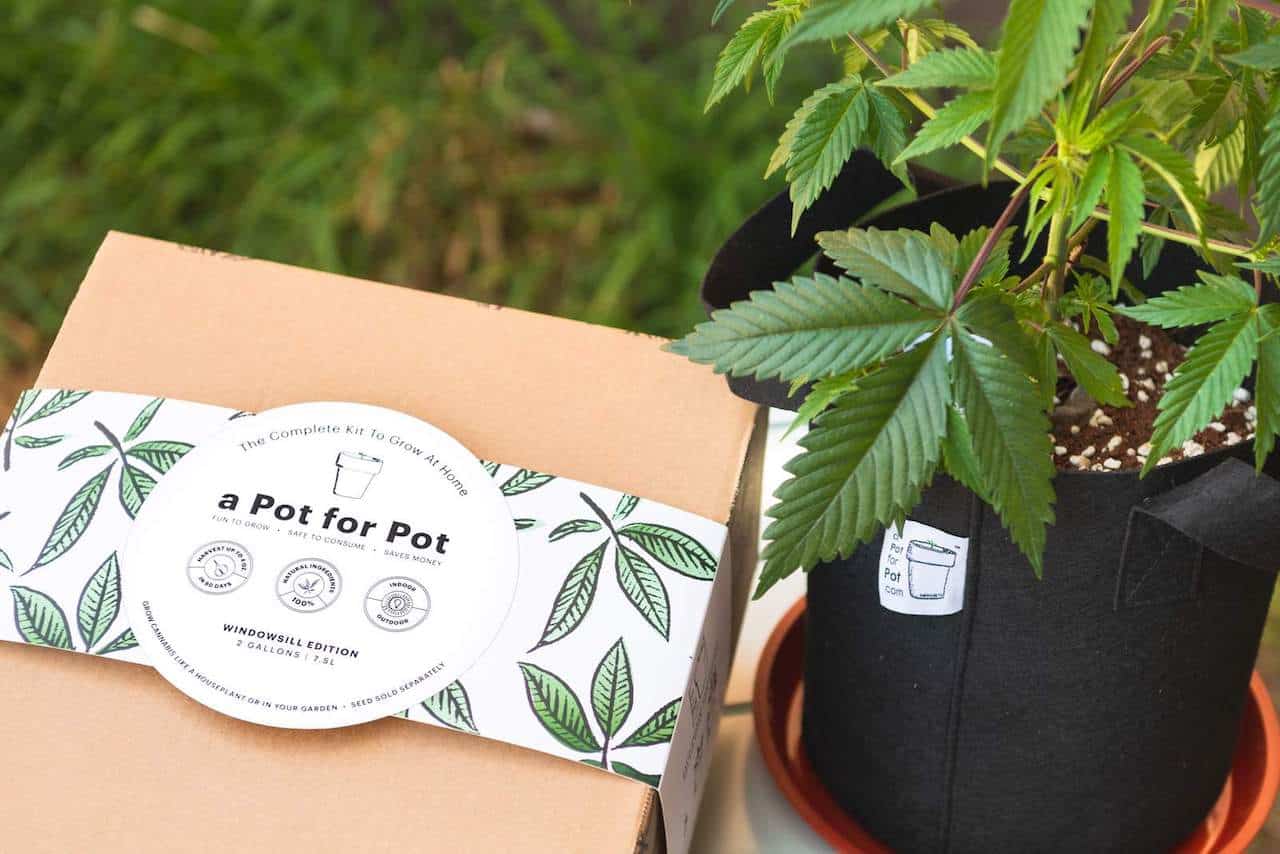
Have you always wanted to grow your own cannabis but didn’t have the means – or didn’t know where to start? In that case, you’ve arrived at the right place with these a Pot for Pot reviews, accompanied by growing guidance on how to grow the healthiest marijuana plants you’ve ever seen.
A Pot for Pot is the ideal solution for getting a cheap grow setup going – indoors or outdoors.
Offering ideal solutions for growers of all calibers, this article intends to show how growing pot with a Pot for Pot will save you money and bless you with the green grass of home beyond your wildest dreams.
Let’s dig into this company, their excellent cannabis grow kit offerings, and various sections that will help you grow the best cannabis alongside Pot for Pot.
How to Grow Pot Indoors and Save Money
One of the best weed growing tips you will ever receive has to do with how to grow pot indoors and save money while you’re doing it. Growing weed from seed and growing it indoors can be extremely satisfying and fruitful once you get the basics and get your green fingers ready to grow with A Pot for Pot weed growing kits.
Rest assured, a small weed plant won’t stay small forever! So be patient when growing weed indoors. With that said, A Pot for Pot has a whole website dedicated to help you along your growing journey. Growing weed indoors step by step is a good way to go – and we’ve summed it up in the following section.
Growing Weed Indoors Step by Step
1. Plan for your garden
In this regard, auto-flowering seeds are a great idea, but if you want to go fem, it’s your prerogative! First, choose whether you will be growing cannabis indoors or outdoors. You’ll need to consider the pros and cons of each.
2. Acquire your A Pot for Pot Kit
Each kit will be reviewed in this article to make it easy for you to choose. Simply decide how big you want to go and choose the appropriate kit for your requirements, wants and needs.
3. Germinate your cannabis seeds
There are plenty of ways to germinate that promising seed of yours, but a premade seed germination kit such as the one provided by A Pot for Pot is the recommended route. Simply moisten the medium, insert the seed(s), and water. Once your seed sprouts, you can place the entire thing into your pot for the easiest transition.
4. The vegetative stage Marijuana
Once your marijuana seedlings develop a pair of leaves, they have entered the vegetative stage. During this stage, cannabis plants are focused on growing bigger and stronger in preparation for the coming flowering stage. You need plenty of light during this phase.
Also, ensure that the temperature in your growing space is a bit warmer than room temperature. That means between anywhere between 68°F and 86°F. The long hours of light will make your plants thirsty, so be sure to give them plenty of water and monitor the moisture level and adjust accordingly.
5. Flowering stage Marijuana
When flowers start to appear, you’ll know you’ve safely and officially entered the flowering stage. This important phase in the life of your cannabis plant lasts until you harvest your prized treasure.
During this stage, your plants get large and bushy – and you may train them by trimming and/or bending the leaves so there is a flat canopy on top. Applying this technique allows ample light to reach your plant for optimal and desirable results.
If you did not purchase feminized seeds, or you are unsure of the sex of your plant, you’ll need to confirm that it’s female, but how do you know? It’s simple. Just look at the junction of the branches and look for wispy white strings emerging. If so, you’re either in luck or have become a master grower!
6. The cannabis harvesting stage
Preparing for harvesting is pivotal to the success of your grow with A Pot for Pot. Yellowed leaves should be removed from the plant before harvesting the buds. Try to isolate the plants in a ventilated room to initiate the process, and be sure to gather the following necessary tools;
Trimmers – Use a handheld or electrical trimmer, although the former is recommended because they allow for more manual control and precision.
Gloves – Prevent cross-contamination and unwanted odors on your hands
Lines for hanging your plants or a drying net
Small clothespins or ties to hang the plants with.
Trim trays – These aren’t essential, but can help make harvesting more organized.
Isopropyl alcohol to keep your area nice and clean.
7. Trimming Weed
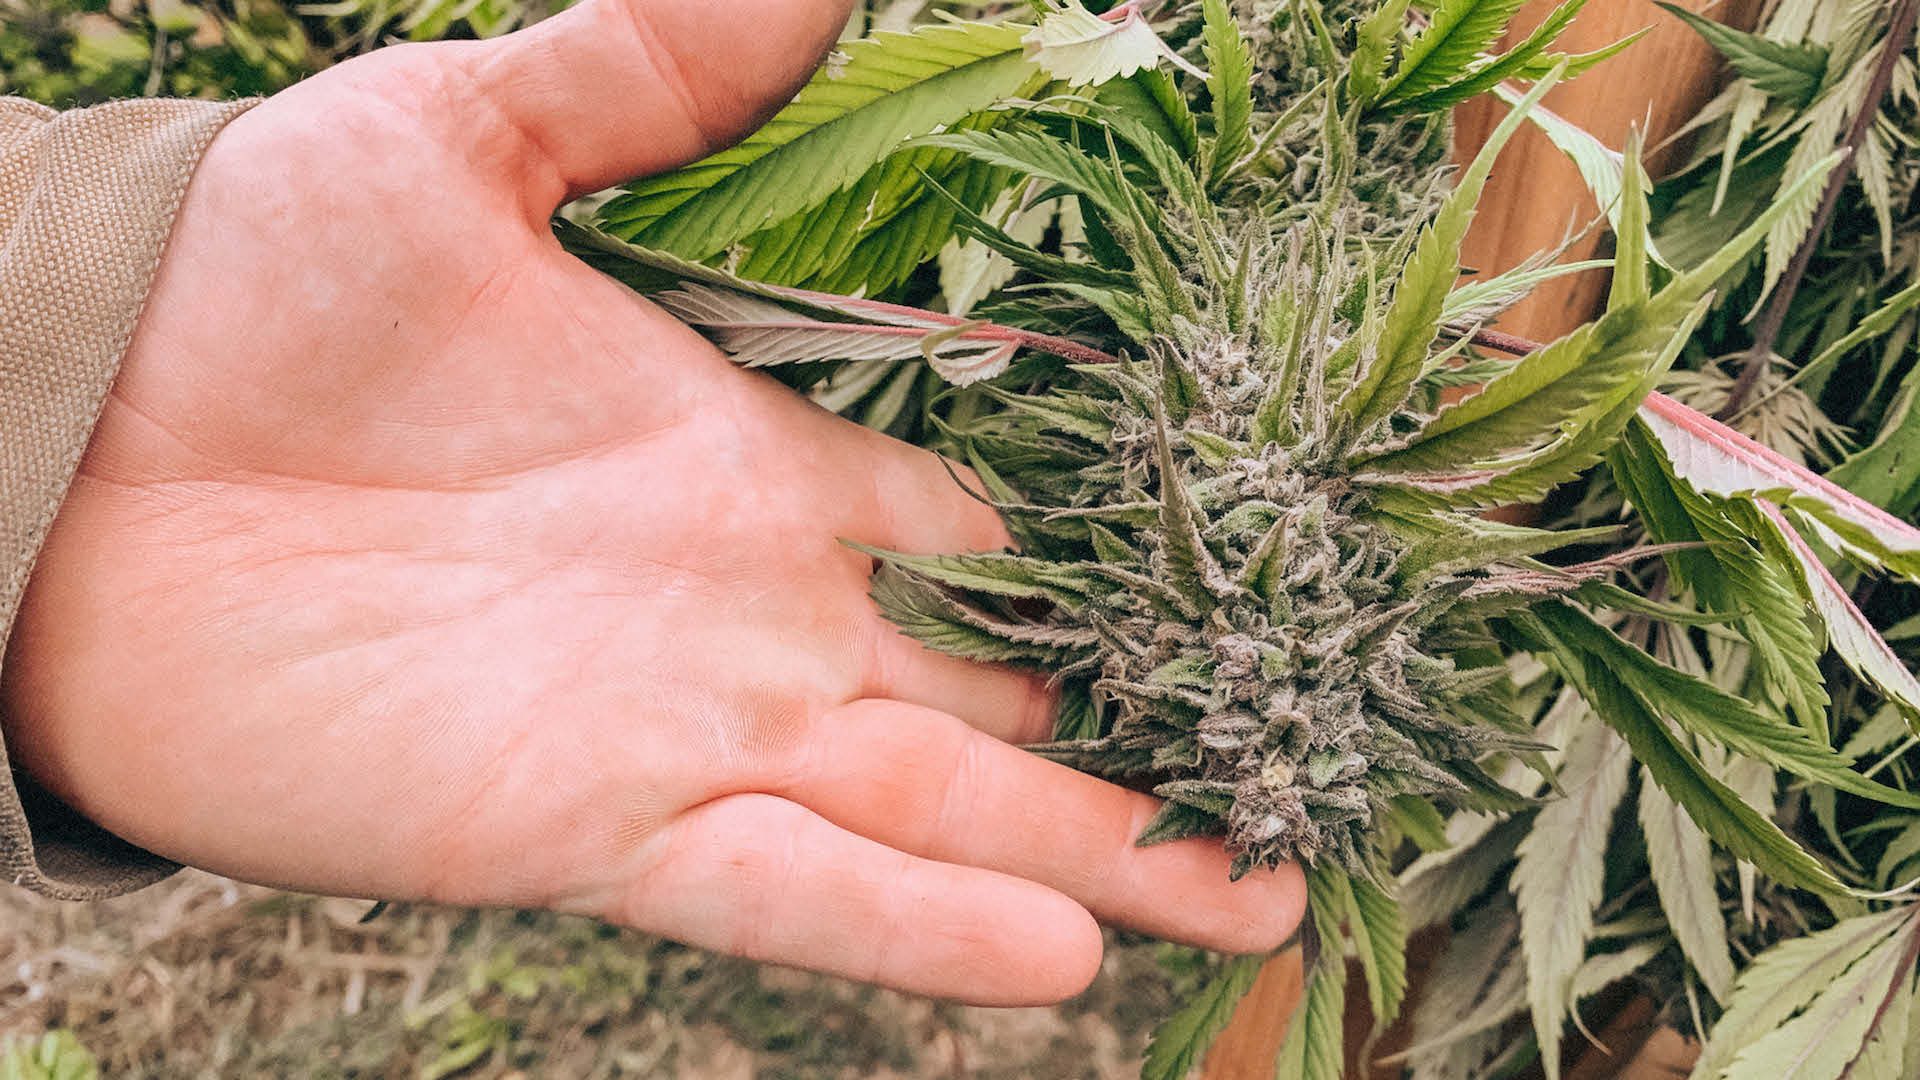
Those who trimmed their weed when it was still wet won’t have to worry about this step. However, if you’ve dried your cannabis first, you’ll notice that those adjacent sugar leaves have curled in tightly to the buds.
The next thing you want to do is remove those dried leaves, and because this is an intricate process, it is best done with the hand. A Pot for Pot’s trimming scissors are perfect for this task. When you are growing for yourself, it makes a lot more sense to trim your weed while it is wet, since the leaves are not too tightly curled around the buds yet.
However, wet trimming leads to faster drying, so be sure to keep an eye on the process. As for professional operations, they use dry trimming because it’s more efficient with trim machines. The best thing to do is to weigh the pros and cons of wet trimming vs. dry to select what will be best for your desired outcomes.
If applicable to your operations, you can use either distilled water or water with a flushing agent to remove the left-over fertilizer, which can give cannabis a harsh taste or chemical smell. Also, be sure to start this process a week in advance of starting harvest.
8. The Marijuana Drying phase
Hang your buds evenly, and make sure there’s good ventilation for about 3-6 days at 50% humidity. Sooner than later, the stems will start to snap instead of bend when they are properly dry. Then, it’s time to finish trimming.
9. The Weed Curing Phase
Now that you have harvested, dried, and trimmed your weed it’s time for the final stage: the curing process. What is the main goal of curing? It is to emphasize the flavor and potency of your weed. This is achieved done by letting the buds evaporate the remaining moisture via a slow-drying process.
Curing is also necessary to make the weed last longer. After harvesting, bacteria break down the sugars and starches of your crop, in other words, the curing process helps the plants use helpful sugars and starches before they dry out in order to stay preserved. To cure your weed properly, place them loosely in opaque glass containers or mason jars.
If you can’t find opaque containers, mason jars will work, but be sure to keep them out of the light. Next, cover your jars tightly and store them in a dark room.
In the initial days of curing, be sure to open the jars for a few moments before closing them up again. This is sometimes done for means of condensation so that all the left-over moist is replaced with fresher air.
As the curing process continues, adjust how often you open the jars. Once your weed has been cured for longer than a month, you can reduce this frequency to once every 5-7 days. As the weed cures, the moisture inside the flowers is moved to the surface by capillary action. Privilege
This is the moisture that forms the condensation on the walls of the container. Another method for curing cannabis involves placing the buds in a paper bag. This process helps prevent mold by removing excess moisture. The paper also absorbs excess wetness and allows the weed to cure.
Here follows a friendly reminder not to put too much in one bag, but rather to place the bag horizontally, spread out the buds evenly and fold over the side that’s open.
Another way to avoid mold is to use a pre-made humidity packet that will also avoid your precious yield from drying out. These packets can last for up to several months, so no replacing is necessary.
You can look forward to perfectly cured weed after about two months’ time, and at that time, the flavors, potency, and other nutrients will be at their highest levels.
Kindly sample your weed from time to time to determine whether it has reached the desired potency and taste. If your weed isn’t cured properly, its quality will degrade rapidly, and it may not be as potent as it could have been.
If you want to know how to grow a weed plant, you’d better know it has a lot to do with lighting. You’ll want to ready your lighting system for growing weed indoors step by step with A Pot for Pot. If you live in a house that gets very little direct sunlight, or a place where it rains 300 days out of the year, a Pot for Pot has your back.
Luckily even in these kinds of environments, you can easily grow great cannabis with a natural spectrum COB LED grow light. And a Pot for Pot offers one of the best on the market.
A 75-watt LED light emits the ideal, optimal wavelength to grow your plants abundantly indoors. This light is not only affordable, it’s also highly efficient and energy-saving, too.
Grow lights from A Pot for Pot are specifically designed for growing a small number of marijuana plants and are conveniently priced well under $200. This reasonable pricing proves that high-quality lighting need not be expensive.
Luckily the prices of LEDs have reduced since it first gained momentum – when the technology was still fairly new. The growing industry has certainly come a long way since then.
FREE E-BOOK
Learn How To Grow Cannabis!
Think about how expensive new technology like smartphones was when they first came out, and it often wasn’t worth it. But now, it’s a different story. A Pot for Pot’s LED grow lights can be bought individually alongside any Grow Kit.
A Pot for Pot 75-Watt LED lights are perfect for a pot with a 1.5 sq ft of canopy, while multiple of these lights can be used for larger grows.
Did We Mention the Money to Be Saved??
When you buy a Pot for Pot, you not only save loads of money, but you also acquire the skills required to grow your own cannabis well into the future and beyond.
But what does that mean? You can kick dispensaries to the curb and save a budload of cash to use for other purposes. For example, with a Pot for Pot‘s 5-gallon kit grow, you can grow up to 8 oz of flower for only $99!
Of course, the equipment is a once-off investment, and compared to the cost of your average retail cannabis running at $79 per an eighth of an ounce – you can do the math for yourself and realize the boundless potential of growing your own weed.
Moreover, because a Pot for Pot partners with I Love Growing Marijuana (ILGM), you will have access to coupons with every kit, so you don’t even have to save up for seeds.
Getting Your Grow On – With a Company That’s Got Their Pots in a Row!
This company comprises a group of passionate farmers and industry veterans who have been growing pot for years, and are just as passionate about teaching others how to grow their own pot. A Pot for Pot was started with the intention to empower people to grow their own medicine, and to combat the stigma it’s difficult to do.
A Pot for Pot has been approached by countless home enthusiasts who want to start small, but don’t know quite where and how to start. Overwhelmed with a plethora of information, most folks tend to think there must be some secret sauce to growing great buds, but there isn’t, really! Not with A Pot for Pot by your side, at least.
This booming company has created a kit for everyone and anyone to grow their own quality cannabis at home. Everything you need to grow your tops shelf bud is in the box. Add water, seed, and sun – and lots of love – and you’ll be the master of your own destiny in no time.
The simple directions that come along with A Pot for Pot take you through the process step-by-step, which makes it easy for you to grow your own natural herbs right at home.
Everything came full circle with this idea when the founder was a teenager and his Dad’s business partner caught him trying to germinate a seed in the boiler room.
The founder of A Pot for Pot has always had the belief that cannabis can have a profound impact on our culture by expanding our minds and healing our bodies, and we fully agree.
In 2009 the founder moved back to the USA, from England, to attend college in Santa Cruz. There he learned you could legally grow cannabis, this blew my mind, and it did not take him long to build up from a hobbyist grower to growing full time – and running a business!
If you’re looking for a ‘grow your own weed kit’, today is your lucky day! Growing weeds from seeds is easy with A Pot for Pot. When you grow at home, you save money, protect the environment, and avoid harmful artificial pesticides and other nasty stuff. We believe everyone should experience the joy of growing your own home stash!
These cute kits will brighten any home and are super fun and easy to grow. The 1/2 Gallon Mini Kit is designed for indoor or outdoor growing, can be powered by the sun or an LED lamp. Under the right conditions, you can harvest up to one ounce!
It contains everything you need. Just follow the simple guide and you’ll be growing your very own bonsai cannabis plant and enjoy the fruits of your labor in no time! Add only water, one auto-flowering seed, and sun. The included living soil blend provides all the sustenance your plant needs to grow beautifully from seed to harvest.
A Pot for Pot has poured all of their knowledge and experience into a box so you can learn to grow faster and easier. With this particular cannabis growing kit, you get an extensive growing guide, fabric smart pot, seed germination kit, nutrient-dense soil, and a cute little watering can!
This cannabis grow kit is perfect for the first-time grower and for the green thumb who wants to learn more – and undoubtedly one of the best weed growing starter kits available for your convenience. The 2 Gallon Kit is designed to be placed indoors or outside – with sun or artificial lighting such as LED.
It contains everything you need to have a healthy harvest at home. Just follow our simple guide and you’ll be saving a bucketload of cash. Only add water, one seed, and sun. The included living soil blend provides everything your plant needs to grow beautifully from scratch.
These plants can grow up to four feet tall and yield up to four ounces. Here’s what you get with the Small Complete Pot Grow Kit from A Pot for Pot:
These A Pot for Pot reviews wouldn’t be complete without including a review of the Medium Pot Grow Kit. This marijuana starter kit is perfect for the first-time grower and for the green thumb who wants to take their skill to the next level.
This 5 Gallon Kit is designed for indoor or outdoor growing setups, and can be powered by the sun or artificial light. Feel free to use auto-flowering seeds, regular seeds, or clones.
It contains everything you need to have a healthy harvest at home. Follow our simple Grow Guide and you’ll save money while enjoying your own clean, green stash in as little as 80 days!
Just add water, seed, and sun. The included living soil blend provides all the food your plant needs from seed to harvest. Here’s what you get with the Medium Complete Pot Grow Kit:
$40 Seed Coupon
5 Gallon Fabric Pot
Pot Drain Saucer
Seed Germination Kit
Superb Soil (x2)
Beneficial Bacteria
Diatomaceous Earth (Large)
Aeration Top Soil Mix (Large)
Coco Bricks (x2)
Rooting Booster
Smartphone Camera Len
Natural Leaf Shine
Watering Can / Spray Bottle
Trimming Scissors
The Medium Kit includes a generous Seed Coupon to discount your separate seed purchase. We recommend using auto-flowering seeds as they make it easy to harvest around about 3 months, regardless of your light cycle. This means you can plant it almost any time of the year and safely expect it to grow up to four feet tall with a yield of up to a good eight ounces!
If you want to know how to grow a marijuana plant successfully, this kit can very easily become your new bestie. A Pot for Pot’s large grow kits are specifically designed to grow regular cannabis seeds that will grow up to staggering heights with seriously dank buds.
Just follow the simple guide and you will be enjoying your own green flowers in no time! The included living soil blend provides all the extra nutrients your plant needs to grow abundantly from seed to harvest. Here’s what you get with the Large Grow Kit from A Pot for Pot:
Grow Guide
$40 Seed Coupon
35 Gallon Fabric Pot
Pot Drain Saucer
Mini 0.5 Gallon Starter Pot
Jiffy Pellet
Superb Soils (x3 Large)
Beneficial Bacteria
Diatomaceous Earth (Large)
Aeration Top Soil Mix (Large)
Coco Bricks (Large)
Rooting Booster
Flowering Booster
Smartphone Camera Lenses
Natural Leaf Shine
Watering Can
Spray Bottle
Clover Cover Crop Seeds
Trimming Scissors
The large kit includes a $40 Seed Coupon that reduces your charge on any online seed order of 5 seeds and more. For the Large 35 Gallon Kit, it is recommended that you use regular seeds which perform best when planted outside in direct sunlight.
“
There are over 300,000 jobs in the cannabis industry. CTU trained me for one of them!
– Johanna Rose Makes $24.50 @ THC +
This type of seed begins to flower when the light hours are equal to the dark hours. This means it will start to flower after about 4 months of growing. These plants can grow eight feet tall and yield up to an entire pound of premium flower or more.
Alternatively, auto-flowering seeds make it easy for you by flowering after about 3 months, regardless of the light cycle. These plants can grow up to six feet tall and yield up to eight ounces. Note, these kits are privacy-wrapped for discretion before being mailed to you.
Whether you’re a first-time grower or a seasoned veteran, this pot-growing kit has everything you need to grow robust, thriving cannabis right at your own home.
This contains all the ingredients to add another pot to your grow, or it slots right into your existing grow tent. Their included Superb Soil blend makes growing a pleasure, and only requires water, seed and sun.
The plants you grow with this kit can grow up to ten feet tall and yield up to a whopping five pounds.
Note that all kits are privacy-wrapped for discretion before being mailed to your doorstep.
If you’re growing outside or in a tent, this kit simplifies the process. Plus, the living soil blend naturally grows healthy plants full of flavor. Here’s what you get with the Expansion Cannabis Grow Kit:
$40 Seed Coupon
2- or 5-Gallon Fabric Pot
Pot Drain Saucer
Seed Germination Kit
Superb Soil(s)
Beneficial Bacteria
Diatomaceous Earth
Aeration Top Soil Mix
Coco Brick(s)
Rooting Booster
The better the soil and the lighter you have, the better your plants will grow. To make it easy, a Pot for Pot blends over 18 different ingredients into their Superb Soil so that it provides all the nutrients needed to go from a seed or clone into a beautiful budding plant.
A Pot for Pot includes everything you need to grow weed from seed – all through to the harvesting stage.
Remember that the cheapest way to grow pot does not mean skimping on certain things.
Don’t be a maximalist, but make sure to provide your plant everything it needs.
In addition to everything you get with A Pot for Pot, soil nutrients and natural pest control will increase your yield and help you get more bang for your buck.
Also be sure to follow the instructions provided with your cannabis growing kit for best results.
Within and between the lines of these A Pot for Pot reviews, you will have hopefully come to new knowledge pertaining to any previous questions you might have had regarding a weed growing starter, or how to grow your own weed kit – or perhaps you wanted to brush up on growing pot plants that pack a punch of potency and aroma.
Just imagine the following scenario for a moment: You stand gobsmacked at the rows of perfect cannabis plants your neighbor has got growing in their backyard. You’d better know that the nugs he blesses you with here and there are physical proof of his green thumb. You envy him and covet his plants and secretly curse your inability to keep plants alive. But hey, don’t swear off gardening just yet!
Where there is a weed, there is a way. And these “all you need to grow” kits from A Pot for Pot are just what Dr. Greenfinger ordered! A flawless way to grow the plants you were meant to smoke; it’s time to show that fellow grower a thing or two and be the gardener you were meant to be with A Pot for Pot’s easy-to-use growing setups.
Fast Buds helps you enjoy champion weed in record time.
With growing season in full swing, cannabis cultivators across the country are hard at work searching for their new favorite strains. One of the foremost seedbanks offering quality genetics to American growers is Fast Buds, a group of autoflower specialists who have been breeding ever since they arrived on the scene over a decade ago. Gaining a reputation for their Gorilla genetics, their most-awarded Gorilla crosses are Gorilla Cookies, Strawberry Gorilla, and Gorilla Zkittlez. We just checked in on Fast Buds’ effort to popularize autoflowering seeds in backyards across the USA, and, as befitting their name, they haven’t slowed down since.
Leafly readers get 15% off Fast Buds autoflowering strains with code LFL420.
Fast Buds has been filling their trophy case in recent years, running the table at strain competitions all over the world, including several prestigious cannabis cup victories. Competing at the American Autoflower Cup, Farmer’s Cup, Spannabis Champions Cup, Autoflower World Cup, Dab-A-Doo Brasil, and more year after year, their breeders rarely come home empty-handed. It’s safe to say that this brand of cannabis autoflowering seeds is well on their way to redefining what you can expect from autoflowering strains worldwide.
We’ve got a roundup of some of those selfsame champion strains so you can get a taste of the winning spirit and pick out some GOATs for your garden.
Strawberry Gorilla Auto
Courtesy of Fast Buds
One of the most decorated strains in the Fast Buds’ stable, Fast Buds’ Strawberry Gorilla Auto took home two prestigious awards in 2023, winning Best Sativa at the American Autoflower Cup in Los Angeles in January and the ‘Highest Combined Terpenes’ title in the Home Grow Hash at the 2023 Farmer’s Cup. This latest victory in the Farmer’s Cup is quite the feather in Strawberry Gorilla Auto’s cap — not only did Fast Buds amazing autoflower hold its own against the competitor’s photoperiod strains, Strawberry Gorilla Auto’s terpenes triumphed, scoring a point for autoflowers everywhere.
Coming in bold with intense strawberry flavor, Strawberry Gorilla Auto has tested with a jaw-dropping 28.417% THC and 29.86% total cannabinoids. That’s enough to make even those with well-developed tolerances sit up and take notice, and extractors will love how much juicy resin each bud will produce. Growers of all skill levels can expect their Strawberry Gorilla plants to reach maturity in around ten weeks, when the chunky, frosty buds are ready to go. Our advice is to take some photos before you harvest; a looker on the tier of Strawberry Gorilla Auto ought to be celebrated.
Gorilla Cookies Auto
Courtesy of Fast Buds
The ruling silverback among Fast Buds Autoflowers, Gorilla Cookies Auto is Fast Buds’ flagship autoflowering strain. This balanced hybrid has scored multiple awards over the years, including a victory at the Expo Grow competition and Best Autoflower at the 2022 Cosecha Cup. Gorilla Cookies also snagged the prestigious Best Indica award at the 2022 Autoflower World Cup, and honestly, it was no surprise. Gorilla Cookies has it all; it’s incredibly potent (testing at a whopping 28.5% THC!), high-yielding, resilient in many different indoor and outdoor climates, and boy, is it flavorful. The impressively high THC levels translate into an intense resin production, making her buds almost completely white and covered in trichomes late in the flowering stage.
Related
Why autoflowering seeds are an excellent choice for backyard cannabis cultivation
If you elect to try your hand at growing Gorilla Cookies Auto, you can expect trichome-frosted buds around the size of poker chips, in around ten weeks in good conditions. Gorilla Cookies Auto also loves to stretch out, reaching up to 150cm at maturity. It’s a bit difficult to describe the flavor of Gorilla Cookies; those who have had the pleasure report notes of hazelnut, earth, dank, and even more. That might be a bit vague, but there’s only one surefire way to discover Gorilla Cookies Auto’s complex flavor: Grow it yourself.
Gorilla Zkittlez Auto
Courtesy of Fast Buds
Gorilla Zkittlez Auto is another of Fast Buds’ legendary crosses that makes use of DNA from the Gorilla family, featuring a potpourri of enticing terpenes that runs the gamut from earthy, spicy early notes to a cotton-candy finish. This strain took home top honors from the 2022 Dab-A-Doo Brasil competition by charming judges with its ludicrous 29.85% total cannabinoid percentage, making Gorilla Zkittlez Auto one of the most potent autoflowering strains to be found, in addition to being one of the tastiest.
A hybrid with a balanced effect, Gorilla Zkittlez Auto makes a great smoke at any time of day, which means fans of this Fast Buds favorite may go through their stocks quickly. Luckily, Gorilla Zkittlez Auto is a shockingly high-yielding strain as well, producing up to 650gr/m2 in as little as 63 days in ideal conditions. With yields like that, growers don’t ever need to be shy about indulging their love for this treat of a strain.
Banana Purple Punch Auto
Courtesy of Fast Buds
The definitive end to all lingering questions about autoflowers’ ability to stack up to photodependent strains, Banana Purple Punch Auto is one of the most potent autoflowers ever tested. Tested at MJ Biz Con in 2023, Banana Purple Punch was shown to have a mind-blowing, earth-shattering 30.4% THC. That puts Banana Purple Punch solidly among famously potent strains like Green Crack and Bruce Banner, but with all the speed and convenience of an autoflower.
This indica-like will produce a respectable amount of bud in a lightning-fast seven weeks. With all these factors in Banana Purple Punch’s favor, it had no trouble winning Best Indica in the 2023 American Autoflower Cup, and it won’t have any trouble winning a spot in your heart, either.
Papaya Cookies Auto
Courtesy of Fast Buds
Hash lovers, rejoice; your time has come. One of the most exciting strains on Fast Buds’ roster, Papaya Cookies is also the second-place winner of the 2024 Best New Strain award at the Autoflower World Cup. Papaya Cookies’ intense THC percentage and far-above-average resin concentration make this sativa-leaning hybrid a dream for hash makers and extractors of all kinds, but that’s not the only thing that Papaya Cookies has going for it. The judges at the AWC noted Papaya Cookies’ delicious, complex flavor as a major strong point.
Receptive to a variety of both indoor and outdoor conditions, Papaya Cookies is a great candidate for growers of all experience levels and takes well to common plant training methods. Expect your buds in just eight weeks, with up to 29% THC for full-day potency.
Apricot Auto
Courtesy of Fast Buds
The winner of the blue ribbon for Best Sativa Strain at the 2024 Autoflower World Cup, Apricot Auto is a potent number with a flavor profile unlike any you’ve experienced before. As you might expect, Apricot Auto has a taste heavily reminiscent of the fruit that shares its name, a surprising and innovative flavor in cannabis. The tangy mix of sweet and sour makes for an excellent pairing with Apricot Auto’s dank notes, making Apricot Auto a truly unparalleled experience on the smoke.
Growers have found that Apricot Auto’s thick, resinous buds make it an excellent candidate for making concentrates, and with up to 26% THC content, any edibles made with Apricot Auto as a base will be plenty heavy-hitting. Apricot Auto will reach full maturity in around nine to ten weeks, so get planting now so you can have this delicious strain ready for summer’s peak.
Ztrawberriez Auto
Courtesy of Fast Buds
The winner of the Best Sativa prize at the 2024 American Autoflower Cup, Ztrawberriez Auto’s smorgasbord of sweet and fruity terps has been winning hearts and minds across the country. Judges, growers, and anyone else who has had the pleasure to enjoy Ztrawberriez Auto report that this autoflower is an ideal daytime smoke, elevating consumers’ moods and energy levels without giving an overly stoney feeling and testing with up to 25% THC to melt worries away.
Ztrawberriez Auto is also a linebacker against pests and rough environments; even in sub-ideal conditions, Ztrawberriez Auto seeds will yield about 600g/m2 in as little as nine weeks. With speed, quality, and flavor all set to the max, it’s easy to see why Ztrawberriez Auto beat out the competition.
Fast Buds has these champs, plus heaps more autoflowering strains on their website. Right now, you can get these strains and more for 15% off from Fast Buds with code LFL420. They are continuously launching new strains, running huge sales and giveaways, as well as educating consumers on the many, many benefits of autoflowers. You can also follow them on social media for interviews with growers, updates on new strains, and announcements of (even more) cannabis cup victories. Happy growing!
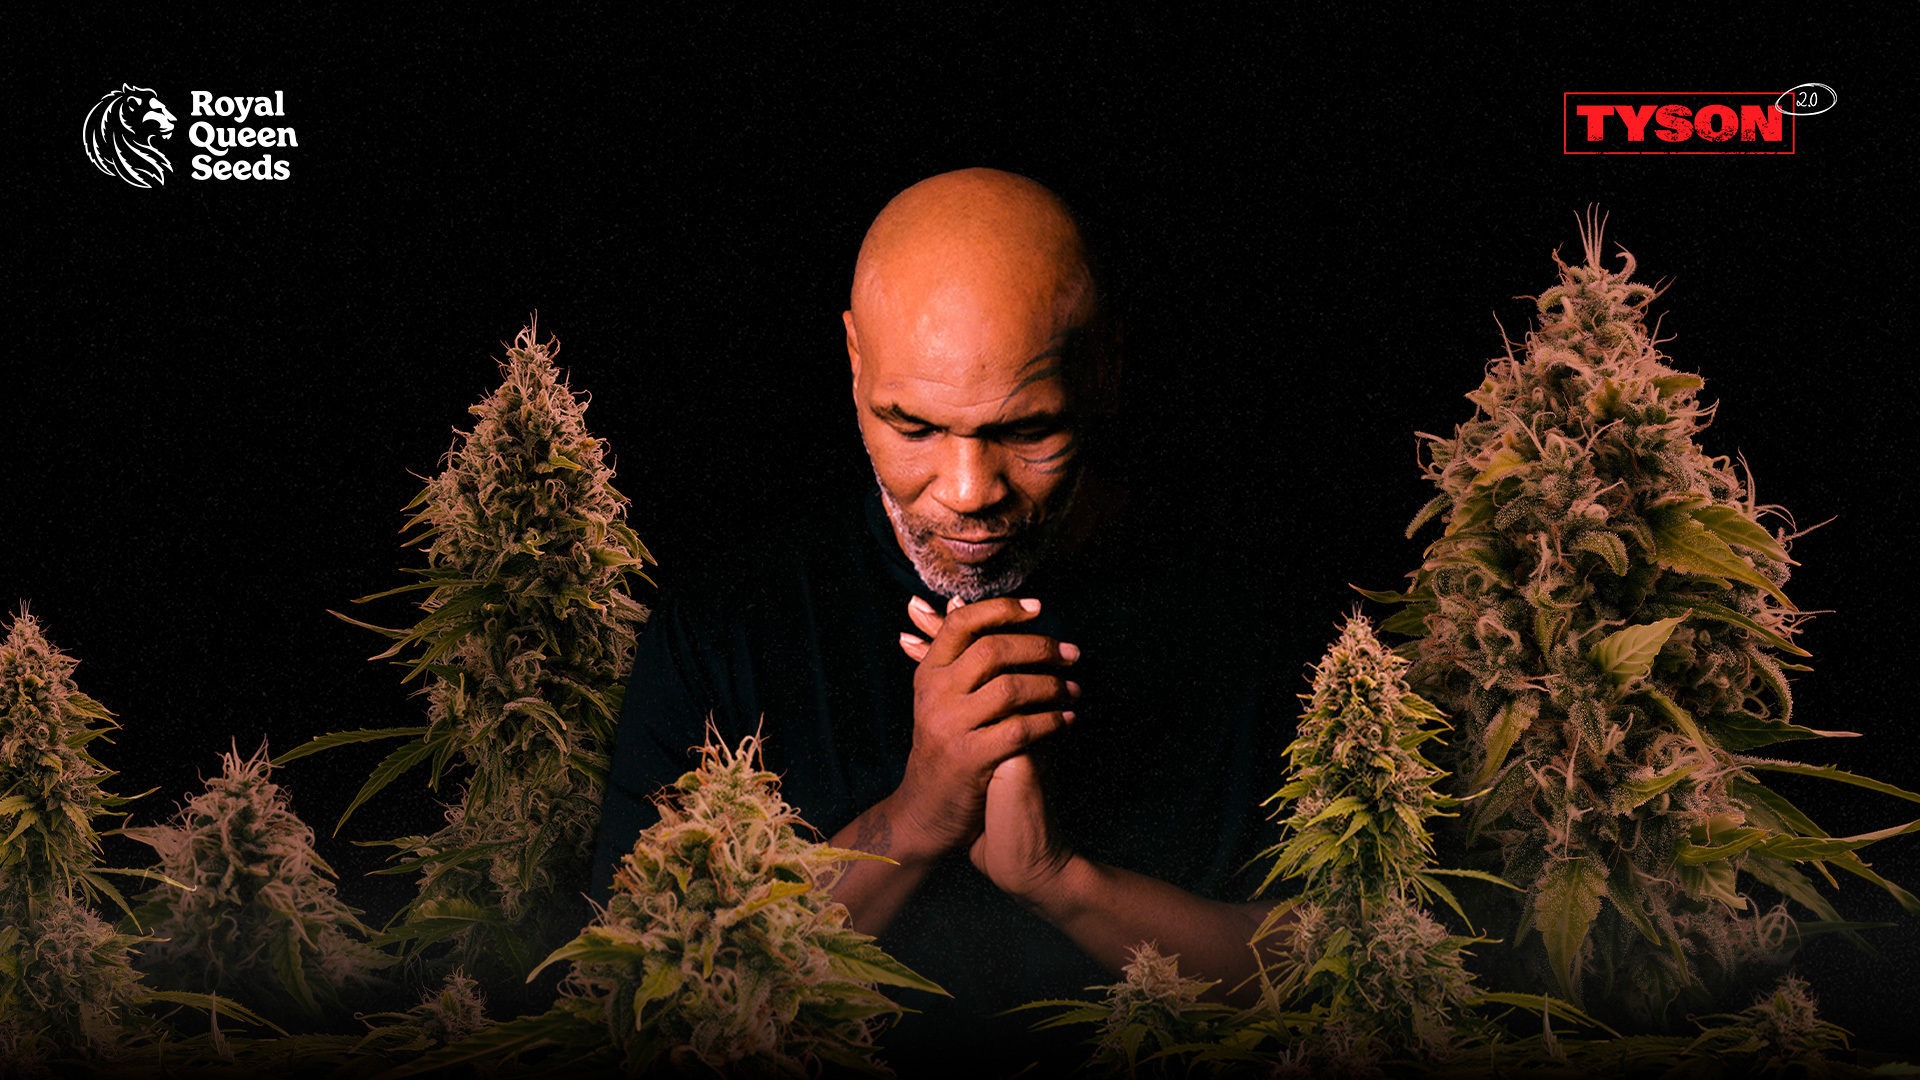
The King of the Ring & the Queen of Seeds make a great 1-2.
Royal Queen Seeds, the award-winning European seed bank that has recently captured the hearts and minds of many American growers, isn’t the type of outfit to just sit around on its laurels. Their high-quality genetics and respect for cannabis tradition have earned both our interest and respect ever since they made their way across the Atlantic, and they’re not even close to running out of tricks.
The drive, focus, and determination that brought Royal Queen Seeds to the apex of the weed world are shared by their newest collaborator, Kid Dynamite himself, Mike Tyson. ‘Iron’ Mike is one of the most famous and recognizable heavyweight boxers ever to tie on a pair of gloves.
His iconic tattooed face has been everywhere from the silver screen to the breakfast cereal aisle, and these days, Iron Mike is becoming the champ of a different arena, cannabis. His Tyson 2.0 pre-rolls, concentrates, and edibles have all made a splash in markets all over the states, and now, thanks to an exclusive partnership with Royal Queen Seeds, you can finally grow these strains for yourself.
Related
Can the Royal Queen Seeds online Seedfinder find your ideal strain? We find out.
These two titans have come together to bring homegrowers some of the most exciting new seeds we’ve seen. In the later rounds of this article we’ll fill you in on the details of these new strains, but first, let’s take a look at why Mike Tyson and Royal Queen Seeds make such a powerful combo.
Get the champ in your corner
Courtesy of Royal Queen Seeds
If you thought that Royal Queen Seeds’ collaboration with Iron Mike is just another celebrity endorsement, another in the long line of pretty faces trying to sell otherwise unremarkable weed, you’d better think again. Tyson brings far more than just his famous tattooed mug to the proceedings.
In recent years, Kid Dynamite has become an outspoken cannabis advocate, evangelizing for the plant’s incredible medical and recreational properties most every time he finds himself in front of a microphone, like on his weekly podcast, Hotboxin’. He’s also shown himself to have impeccable taste and a vast knowledge of weed and its history, making him one of the most dynamic personalities in the cannabis space today.
Related
How to get the most out of these five unique strains by Royal Queen Seeds
Mike has confirmed that cannabis has been a part of his life for many years and has helped him cope with both physical and mental stress, the same struggles that bring many Americans to cannabis today. This all goes to what makes this exclusive collaboration all the more special; these strains weren’t developed only by Mike Tyson, The Baddest Man on the Planet, but also by Mike the Grower, the tireless cannabis advocate and homegrowing enthusiast.
Mike the Grower is out to spread the love of growing like a modern-day Johnny Appleseed, albeit one with a champion belt and a devastating left hook. But his cannabis bonafides are as legit as they come, and we’re thrilled that Iron Mike is a kindred spirit.
It’s tough to imagine a better collaborator for Tyson than Royal Queen Seeds. Royal Queen Seeds brings Tyson 2.0 to the next level in the same way that a great coach brings the most out of a talented fighter. RQS is a team of cannabis breeder’s breeders, with decades of experience delivering top-quality seeds to growers.
Related
Why you should be growing F1 hybrids from Royal Queen Seeds
In the same way that a good boxing couch can take a fighter to the next level, Royal Queen Seeds brings Tyson 2.0 to even greater heights. You can be sure that any seeds ordered from RQS meet their exacting standards of genetic quality and pedigree purity, and at an affordable price to boot. Said Tyson: “If you’re the best in the world at what you do, most likely, we’re gonna be partners.”
What else is there to say? Some of the best of the best are teaming up to make themselves even better. Let’s get ready to rumble and take a look at the first six strains on offer from Royal Queen Seeds and Tyson 2.0.
Royal Queen Seeds x Tyson 2.0 Gelato 44
Image courtesy of Royal Queen Seeds.
Descended from Sunset Sherbert and Thin Mints GSC, Gelato 44 is a powerful indica-dominant hybrid that doesn’t pull its punches. Newer growers need not apply; Gelato 44 is a strain that requires a consistent amount of light and good soil quality to thrive, making it a better fit for experienced growers.
While Gelato 44 is not for the faint of heart, either for growing or for smoking, those who can hang ten rounds with this strain will find that it offers a tasty citrus flavor and a pleasantly relaxing, occasionally euphoric sensation. Gelato 44 is also potent enough to overcome Iron Mike’s formidable tolerance. Growers can expect their buds to be around 22% THC by volume.
Royal Queen Seeds x Tyson 2.0 Dynamite Diesel
Image courtesy of Royal Queen Seeds.
Named for Kid Dynamite, one of Mike’s many monikers, Dynamite Diesel is a piston-punching indica-like that’ll put even frequent cannabis consumers flat on their backs. Dynamite Diesel has DNA from two legendary strains you’re probably familiar with, Sour Diesel and Skywalker OG. With genetics like those, there was no way that Dynamite Diesel would wind up with a glass jaw—on the contrary, it’s more than worthy of bearing one of Mike’s names. This beauty takes particularly well to outdoor environments and can reach titanic 200 cm heights. Plant some this season, and you’ll have a full tank of gas come harvest.
Royal Queen Seeds x Tyson 2.0 NYC Sour D Auto
Image courtesy of Royal Queen Seeds.
A favorite of the man himself, with NYC Sour D, you can now grow the strain that charmed The Baddest Man on the Planet. While most of the Tyson 2.0 strains are pretty heavy hitters, NYC Sour D is a lighter affair, a sour, citrus, and gas-flavored sativa perfect for an energetic morning smoke or midday rally. Growers working with limited space will love NYC Sour D. It only grows to around 80 cm tall when grown indoors, perfect for most tents and balconies. NYC Sour D Auto comes from fine genetic stock, an heir of NYC Diesel and Sour Diesel Auto. The result is an autoflowering strain that doesn’t skimp on all the good stuff. Who says good things can’t come in small packages?
Royal Queen Seeds x Tyson 2.0 GOAT’Lato Auto
Image courtesy of Royal Queen Seeds.
You can tell that the Tyson 2.0 team knew they had something special when they named this strain. GOAT’Lato Auto is a cross between Cookies Auto and Tyson’s own Gelato 44, an inspired combination that has resulted in a true contender. A fast-growing indica-dominant hybrid that can be ready to harvest in as little as ten weeks, GOAT’lato Auto is tough to beat if you need to grow your stash quickly.
Nearly as fun to say as it is to smoke, GOAT’Lato Auto also has the rare distinction of being among the most flavorful of all of Royal Queen Seeds’ vast stock, a tasty terpene-packed treat that comes on quickly and takes no prisoners. Fans of GOAT’lato Auto report that it’s an incredible focus aid, helping them lock in and KO chores in the first round. But is it truly the greatest Gelato of all time? Order from Royal Queen Seeds today and find out for yourself.
Royal Queen Seeds x Tyson 2.0 Punch Pie
Image courtesy of Royal Queen Seeds.
Another of Iron Mike’s personal favorite strains, Punch Pie is a pleasure to grow for indoor and outdoor setups alike. Punch Pie’s genetics include strains like Purple Punch and Purple Kush, making it as true an indica as you’re likely to find. You’ll see it in the grow; Punch Pie likes to spread out in wide bushes, topping out at about 150 cm in ideal outdoor conditions.
When it’s time to harvest, you’ll be greeted by gorgeous, sweet-smelling buds that are caked in resin. Like any great fruit pie, you’ll be able to taste a whole medley of berries in Punch Pie, with notes of blueberry and cherry accompanied by earthy undertones. You can expect some serious couch-lock as well. The best part about Punch Pie is that it doesn’t even need that long in the oven. You can expect to harvest your Punch Pie plants in about nine weeks after planting.
Royal Queen Seeds x Tyson 2.0 Corkscrew Auto
Image courtesy of Royal Queen Seeds.
For the final entry in our list, we’ve got a slightly sativa-dominant hybrid dubbed Corkscrew Auto. Corkscrew is the descendant of Cherry Pie Auto and Tangie, two easy-to-grow strains that can hold their own in rough conditions. Corkscrew Auto has the grit to go all ten rounds and make its genetic stock proud; it’s a tough customer that’ll thrive in whatever setup you have at home.
On the smoke, Corkscrew leads with a haymaker. You’ll feel the cerebral effects as soon as you take the first hit, helping you feel energetic and creative. Corkscrew Auto will take a touch longer than some of the other seeds on this list to harvest, but trust us, and trust Mike. Corkscrew Auto is well worth the wait.
And there’s the final bell! That’s all the Tyson 2.0 strains currently available from Royal Queen Seeds, but stay tuned—this partnership may well go the distance. Make sure to visit the Royal Queen Seeds website and follow them on socials to keep yourself up-to-date on all the new seeds they have in store. Likewise, you can keep up with Tyson 2.0 by heading to their website and following them on social media to see what sort of big moves Kid Dynamite and his crew have planned for the next round. Happy growing!
Spring has sprung and with it fresh veggies in the garden. High season has also kicked in for cannabis gardeners: clone and seed sellers are doing brisk business as growers big and small ramp up for the 2024 full-sun outdoor run.
You can grow a pound of AAA-grade buds off a single outdoor plant if you get started today. Here’s how from Leafly’s weed grower’s guide to 2024.
Where to start
Start with Leafly’s first-ever Weed Gardener’s Almanac for 2024. Learn the right thing to do at the right time to stay synced with the seasons and maximize your investment in seeds, soil, water and time.
Image Not Found
The official Leafly Weed Gardener’s Almanac 2024
You can also start with Leafly’s Learn/Growing section—our evergreen guide to the basics of weed gardening.
Image Not Found
Leafly’s guide to growing marijuana
Can’t grow? No problemo
How to order weed delivery online with Leafly
What to grow
Man, do we have some options for you! Our affiliate link partners want you to start with “The best cannabis seed companies”. Featuring groups like:
Beyond that, we published our biggest, independently reported, 100% organic, 100% AI-free guide to the best seeds and clones to grow in 2024. Part 1 has the hot-hot new-new from the top dogs. Part 2 digs into strains related to Sour Diesel and Chemdog and such. Part 3 focuses on strains perfect for making extracts (aka hash) both old-school and new.
Modern cannabis too strong for you? No sweat, we have some excellent picks for strains with a balanced amount of THC (which causes euphoria) and CBD (which can moderate THC’s effects).
How to grow it
So you figured our where to start and what you want to grow—now you need to know how to grow it!
For that we got a fresh story on the ‘living soil’ wave sweeping cultivation. What is living soil? Read about it and start that compost pile today!
Get pest management tips from Kannabia Seed Company.
Image Not Found
How to keep your grow pest-free with Kannabia Seed Company
Leafly Strain of the Year 2023 is Permanent Marker—Here’s how to grow that strain and catch that wave.
Image Not Found
How to grow the Permanent Marker strain
How to harvest it
Growing is only half the battle. So much good pot is destroyed in the drying and curing phase where you got to keep temps low, humidity balanced, and avoid mold.
Here’s some fresh drying tips for an experienced master.
Image Not Found
Expert interview: The science of saving those terps at harvest
Then check out our evergreen guides to drying and curing:
Image Not Found
The ultimate guide to drying and curing cannabis for the best results
Troubleshooting your garden
If you want to make God laugh, tell Her your plans. When things go off the rail, practice a positive, solution-oriented mindset and enjoy the chance to learn something new from our troubleshooting guides.
The best part about growing weed is the friends you make along the way. You’ll be stronger and happier when you grow in community with your fellow gardeners and cannabis culture. Plug into your new network by attending these amazing cannabis events, all across the country.
Image Not Found
Ultimate weed contest calendar of 2024
Are you excited about growing a pound yet? You should be. The golden era of ganja shines even brighter when every garden has a seven-leafed tree poking out of it. Remember: She who is not busy growing is busy buying!