

Marijuana Grow Guides
What is cannabis wind burn? How to treat and prevent it.
To cultivate cannabis successfully, your plants need to have the right environmental conditions. Good air circulation around your plants is one of the most critical factors affecting their overall health. This is especially true indoors, where small problems can quickly turn ugly.
While it’s important to provide good air movement all around your plants, you can actually harm them by giving them too much direct air. This will cause a condition called cannabis wind burn. Let’s discuss cannabis wind burn and the ways to prevent it.
What is wind burn?
Wind burn is caused by the forceful movement of air directly on the plants’ leaves and stems, either from fans (indoors) or excessive winds (outdoors). Growing plants release water vapor through transpiration in balance with their surroundings, and excessive winds accelerate this process.

With the balance of moisture disrupted, water vapor is lost from the leaves and stems at a higher rate than the plant can replace it with. This strips the plant of necessary hydration and damages the hardest hit plant tissue.
Cannabis windburn can also weaken a plant’s overall health, making it more susceptible to other pests and diseases. Damaged plant tissue creates entry points for pathogens, increasing the chances of infections and affecting the plant’s ability to thrive.
Is too much wind bad for cannabis?
Cannabis plants are nearly 90% water and need constant air movement around them, especially indoors. Stagnant air slows down plant metabolism and allows moisture and dust to settle on the plant surfaces which leads to fungal diseases and pest problems.
Good air movement around your plants is necessary to keep transpiration at optimum levels. However, too much direct air on plants will dry out leaves and stems, causing affected foliage to grow in a stunted and twisted manner. In severe cases, the affected foliage can die off (necrosis).
While larger plants can tolerate a little more wind, smaller plants, and especially clones and seedlings should never have strong wind directly on their foliage.
Can indoor cannabis plants get wind burn too?
The issue of cannabis wind burn is primarily a bigger problem in indoor gardens. Limited space between plants and fans on walls and floors can force air directly onto foliage.
Using fans that are too large for a space, like a grow tent, can force air directly onto plants. Using smaller fans or fans with multiple speeds can help alleviate these issues.
Improper ventilation and exhaust (excess heat) can amplify the effects of wind burn. Executing proper grow tent air circulation and ventilation is a difficult task for many novice growers.
Can plants recover from wind burn?
Affected plants will recover from wind burn and resume normal growth once the proper changes to airflow and circulation have been made, however, severely damaged foliage won’t return to its normal shape and may remain discolored. Dead, damaged, or diseased foliage from wind burn should be removed entirely.
The effects of wind burn can be negated by aiming fans and airflow just above and below your plants, where it should be to begin with. Poor setup (and inexperience) are the biggest reasons why wind burn happens.
Consult our Weed Grow Bible for thorough instructions on setting up proper airflow in your grow.
What does wind burn look like on cannabis?
The symptoms of cannabis windburn are often distinct and recognizable. First, you may observe stunted or twisted growth of the affected leaves, or leaves curling downward from the tip, commonly known as leaf curling or “clawing.”

The leaves curl downward to protect themselves and it resembleas a claw. Leaf edges will dry out and become necrotic. Under severe conditions, the leaves become withered, shrivel, and ultimately die off due to dehydration.
Another sign is the appearance of small yellow, brown, or bronze spots that gradually spread across affected leaves. The leaf tissue in these areas are dead or dying.

Common misdiagnoses
The most obvious difference between wind burn and other visible plant deficiencies is the location of the affected foliage. Wind burn affected foliage will be directly in the path of the wind and as close to the offending fan(s) as possible.
Wind burn damage occasionally looks similar to other plant problems like overwatering or overfeeding, which can cause leaves to curl downward and damage the tips and edges.
Plant deficiencies tend to affect specific plant parts, and wind burn damage is no different. The location of a plant deficiency will give you the best clue as to the source, so pay close attention and take notes if necessary. Learn by observation.
How do you treat wind burn on cannabis plants?
To treat and prevent wind burn indoors, you’ll need to adjust your fan position & aim, adjust your fan speed, or both. You want good air movement around your plants, not directly on them, so aim your fans just above and below the canopy where they will circulate air through your plants without damaging them.
Wall fans should oscillate (move side to side) to optimize circulation. You want to see leaves moving and rustling gently, not rocking and whipping violently back and forth. It’s like when you see trees outside in a gentle breeze vs high winds. It’s the same thing with the wind in your garden.
If you’re in a small grow space, like a grow tent or a closet, then you may need to aim your fan at a wall or the ceiling to circulate the air around indirectly, without damaging your plants.
Grow tents also have vent holes that can be used with inline fans to pull air through the tent from floor to ceiling. This will provide both adequate air movement and exhaust the warm air coming from your lights.
You won’t be able to bring back the foliage that is severely damaged or dead, so be sure to prune (cut off) this foliage as soon as possible. Severely damaged plants will require extra time to grow back to where they were before the wind burn happened.
There are anti-transpirant sprays that you can use to prevent plant tissue from drying out excessively in situations where you cannot control the wind exposure or move plants around to avoid wind burn.

How do you protect outdoor cannabis from wind burn?
Prevention and planning is the key to protecting your outdoor plants from wind burn. If you’re growing outside, you will want to scout your growing area for windy conditions and avoid planting in those spots if possible.
You may need to use objects that can act as wind breaks, such as solid fencing or trees and shrubs that you can plant behind for protection. You can use other types of potted plants or objects like tarps if there is nothing else available, just make sure you leave enough space for air and light to reach your plants.
I have used pruned bamboo as a both a hedge and windbreak for my cannabis plants to screen them from wind and wandering eyes. Keep topping the bamboo so that it spreads out wide and forces new shoots to spring up.
How do you protect indoor cannabis from wind burn?
Again, prevention is the best way to protect your plants from wind burn. Use advanced planning. Always setup and test drive your grow space before adding plants.
Turn on all the lights and fans and see if you can feel any hot spots or a lack of circulation in the room. Make adjustments, and when it feels right, add your plants. Double check things every couple of weeks, or as necessary, throughout the first grow cycle to make sure conditions are optimized for a successful grow.
Use floor fans, inline fans, or squirrel cage fans to circulate air underneath the plants or between rows. Reposition fans if necessary; aim them above and below the canopy or at a wall to safely circulate air around and through the foliage. Learn about the best ways to setup a grow room and avoid wind burn, pest issues, and more with Robert’s Grow Bible.
The art of discretion as an indoor grower is based on sight, smell, and sound. If these three factors are well covered, you should never need to worry about an unexpected knock on the door or for any neighbors to ever suspect you of being a green-fingered enthusiast. In this article, I explain all you need to know about how to soundproof your grow room or grow tent, why you should soundproof in the first place, how to make a DIY muffler at home, and above all, my top tips for a silent grow location.
Why should I soundproof my grow room or tent?
Well, why not? Running a quietly operated indoor grow room is not only pleasant for your own sake; it will also remove any concerns that a close-by neighbor may become aware of what is happening one wall away.
The amount of noise you create is like an audio footprint that needs to be well-considered. Not only will soundproofing your grow tent, converted room, attic, or basement make life easy, it will also keep away the unwanted presence of police or thieves.
What are the noisiest parts of my grow room and tent?
Exhaust fans, oscillating fans, wall fans, and hydroponic pumps will be your main source of noise. Sometimes, it can be difficult to reduce the noise levels of industrial-powered fans, especially large-sized ones with the capacity to remove up to 1300+m3/h- those will produce 45–55 decibels of sound.

The sound of air passing through ducting is also one of the main culprits of a noisy grow space. As a first-time grower, you may plug in all your equipment and be overwhelmed by the noise output. I remember the first time I set up my extraction at home while living with my parents. It was so loud you could hear it while watching TV downstairs, which bothered them deeply.
9-12 inch fans at full speed can also become noisy, especially if clipped to tent poles or sat directly on the floor. You would be surprised at the difference mounting a fan correctly can make inside a tent or grow room wall. The other main source of noise you may encounter if working with hydroponics is the required aquarium pumps and air pumps

Once plugged, air pumps will make a loud and clear humming sound close to the 50-decibel mark. Not only will air pumps be switched on 24 hours a day, they may become louder over time until they need replacing. This can also be the case with water pumps, which circulate nutrient solution back to the reservoir.

Ready to learn more about building the perfect grow room? Please sign up for our Grow Bible below and learn all the tips and tricks from Robert Bergman himself!
How to soundproof my indoor cannabis garden
The extent of how much time, effort, and money you invest in soundproofing your grow room will be based on budget, space, and experience. Below are some of my personal favorite ways to help you significantly reduce the amount of noise pollution to consider.
1. Passive cooling grow lights

In recent years, passive-cooled technology using heat sink designs has allowed horticultural grow lights to operate in silence. Unlike some older LED lights with noisy internal fans prone to dust and breaking down, passive-cooled lights mean operating a discreet and quiet grow room as far as lighting is concerned.
The benefits of passive cooling lights
There is no need to be concerned about internal fans malfunctioning, which is what t I enjoy about using passive-cooled lighting. When the internal fan of a grow light stops working or begins to lose power substantially, you can be left jeopardized, causing a temperature and humidity fluctuation.
Avoid these mistakes
- Spending your hard-earned money on cheap LED lights.
- Low PAR levels; they’ll only produce small yields, so do your research.
- Forgetting that high-powered LED lights may not be the most cost-effective.
- Choosing old designs with a small output of light and outdated tech.
2. Acoustic ducting

Traditional aluminum ducting is cheap and cheerful, but if you are prepared to invest in acoustic ducting, you can significantly reduce noise levels. I always use acoustic ducting attached to silencers and find this is the most silent and discreet way to transport high volumes of air. The cost of acoustic ducting compared to standard aluminum can be 2–3 times the cost; however, it is well worth the investment over time.
The benefits of acoustic ducting
Using acoustic ducting can take the edge off, allowing your room to exhaust air in a quiet and discreet fashion. However, it is worth knowing that acoustic ducting can be expensive. When installing in a large-sized room, your costs may rapidly increase.
Avoid these mistakes
- Allowing the ducting to droop when you are hanging the equipment.
- Installing without a face mask for protection from asbestos.
- Handling the ducting with skin exposed. This can cause irritation.
- Attaching the ducting with a loose fitting, causing air to escape.
3. Silencers

In my opinion, silencers are one of the most effective means of controlling noise levels. They act as a muffler, allowing air to pass without losing power or efficiency. I always like to use two silencers and connect one on either side of the extractor. You will be amazed at the difference.
The benefits of silencers
Silencers are one of my personal favorite additions to any indoor secret garden. They are lightweight, solid in design, and will last for years. You can easily attach them to ducting, and when using two, you will find the noise levels will drop to a level all the members of your house will be happy with.
Avoid these mistakes
- Overcrowding inside small-sized tents when installing silencers.
- Installing too few. Using one works well, but spend the extra money and buy two.
- Incorrect fir. Make sure that the silencer has an airtight, secure fit.
4. Plug dimmers

These simple but highly effective devices act by connecting to the plug socket then allowing you to change the power output. Turning a dial left or right allows airflow and noise to be lowered at will. Plug dimmers work like a charm when using large-sized extractors or for those who sleep in the same room as their tent or stealth grow box.
I recommend never lowering the dial below 25%, as this can cause some ventilation systems to switch off or produce such little output it is not worth it doing. Plug dimmers are a wonderful tool for a visiting landlord, bedtime, and finding the sweet spot that works for you while providing adequate levels of exhausted air.
The benefits of plug dimmers
Plug dimmers are an excellent way to reduce noise levels and the amount of power received, thus reducing electricity bills. One thing I love about these cheap and highly effective devices is their versatility. They can also be used on house lamps to lower lighting.
5. Using T.T. fans

RVK fans are the large-sized round extractor fan that is most commonly used when growing cannabis indoors. The only issue with RVK fans is the fan’s noise when spinning at full power and the noise from the air being produced. T.T. fans are smaller extractors that can serve the purpose of a small-sized stealth grow box and are far quieter than the RVK model.
The benefits of T.T. fans
Growers operating a stealth grow box will benefit the most from T.T. fans. These small-sized fans are light, easy to hang, and make little noise when on full power running 24 hours a day.
Avoid these mistakes
- Wiring the T.T. fans wrong and causing a blown fuse (easily done).
- Buying low-powered commercial bathroom exhaust fans.
- Having short plug wires. Make sure your plug wire is at least 2 meters.
- Not replacing the T.T. fan after every second harvest.
6. Acoustic wooden boxes

You may have seen these in your local grow shop or online and thought, what is that? These wooden boxes with soundproof foam lining are designed to house an RVK fan and eliminate the noise produced by the moving parts. When connected to a plug dimmer, acoustic wooden boxes can really pay off big time.
The benefits of acoustic wooden boxes
What I like about acoustic wooden boxes is that they allow you to sit the box firmly on the floor. This means you can connect the ducting from the box through the top of the tent, giving you plenty of space inside the tent.
Avoid these mistakes
- Hanging the heavy wooden box inside the tent using chains and metal hooks.
- Making a poor-quality homemade version that lacks efficiency.
7. Silent operating hydroponics
One way to grow the biggest yields possible and operate a silent grow room is to use certain hydroponic systems that do not use loud air pumps like DWC. Dripper systems with hydroton and NFT tables with a pump left on 24 hours a day are both great ways to produce minimal noise while maximizing your grow space. This is because NFT water pumps run quietly, use a small flow of water, and only make a dripping sound. Dripper systems can run 24 hours a day (with 100% hydroton) or in 15-minute segments, again only producing a little noise when operating.
The benefits of silent operating hydroponics
I recommend using hydroponics once you have a few grows under your belt and are familiar with the plant, feeding schedules, pH, and E.C. maintenance. Once you get the hydro bug, you never look back, and it can quickly develop into a passionate hobby, as it did with me! The main benefits are yield, short vegetative times, and a clean grow room.
Avoid these mistakes
- Loud air pumps can be a nightmare, especially if sleeping in the same room.
- Vibrating water pumps will shake floorboards and cause reverberation.
- Large reservoir systems can use much more nutrients and take up more space.
- Only using one air stone; instead, use extra air stones to avoid pressure buildup.
8. Electronically commutated fans (E.C.)
In the same way LED lighting changed indoor growing, E.C. fans have also become the preferred choice for the experienced grower. For these, an exhaust fan designed to convert A.C current into direct current (D.C) works with a silent brushless motor. These high-priced exhaust fans have adjustable speeds, produce little noise, and are energy efficient compared to RVK fans.
The benefits of E.C. fans
These fans may set you back in the financial department; however, after buying my first-ever E.C. fan, I cannot recommend them enough. You can adjust the power using a dimmer with most E.C. fans, allowing you to operate a silent room.
Avoid these mistakes
- Focusing on a good deal only and going with a non-reputable, cheap brand.
- Not checking the amount of air per hour they can exhaust.
- Hanging inside without assistance, E.C. fans can be quite heavy.
Grow room specific soundproofing considerations
Sound-absorbing materials are an excellent way to convert a spare room, old cellar, or basement to a warm, temperature-controlled environment. Not only will they act as an insulator, they also reduce reverberation and noise. Below are some precautions to consider while planning for your next indoor space.
Weatherstripping tapes on doors & windows
- This is especially important to prevent light breaks and ensure an airtight seal.
- Easy to apply, and for the extra small cost, it is well worth it.
Padding dry walls
- Sound will become muffled through padded walls.
- Using acoustic foam ducting or asbestos foam works well.
- Padding will also help prevent cold spots and moisture build-up.
How to Make a DIY Exhaust Muffler
The easiest way to make a homemade muffler is to use a deep water culture 20-liter bucket. You will need to source the following materials before starting; however, you’ll end up with a very simple and highly effective end product. This example is based on a 6-inch ducting; however, you can use up to 4-10-inch ducting (100-250mm)
Materials
– Acoustic foam (music studio quality)
– 20-liter bucket
– Aluminum ducting
– Acoustic adhesive foam
– Drill with a 6-inch hole saw drill bit
Step 1:
Measure a circle that is 6 inches in diameter. You will want to make a hole at the bucket’s base so the ducting can easily and firmly fit inside.
Step 2:
Using your acoustic foam, measure out the exact length so you can line the wall of the bucket. There should be a snug fit, ensuring that no plastic is exposed.
Step 3:
Once you are happy with the amount of foam, wear a face mask and gloves before spraying the acoustic adhesive foam. In my opinion, this is the best type of glue on the market for this job.
Step 4:
Now drill a 6-inch clean cut through the bucket and insert the ducting into the base of the bucket. The acoustic foam will absorb the exhausted air and instantly reduce the noise level.
Step 5:
I recommend inserting two hanging hooks in the sides of the bucket to make life easy when hanging horizontally.
Step 6:
Switch on your fan and let the muffler do all the work!
When you have set up your soundproof grow room, it’s time to get the seeds for your grow! You can find a selection of our best seed deals below.
My top tips for operating a stealth and silent grow room
Top tip #1:
Always make sure that the ducting is airtight when installing your indoor ventilation. Use duct tape or metal clips. This will help you achieve a top-quality airtight fitting.
Top tip #2:
Be aware of the noise coming from your house or apartment. This refers to where the air is being blown out and if it can be heard from a close-by neighbor, or worst case, standing in front of your house. Do sound checks and listen for any humming or whirring noises.
Top tip #3:
Be careful when removing the trash and keep nutrient bottles, pots, soil, leaves, and stems out of sight. There is no point in running the world’s quietest grow room and not taking care when it comes to discretion.
Top tip #4
Use foam or rubber mats to sit oscillating fans on top of. The layer of mat between the moving fan and the floor will reduce the amount of reverberation through the floorboards.
My final thoughts
I have invested thousands of dollars in all types of ventilation equipment over my lifetime. I wish I had been aware of many of the points covered in this article beforehand. Operating a near-silent grow room is possible, especially for those currently working with a stealth grow box design.
Avoid cheap equipment that is only destined to fail over time, and always be aware that an old fan, air pump, or water pump can become very noisy and, in some cases, can develop into a nuisance for any indoor grower or neighbor. Make sure your grow tent is always sealed and airtight and all ducting is firmly attached.
Be prepared to invest in making your grow room/tent acoustically sound, and you will always have the ultimate peace of mind as an indoor grower. For those willing, try and build a rapport with your neighbors.
As always, if you want to take your growing skills to the next level, I recommend reading Robert Bergman’s Grow Bible!
So you have a basement and a dream. What’s next?
When people think of home growing, they immediately jump to growing in a closet or a tent. While that’s feasible and possible, those with space in their basement might want to make the most of it.
Although it can be rewarding, building a grow room in a basement takes a lot of thinking about the equipment you’ll need and the environment you want to create for your plants. Basement grow rooms can allow for enhanced security and easier light control. However, the downsides include humidity and cleanliness issues and infrastructure problems.
Are you curious about building a basement grow room? We’ll walk you through the good, the bad, and the different considerations to remember.
The pros and cons of growing cannabis in your basement
Upsides of growing cannabis in your basement
Growing weed in a basement lends itself to many upsides concerning traditional worries about cultivation, such as stealth, ventilation, light control, and pest management.
Regarding stealth and security, a big worry with growing at home involves people smelling and hearing your grow. A basement grow provides odor control and noise reduction by being directly underneath your home. With suppressed odor and noise, the likelihood of anyone detecting your grow or attempting to steal your crop is significantly reduced.
Environmental control is a massive and essential part of making the most of your grow from a plant health and yield standpoint. Basements tend to run cool and damp, both of which are usually a problem when it comes to cannabis, but with the proper preparation, you can make this an advantage. Dehumidifiers and heat mats will be your friends in cool, damp environments. Cool temperatures from the floor can stunt root development, and moist environments make a hospitable environment for pathogens like powdery mildew.
Another beneficial aspect of growing weed in a basement is that basements typically don’t have windows. This simple fact significantly reduces the possibility of light leaking into the room and messing up your veg or flower cycles by shocking your plants in their night periods.
Downsides of basement cannabis cultivation
Considering the challenges and inherent issues you’ll face with using your basement for an indoor grow room is just as important as considering the benefits. Again, basements often have more moisture, making them susceptible to mold and bacteria growth. Use fans to circulate the air and dehumidifiers to control the extra dampness. It’s essential to keep fresh air and prevent harmful matter from growing on your indoor cannabis plants.
You need to address infrastructure challenges to make a proper grow space out of your basement. Unfortunately, establishing adequate water supply, electrical outlets, and heat sources can be demanding. However, overcoming these challenges is essential to provide indoor cannabis plants with the resources for healthy growth.
Unlike a traditional indoor grow room, basement grow rooms tend to be cooler, which can slow down plant growth and cause a shock to your roots. To build a DIY grow room under your house, you must optimize your plant’s climate to produce high yields and top quality. You’ll also need to consider how to make it warmer in your basement, like using heaters or considering the type of light you use – such as whether or not it generates heat.
If you want to read the basics about starting your grow, please sign up below to receive our grow bible and weekly grow tips and seed deals!
Designing and building a grow room in your basement
Basement grow room design can be separated into equipment and infrastructure. Sure, equipment planning is necessary for any grow space, but you’ll need to take special considerations when dealing with a basement environment.
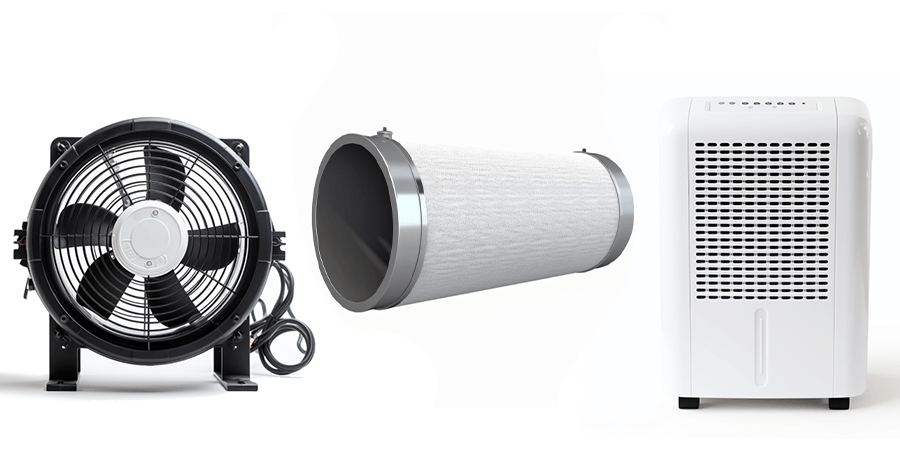
When you build a grow room, the most prominent points to consider for basements are ventilation and humidity. The best way to maintain these two growth pillars is with dehumidifiers, fans, and filters.
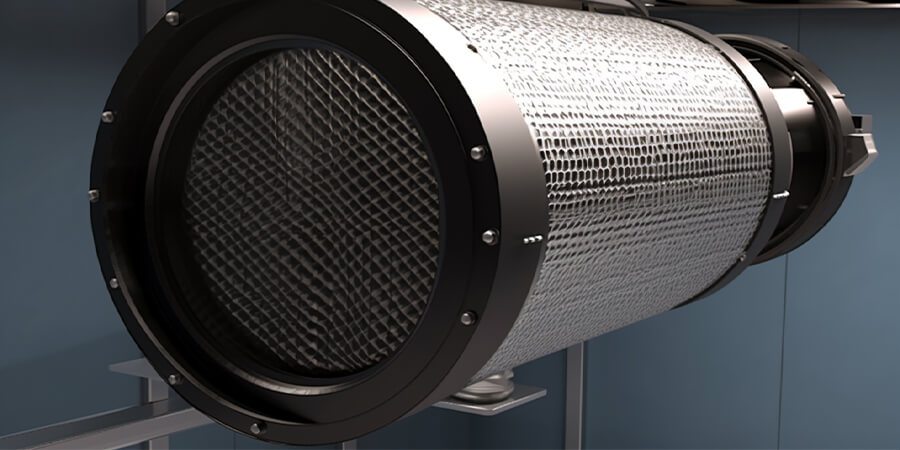
Dehumidifiers, fans, and filters will help keep your space optimal and your plants happy— Especially the carbon filter, which can help keep most of the odor inside your weed grow room. Most other concerns for the room are infrastructure-based and centered around prepping and sealing your room.

CO2 enrichment for your basement grow room
Additional growth supplementations are a typical consideration when growing cannabis. CO2 is a perfect solution for boosting your plant’s growth. It also helps boost your plant’s photosynthesis process. You can use CO2 in a basement grow. Ensure you maintain proper ventilation around your room when supplementing CO2 and keep your ppm between 1000-1500.
Proper climate control and ventilation are key for a basement grow
Basement grow room ventilation will be a top priority for your grow room. Basements are typically deep underground and sealed to separate the environment from the floors above them or areas like closets. To encourage good ventilation, consider placing fans in different regions of the room. This helps keep your canopy from dead zones that make the perfect environment for pathogens. Aside from pathogens and pests, having fresh air move through your canopy helps encourage the growth of stronger branches.
Have a separate space for the vegetative and flowering stage
A basement grow room can be set up in a few different ways. You can set up a multi-room basement into separate flower and veg rooms, or you can veg or flower simultaneously in a single-room basement.
Tents are another option for creating different environments for veg and flower plants in the same room. Even if you’re using two separate rooms, ensuring they’re sealed off is essential. Remember, each cycle has specific light requirements, leading to the potential of causing veg plants to pre-flower by exposing them to too much light.
Make the most of any available space, but if you want to grow plants in both their veg and flower stages, it’s smart to keep them in separate spaces. Here’s why: having different areas to grow your veg and flower plants lets you do “perpetual” growing. That might sound like a fancy term, but it isn’t all that complicated.
Here’s how perpetual growing works: In one portion of the grow room, you’ll grow veg plants to the size you’re comfortable with before transferring them to a grow tent where they’ll flower. Once those veg plants are out of that space, you’ll replace them with new veg plants that will grow at the same time as your flowering plants.
As your veg and flower plants grow, you’ll begin harvesting your flowering plants and hanging them up to dry. As you pull these plants down, you can transfer your vegging plants to the flower tent and start the cycle over again. This flow ensures that you constantly have flowering plants to harvest and continuous product coming in.
The importance of a clean environment when doing a basement grow
When it comes to the environment of your basement grow room, it’s imperative to consider the cleanliness of your basement as well as your ability to ensure your grow is as pest and pathogen-resistant as possible.
Contamination can happen quickly if you don’t efficiently clean your space and supplies. Mold, heavy metals, and other bacteria can form and pose significant risks to your growing marijuana plants.
If you’re planning to grow in tents, clean both the inside and outside of your grow tent with a mixture of one part 30% hydrogen peroxide and one part water. This mix ensures it’s strong enough to kill pathogens and light enough not to harm your plants or your body, should you get it on your eyes or skin. Safety is a priority!
Another aspect of keeping a clean environment is ensuring you minimize the possibility of bacteria and pests by using an Integrated Pest Management plan. If left unchecked, you can attract mites, fungus, mildew, and other preventable ailments to your plant, but not if you have the right plan! Need supplies? ILGM makes a line of tailored preventative feed solutions to keep your plant safe against threats.
Check out Robert’s Plant Protector series for your IPM needs!
Bergman’s Plant Protector
- Protect your plants from diseases and harmful pests.
- Consists of three 20 ml bottles
- Enough plant protection system supplies for up to 20 plants
- Suitable for soil, hydroponic and all other grow mediums
Final thoughts on basement cannabis cultivation
Embarking on a basement cannabis cultivation adventure offers opportunities and challenges. The advantages include enhanced security, precise light control, and potential stealth. The challenges are the environment.
While dampness in basements can be a concern, you can mitigate it with tools like dehumidifiers and heat mats. Excess moisture invites mold and bacterial growth; adequate ventilation and dehumidifiers help maintain a healthy growing atmosphere.
Crafting an efficient basement grow space requires meticulous planning of equipment and infrastructure. Addressing infrastructure needs, such as water supply and proper heat sources, is fundamental for a successful setup. Prioritizing ventilation, humidity control, and cleanliness is also essential.
Your basement can evolve into a thriving environment for cannabis, provided you embrace safety, hygiene, and climate control. Have more questions about growing indoors? This article is part of a comprehensive series on optimal indoor cannabis cultivation.
Happy growing!
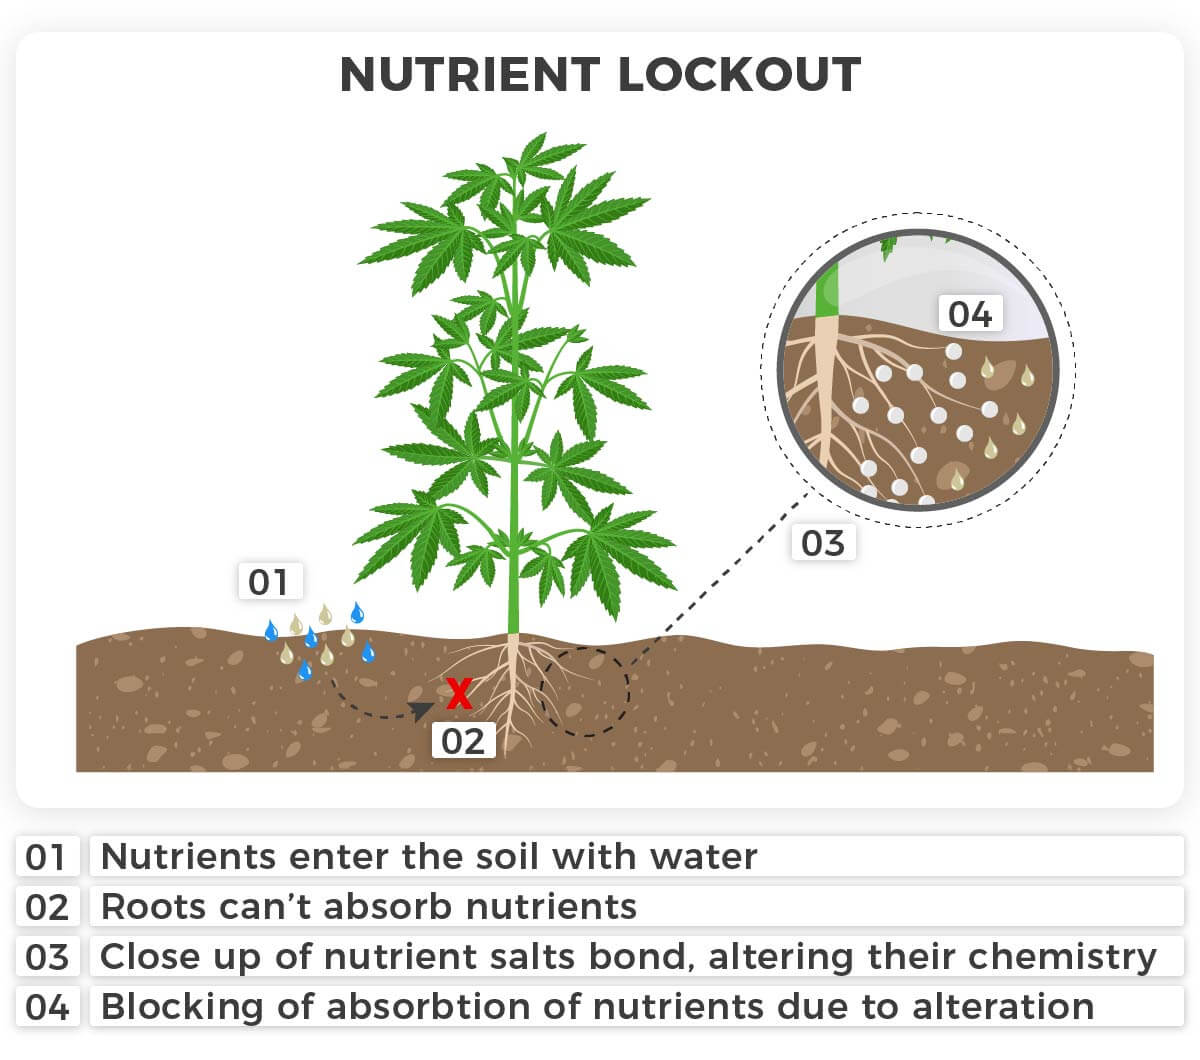
Nutrient lockout is a fairly common problem in indoor cannabis cultivation due to the use of fertilizers containing nutrient salts. Excess nutrient salts can accumulate in the growing medium, leading to fluctuations in pH, nutrient levels, and nutrient availability.
When this occurs, a plant cannot absorb the necessary nutrients from its growing medium. The resulting nutrient deficiencies will severely hinder plant growth and development. It can even result in plant death.
Thus, Growers must temporarily stop plant feeding in favor of flushing out the medium to restore balance. However, this can slow overall growth and cause further delays in plant development.
Let’s explore the concept of nutrient lockout, its causes, symptoms, remedies, and preventive measures that can help growers avoid this common mistake, not make it worse!
What is nutrient lockout?
Nutrient lockout refers to a condition where cannabis plants cannot uptake and absorb the essential nutrients for healthy plant growth from the growing medium despite nutrients being present.
This condition happens when excessive nutrient salt residues accumulate in the growing medium, creating imbalances and disruptions in the pH levels and/or nutrient ratios within the root zone, hindering the plant’s ability to absorb them.
Nutrient salts bond with soil particles and other salts, which slightly alters their chemistry and locks them out, making them unavailable to plant roots. As the locked-out nutrients fail to enter the plant’s vascular system, the plant begins to starve while surrounded by food it can’t access.

What is the difference between ‘lockout’ and nutrient burn?
While nutrient lockout and nutrient burn are often confused, they are two distinct conditions. Nutrient burn occurs when plants are exposed to excessive levels of nutrients, resulting in burnt or scorched leaf tissue. This excess may result from improperly composted “hot” soils or excessive liquid fertilizer applications, especially on young plants.
On the other hand, nutrient lockout occurs when the plant cannot absorb the available nutrients in the growing medium because accumulated salt residue from prolonged nutrient use has made them unavailable. Nutrient lockout can lead to deficiencies that often look similar to nutrient burn.
What causes nutrient lockout?
Nutrient lockout can be caused by several factors, such as incorrect soil or nutrient solution pH levels, imbalanced nutrient ratios, low-quality water/improper watering practices, and soil compaction.
Generally, the single biggest reason for nutrient lockout is the presence of excess nutrient salts in the growing medium from the use of fertilizers. Over time, these excess salts will raise or lower pH levels in the medium away from the optimum levels desired by plant roots.
As plants have an optimum pH range for nutrient absorption between 5.5 (hydroponics/soilless) and 6.5 pH (soil/organics), fluctuations caused by these excessive salts can raise or lower pH levels outside of that optimum range, making most nutrient elements unavailable to the plant.
A growing medium can only hold a specific amount of nutrient salt particles relative to its electrical charge. Negatively charged (-) clay particles, for example, can attract the most cations (+) (positively charged particles) (pronounced cat ions) from nutrient solutions. This concept is known as CEC (Cation Exchange Capacity).
Visit the ilgm grow guide to learn more about the specifics of water & nutrients and take your growing skills to a higher level.
Nutrient lockout’s inner workings: What’s happening inside the plant?
Nutrient lockout disrupts the ion exchange process that occurs within the root zone. Plant roots release hydrogen ions (H+) to exchange with and absorb essential nutrients from the growing medium. However, when pH levels are too high or too low, this exchange is hindered, preventing the plant from accessing the required nutrients.
As a result, the plant is starved of the elements it needs to perform the metabolic functions that support optimal growth. The plant will begin showing symptoms, such as discoloration (chlorosis) of leaf tissue, limp leaves, and slowed or stunted growth.
Nutrient lockout can progress to the starvation death of leaf tissue (necrosis).

Can overwatering cause nutrient lockout?
Yes, overwatering can contribute to nutrient lockout. The excess moisture displaces oxygen from the root zone, leading to anaerobic conditions and root rot. Killing off roots will reduce a plant’s ability to absorb necessary nutrients in the soil, allowing excess salts to accumulate there, making the problem worse.
The lack of oxygen also kills off the beneficial bacteria in the soil, which help to break down nutrient salts so that plant roots can absorb them.
Overwatering kills more cannabis plants (and housepants) than any other reason. Why? Because we are faulty humans, and our nature allows us to overdo things.

Can hard water cause nutrient lockout?
Hard water, which contains high levels of dissolved minerals like calcium and magnesium, can contribute to nutrient lockout. The excess minerals in hard water can raise the pH levels of the soil or growing medium above the optimum range, affecting nutrient availability to the plant. Using a water filtration system or distilled water can help prevent nutrient lockout caused by hard water.
How do I know if my plant has nutrient lockout?
Plants experiencing nutrient lockout display various symptoms. Common signs include yellowing or browning of leaves, stunted growth, limited new growth, and overall poor plant health. Additionally, pH testing of the runoff water and nutrient deficiency tests can help identify nutrient lockout.

How do I fix nutrient lockout?
Take these steps to fix nutrient lockout:
Step 1: Identify the symptoms affecting your plants. Are they caused by nutrient lockout? If that’s the case, then…
Step 2: Stop fertilizing the affected plant(s). Prepare a flushing solution of balanced water using pH-up or pH-down solution mixed into irrigation water.
Step 3: Flushing the plant with a pH-balanced solution helps remove excess salts and restore proper nutrient uptake. Be sure to use enough solution to achieve runoff (allowing excess solution to drain out of the plant), as this will reduce salt buildup.
Step 4: Measure the nutrient strength and pH of the runoff water and adjust the nutrient solution’s strength and pH composition to suit the plant’s needs if necessary.
How do I flush a nutrient lockout, and how long do I flush?
Flushing involves watering plants with a large volume of pH-balanced water to flush out excess salts and restore nutrient uptake. The duration of the flush depends on the severity of the nutrient lockout and growing medium, usually lasting anywhere from a few days to a week.
It is essential to monitor the pH levels and salt content of the runoff water during the flush to ensure proper removal of excess salts. Using a TDS device (total dissolved solids) to measure salt content and a pH meter will make this task much easier and more precise.
Will my cannabis plants recover from nutrient lockout?
With proper care and intervention, cannabis plants can recover from nutrient lockout. Adjusting the pH levels, flushing the growing medium, and gradually providing the necessary nutrients will help restore the plant’s health. However, it is important to note that the recovery time may vary depending on the severity of the lockout and the plant’s overall condition.
How do I prevent nutrient lockout?
Preventing nutrient lockout involves maintaining optimal pH levels in the growing medium, using properly balanced nutrient solutions, and practicing proper watering techniques. Regular pH testing and monitoring and periodic flushes can help prevent nutrient imbalances and lockout. Additionally, using high-quality water and avoiding overfeeding can contribute to preventing nutrient lockout.
Bergman’s Plant Protector
- Protect your plants from diseases and harmful pests.
- Consists of three 20 ml bottles
- Enough plant protection system supplies for up to 20 plants
- Suitable for soil, hydroponic and all other grow mediums
Final thoughts on nutrient lockout
Nutrient lockout is a common issue faced by many indoor cannabis cultivators and is largely the result of inexperience in the garden. It’s human nature to think that “more is better,” and this reasoning leads to excessive fertilization.
As we learn by doing, nearly every gardener will overdo it with fertilizers at least once and damage their plants somehow. Cannabis plants don’t need to be fertilized every day. If you ate constantly, you would get fat and sick!
Understanding the causes, symptoms, remedies, and preventive measures for nutrient lockout is essential for successful and healthy plant growth.
Maintaining proper pH levels, providing balanced nutrient solutions, and practicing good watering, feeding, and flushing techniques can help growers minimize the occurrence of nutrient lockout and maximize the potential of their cannabis plants.
A good rule of thumb is to fertilize with plain water for a day after every 2 to 3 days of macro feeding or to reduce the amount of macro fertilizer used by ⅓ if you’re going to fertilize more often.
Used sources for this article
- Llewellyn, D. J., Golem, S., Jones, A. M. P., & Zheng, Y. (2023). Foliar Symptomology, Nutrient Content, Yield, and Secondary Metabolite Variability of Cannabis Grown Hydroponically with Different Single-Element Nutrient Deficiencies. Plants, 12(3), 422. https://doi.org/10.3390/plants12030422
- Bamsey, M., Graham, T., Thompson, C., Berinstain, A., Scott, A. B., & Dixon, M. (2012). Ion-Specific nutrient management in closed systems: The necessity for Ion-Selective sensors in terrestrial and Space-Based agriculture and water management systems. Sensors, 12(10), 13349–13392. https://doi.org/10.3390/s121013349

Does Lizzo Consume Weed – The Fresh Toast

Do Delta 8 Edibles Work For Female Arousal?

Could You Help Your Lips With CBD Balm

California Awards $12 Million In Local Cannabis Equity Grants To Repair Drug War Harms

Patient Zero for Untreatable Depression Begins Groundbreaking Psychedelics Therapy

Mother’s Day weed gift guide 2024

Key Things To Know About Hemp And Marijuana Drinks

Indica, Sativa, Hybrid & More

A Deep Dive into the Benefits of Medical Marijuana for Mental Health

Canada’s medical cannabis exports jump to CA$220 million as domestic sales fall

Distressed Cannabis Business Takeaways – Canna Law Blog™

United States: Alex Malyshev And Melinda Fellner Discuss The Intersection Of Tax And Cannabis In New Video Series – Part VI: Licensing (Video)

Drug Testing for Marijuana – The Joint Blog

What you Need to Know

Cannabis, alcohol firm SNDL loses CA$372.4 million in 2022

NCIA Write About Their Equity Scholarship Program

City Of Oakland Issues RFP For Employee Training Programs

It has been a wild news week – here’s how CBD and weed can help you relax

A new April 20 cannabis contest includes a $40,000 purse

UArizona launches online cannabis compliance online course
-
 Cannabis News1 year ago
Distressed Cannabis Business Takeaways – Canna Law Blog™
-
 One-Hit Wonders1 year ago
United States: Alex Malyshev And Melinda Fellner Discuss The Intersection Of Tax And Cannabis In New Video Series – Part VI: Licensing (Video)
-
 drug testing5 months ago
Drug Testing for Marijuana – The Joint Blog
-
 Cannabis 1011 year ago
What you Need to Know
-
 Marijuana Business Daily1 year ago
Cannabis, alcohol firm SNDL loses CA$372.4 million in 2022
-
 Education1 year ago
NCIA Write About Their Equity Scholarship Program
-
 Education1 year ago
City Of Oakland Issues RFP For Employee Training Programs
-
 Cannabis1 year ago
It has been a wild news week – here’s how CBD and weed can help you relax