

Grow Reports
Double Kush Cake Feminized Grow Report

Double Kush Cake Feminized is the result of crossing three heavy hitters; Skunk Kush, Afghani #1, and Hindu Kush. This indica-dominant powerhouse produced some impressive colas with an exquisite profile unique to Kush cultivars. Join us in the garden as we document the growing, harvesting and curing process. It was easy to grow, and fun to enjoy!
Flowering stage: 66 days
Total time, seed to harvest: 99 days
Final yield: 117 grams
THC content: 21.92%
Double Kush Cake Feminized seeds (also available in automatic) have been on our list to include in a grow report, and we were happy to get the chance to grow them again. We used our regular grow room, which has housed plants in many of our other grow reports.
Multiple fans inside the area move air above and below the canopy. Inline fans are strategically positioned to help extract stagnant air, while the carbon filter helps remove any unwanted floral odour. We used 1000W Green Power Phillips HPS lights attached to the ceiling at a height of 3M above the soil level. For the vegetative cycle, our lights were scheduled to be 18 hours on & 6 hours off, and for flowering, this was switched to 12/12.
Our Double Kush Cake Feminized was grown in BAC Lava Soil mix and fed using Bio Grow and Bio Flower nutrients. The pH of our final solution was always 6.2, and we gradually increased the EC as the root system grew larger. Temperatures were steady, 24°C with the lights on and 21°C during the lights-out period. Humidity was gradually reduced as we reached harvest, and we started our cycle with 65% humidity for our seedlings.
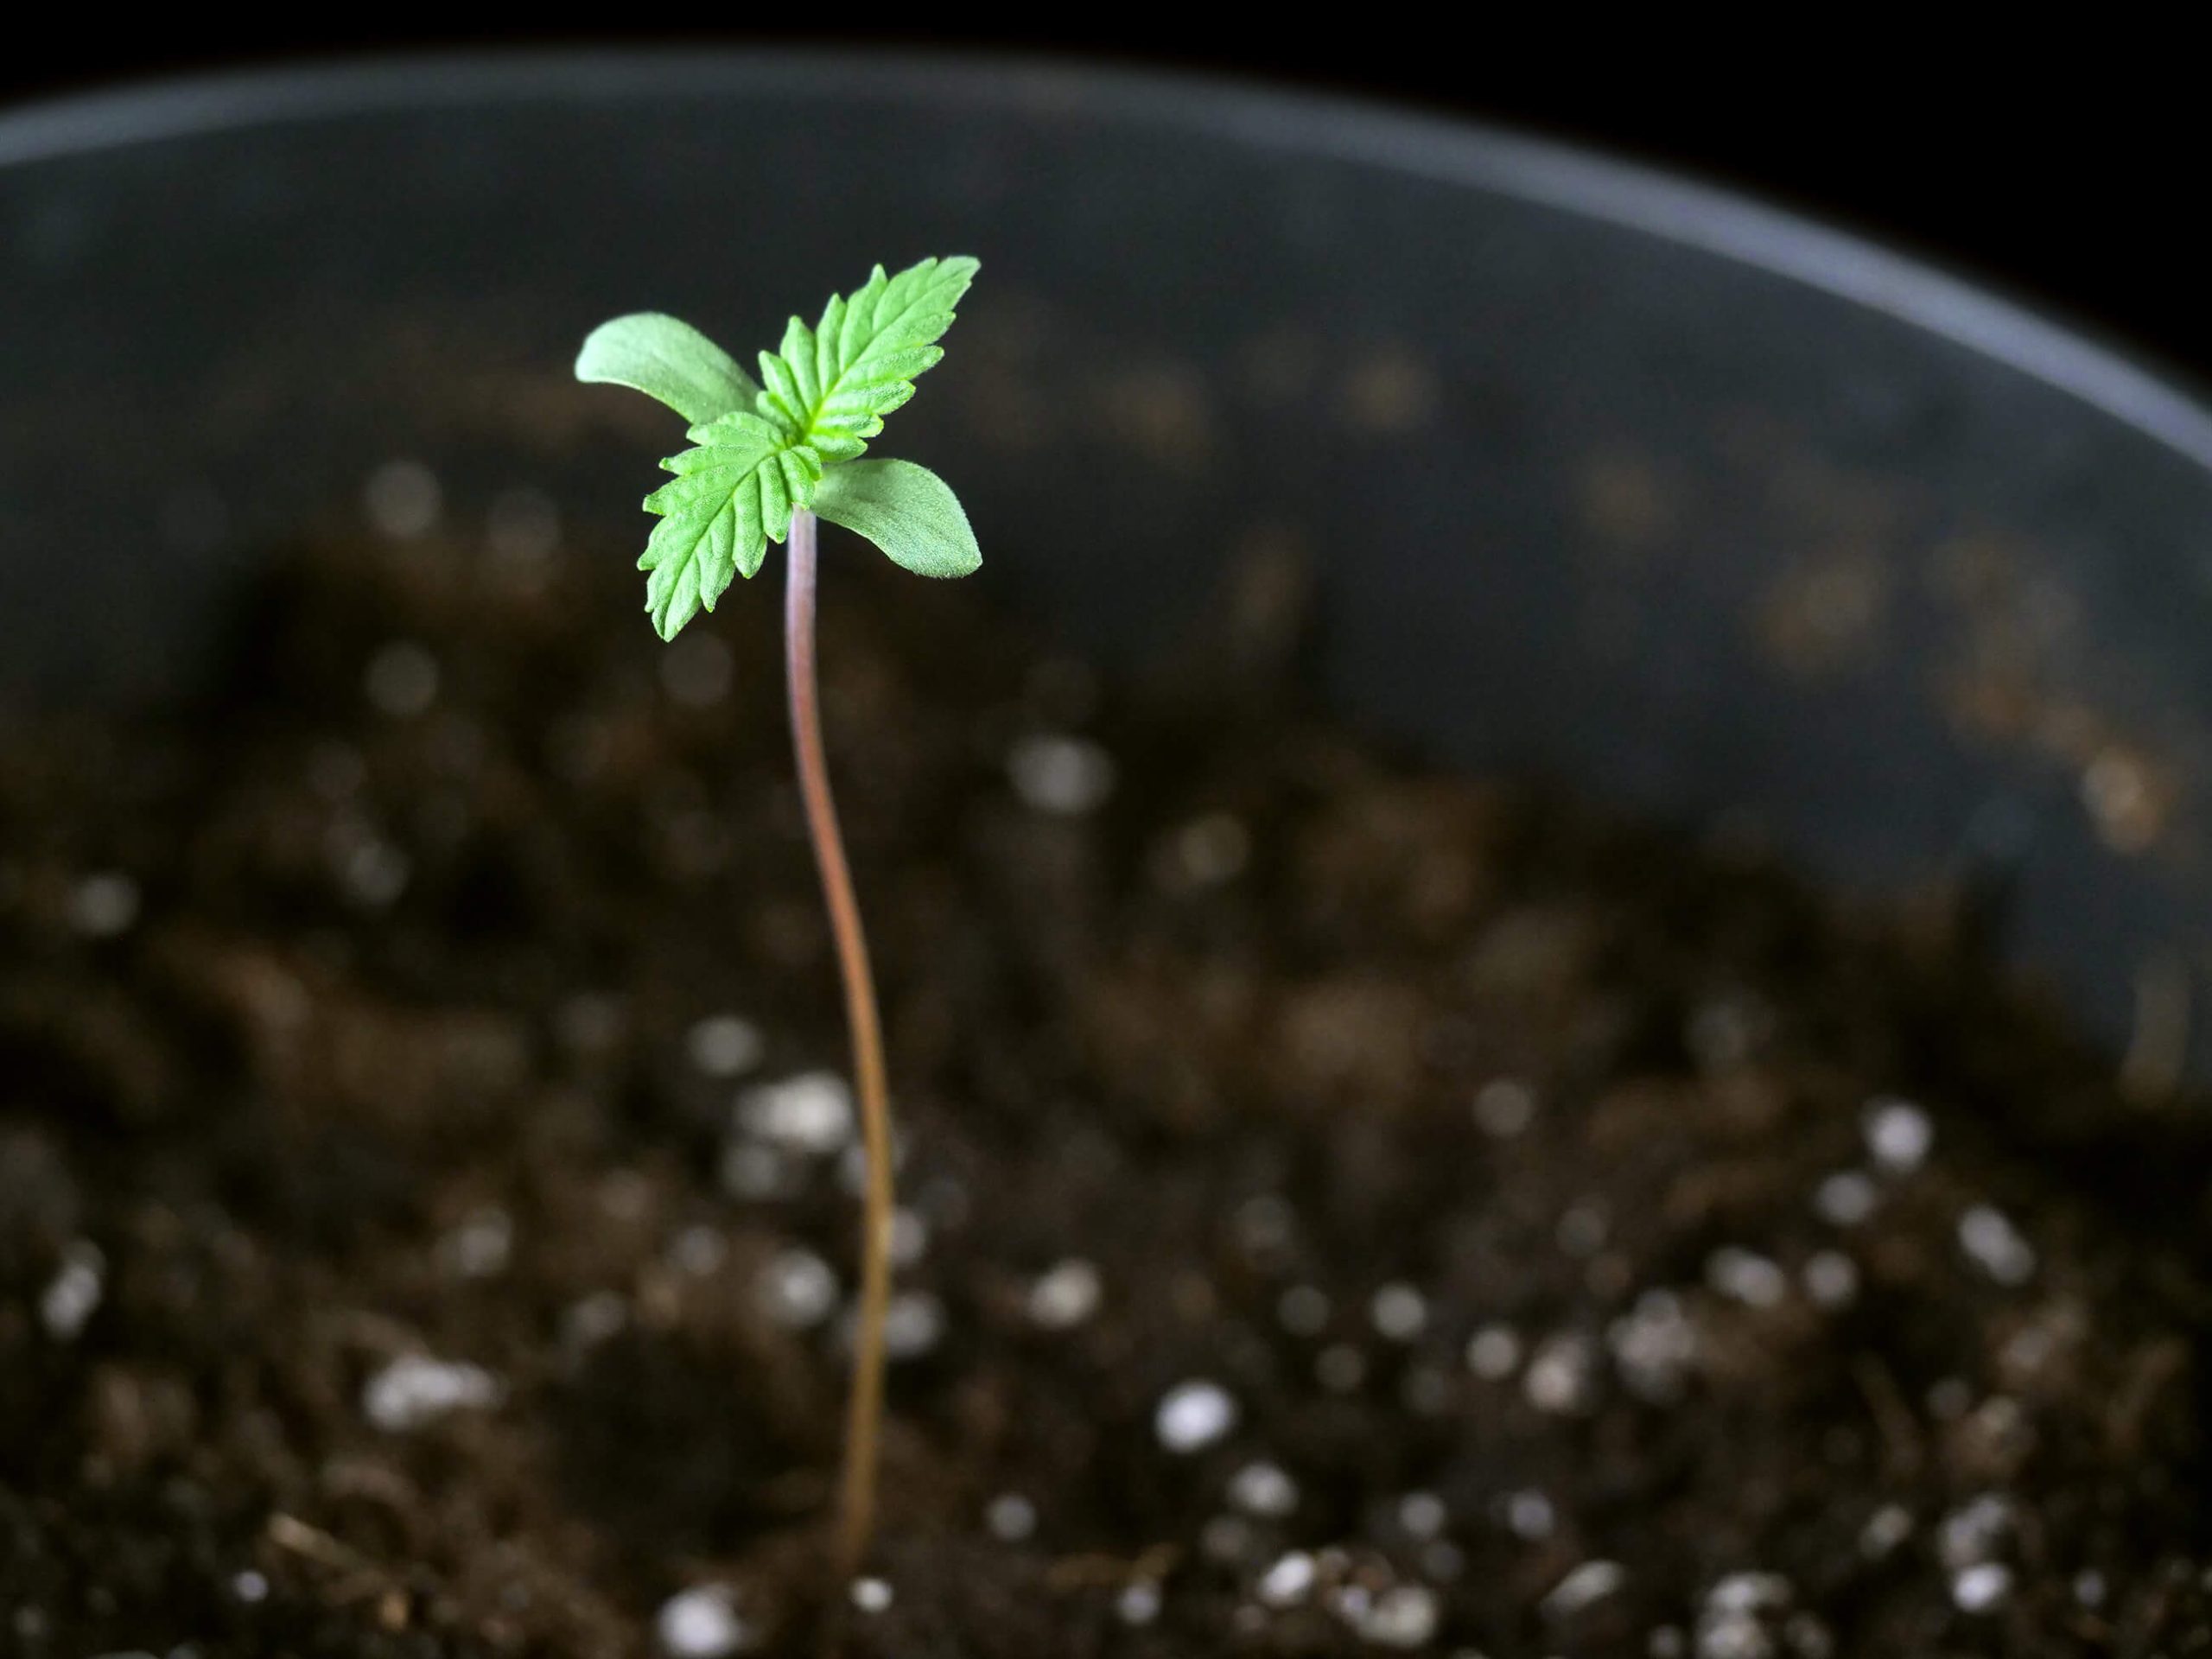
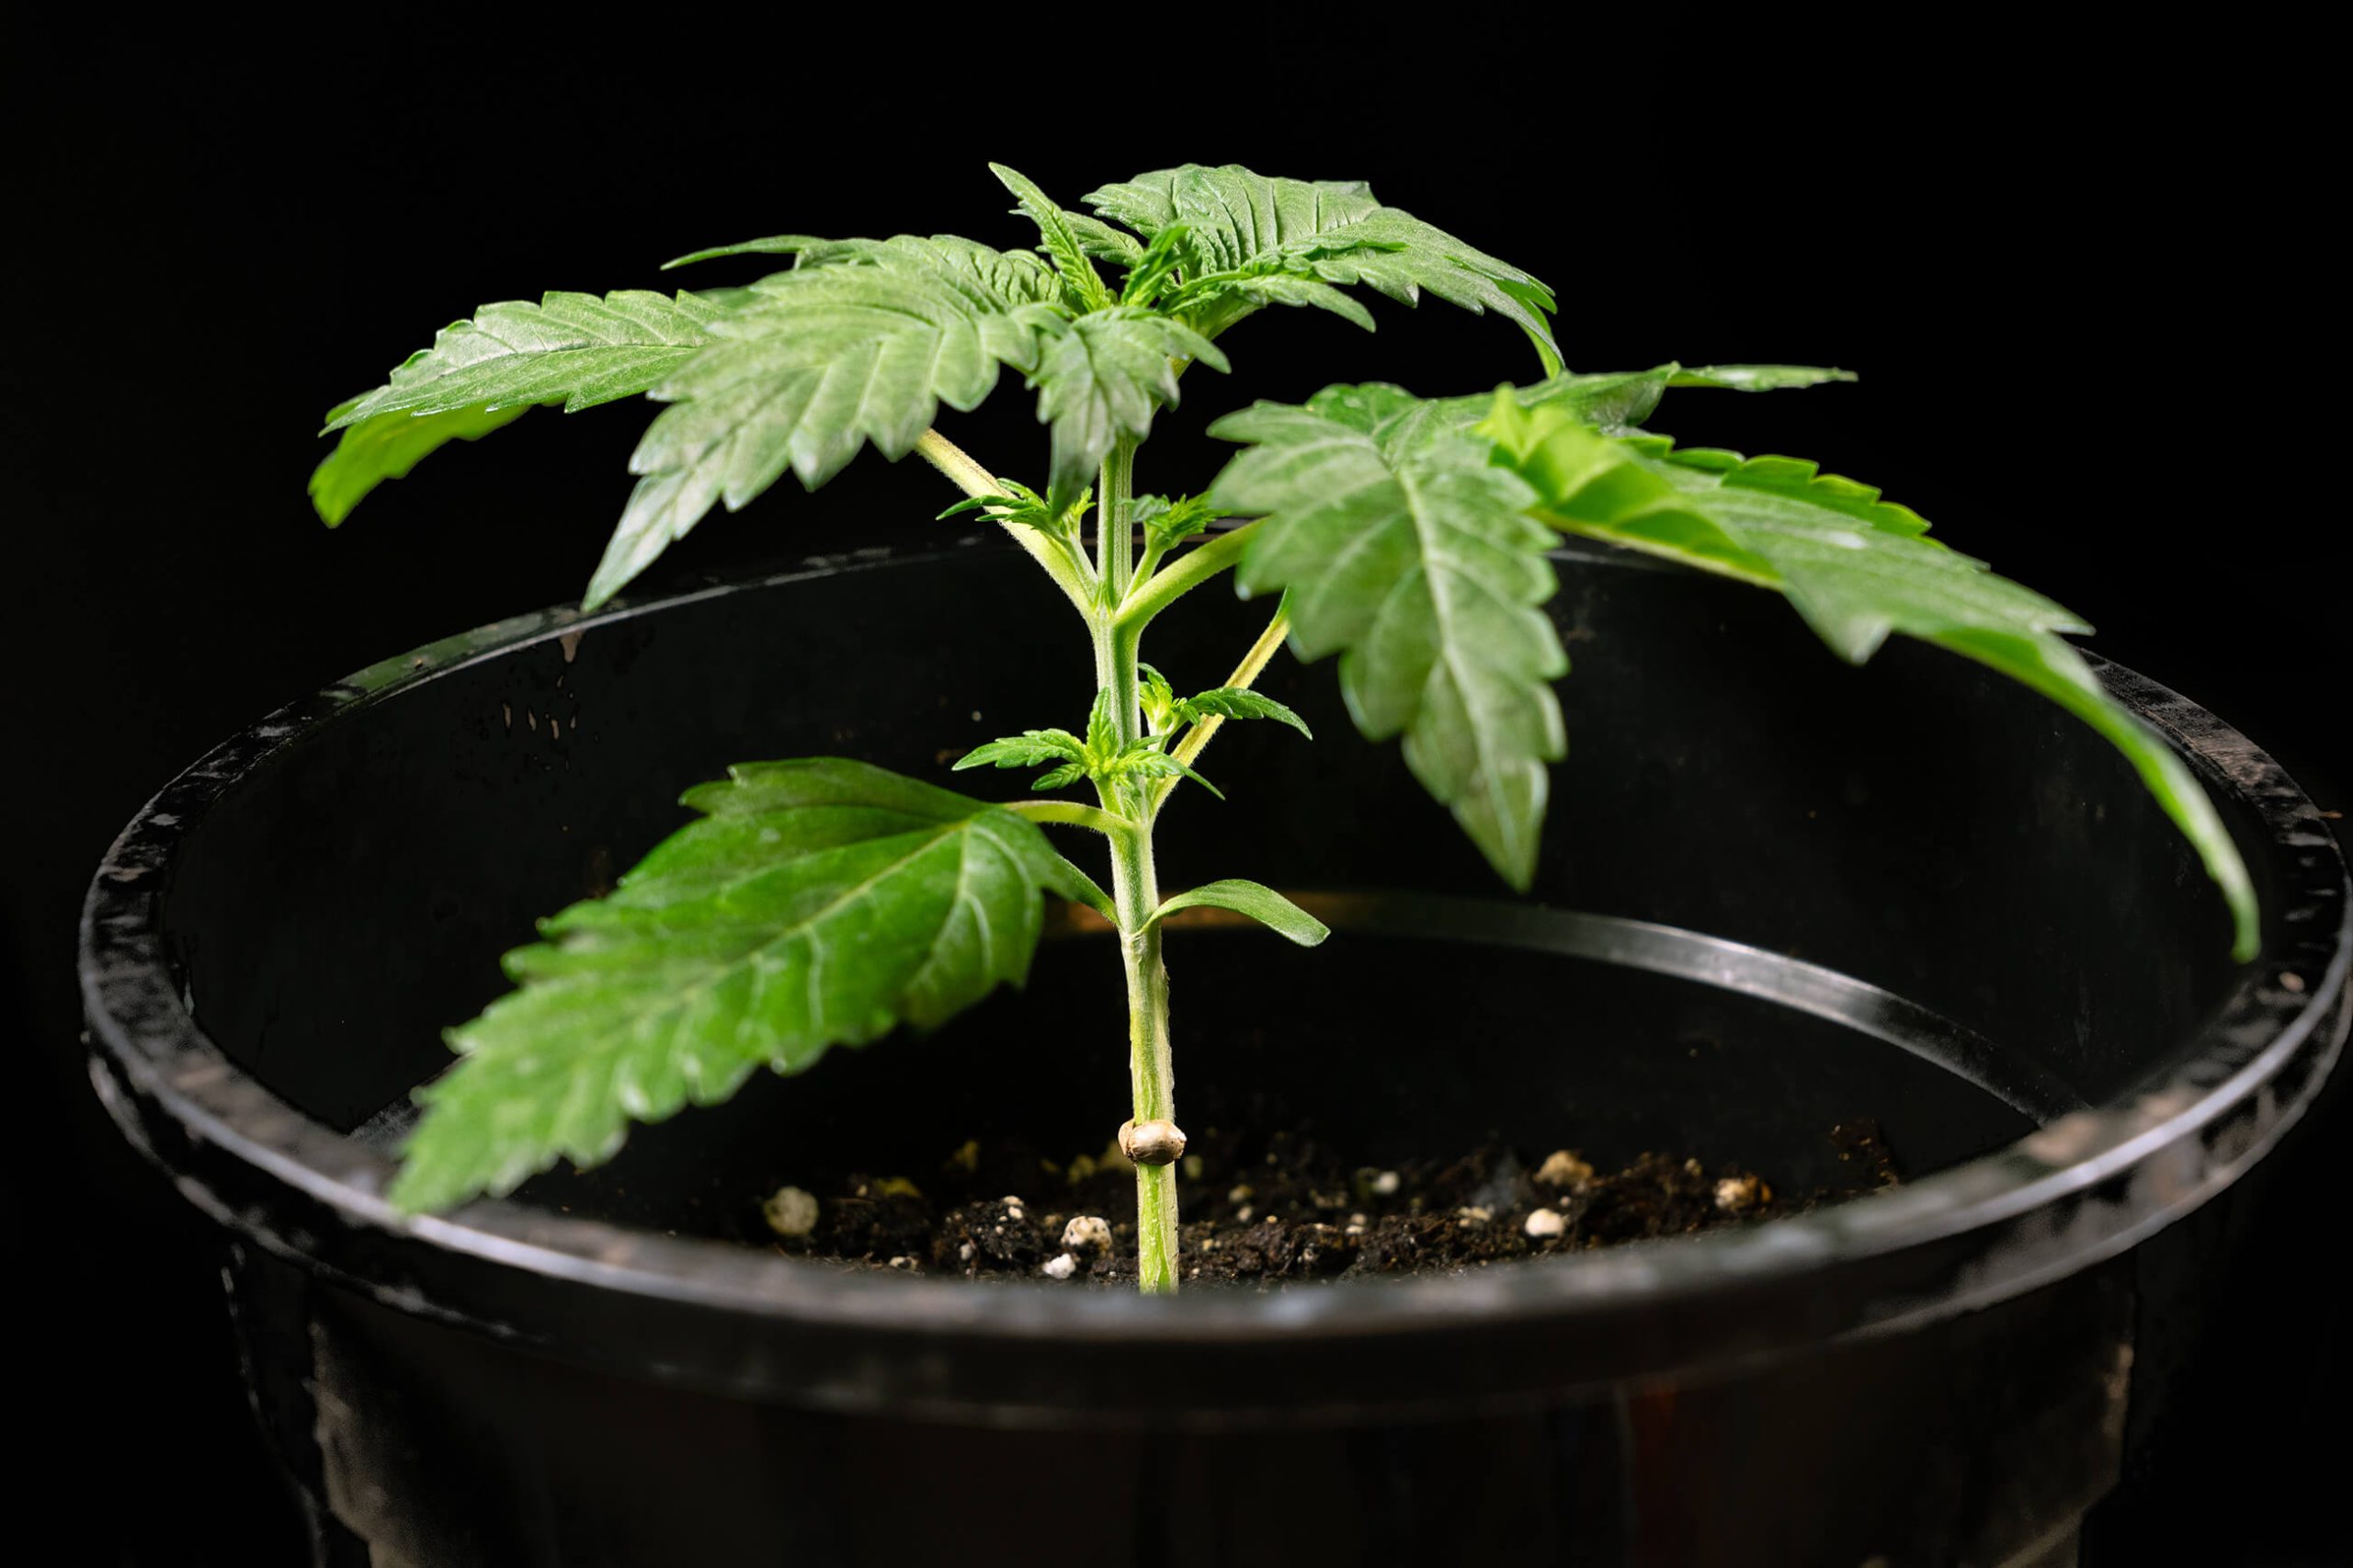
We prepared two plates with two damp paper towels on top to start the germination process. We placed our Double Kush Cake Feminized seed on the damp paper towel and sealed the two plates together, enclosing the seed between the moist towels.
The plates were then kept in a dark and warm environment at around 21°C for optimal germination conditions. Within days roots emerged, and it was time to transplant them into a larger container. Carefully removing the seedling from the paper towel, we transplanted our Double Kush Cake Feminized into our 1-litre container while giving her 100 ml of water.
Within a few days, our seeds had sprouted and were emerging from the soil. Three days after our seedling emerged from the soil, we added another 100 ml of water with a root stimulant around the base of the stem. The final EC of our solution was 0.8 before feeding.

In week two, the root stimulant worked great, and we saw fresh white roots sticking out of the drainage holes before transplanting them into a 5-litre pot. We introduced Bio Grow nutrients into our feeding solution. Due to the youthful root system, we used a diluted solution with a final EC of 1.4. We fed our Double Kush Cake Feminized 100 ml of water, pouring it around the stem’s base.
As we know specific bugs can be a threat to the health of our cannabis plants, we released predator bugs as part of our organic Integrated Pest Management (IPM) program. Satchets of Neoseiulus Californicus and Amblyseius Swirskii were placed against the plant. These insects will hunt and kill thrip larvae, fungus gnats, aphids, and other plant-damaging bugs. It is better to be proactive instead of reactive in the garden!

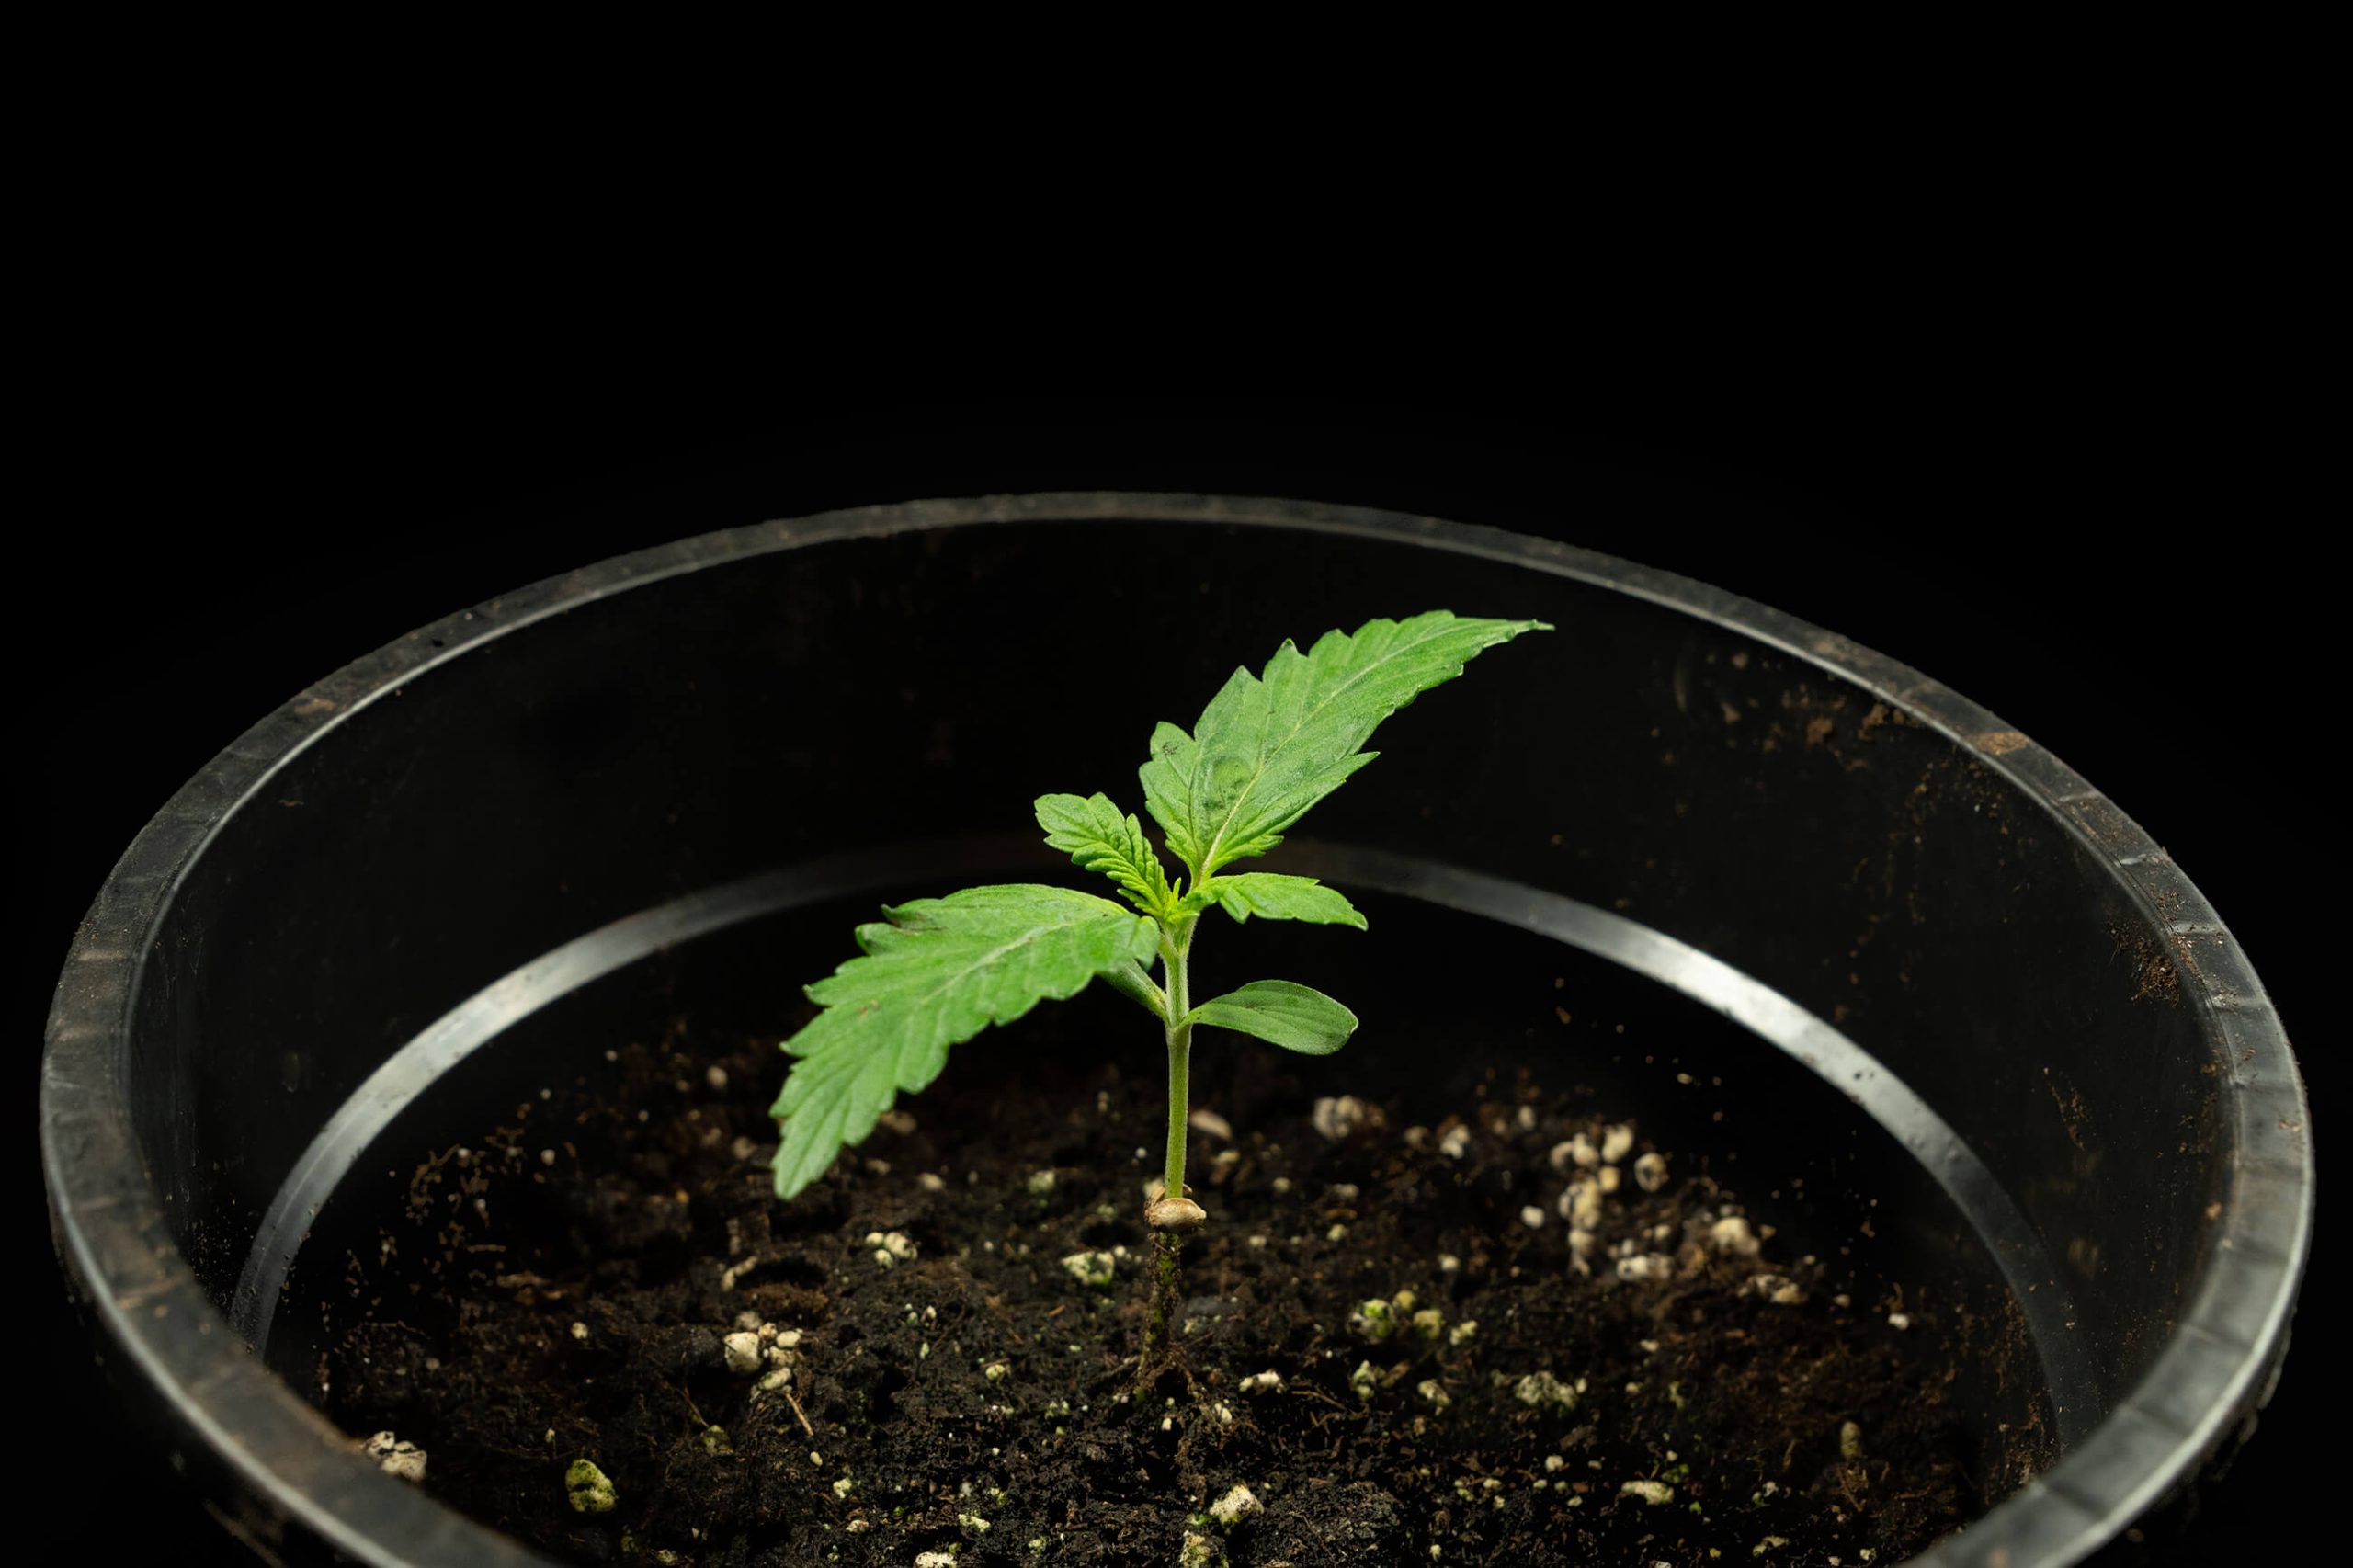
By week three, our Double Kush Cake Feminized had already reached 21 cm in height. We increased our feeding solution to 200 ml to support the growing root mass. We concentrated the watering around the stem’s base, but we moved closer to the edge of the container. This encourages roots to stretch into those areas to find water.
Our Double Kush Cake Feminized had reached several nodes in height. The leaves had large, fat fingers that were now reaching the edges of the pot. Five and even seven-fingered leaves indicated the seedling stage was over. The plant subsequently increased its above-ground biomass and was rapidly photosynthesizing to support further growth.

Throughout week four, our Double Kush Cake Feminized was reaching the height where we considered changing the light schedule and had grown another 10 cm before the end of the week.
However, we opted for one more week of vegetative growth and increased the volume of the feeding solution to 400 ml with a final EC of 1.7. We were now watering the entire soil surface each watering, and before entering the flowering stage, we dropped the room humidity to 60%.

In week five, the plant had reached 53 cm and was drinking heavily. We switched from Bio Grow nutrients to Bio Flower, increased the volume of our feeding solution to 800 ml, and adjusted the EC to 1.8. It was a week of significant changes in the garden, but the most considerable change was the light schedule, and we were now using a 12/12 light schedule to induce our Double Kush Cake Feminized to flower.
Several lower branches had grown up and outwards to harness the light. The shape created an excellent separation, allowing all main bud sites to receive direct light. The upper leaves had a slightly lighter green colour than the dark green lower leaves below. A few larger fan leaves were shading lower areas, but we were not ready to defoliate and did not want to stress the plant in the first week of flowering.

Throughout week six, our Double Kush Cake Feminized was experiencing the stretch phase of flowering. It was now 83 cm tall and proliferating. Because some of the lower branch tips were positioned far from the light source, we removed them. This action removes a branch that would produce subpar buds and redirects that growth energy to higher branches. The upper branches can now grow larger buds with the increased resources.
We nearly doubled our water volume and gave our Double Kush Cake Feminized 1500 ml of solution per feeding. Continuing to be proactive with our IPM, we scouted the plants but saw no plant-damaging insects or fungus gnats. However, just in case, we released another sachet of our two predator insects, Neoseiulus Californicus and Amblyseius Swirskii.

Week seven and the very first stigmas were beginning to rise from the clustered branch tips. We started our week by flushing the soil with 5 litres of pure water; pH’d to 6.2. Flushing the soil is done to wash out unused nutrients and salts accumulated from our regular feedings, allowing for a better balance of nutrients in the root zone.
Remember to remove run-off and not let your roots sit in standing water. After the flush on the first day of the week, we resumed feeding our Double Kush Cake Feminized 1500 ml of nutrient solution with an EC of 1.8.
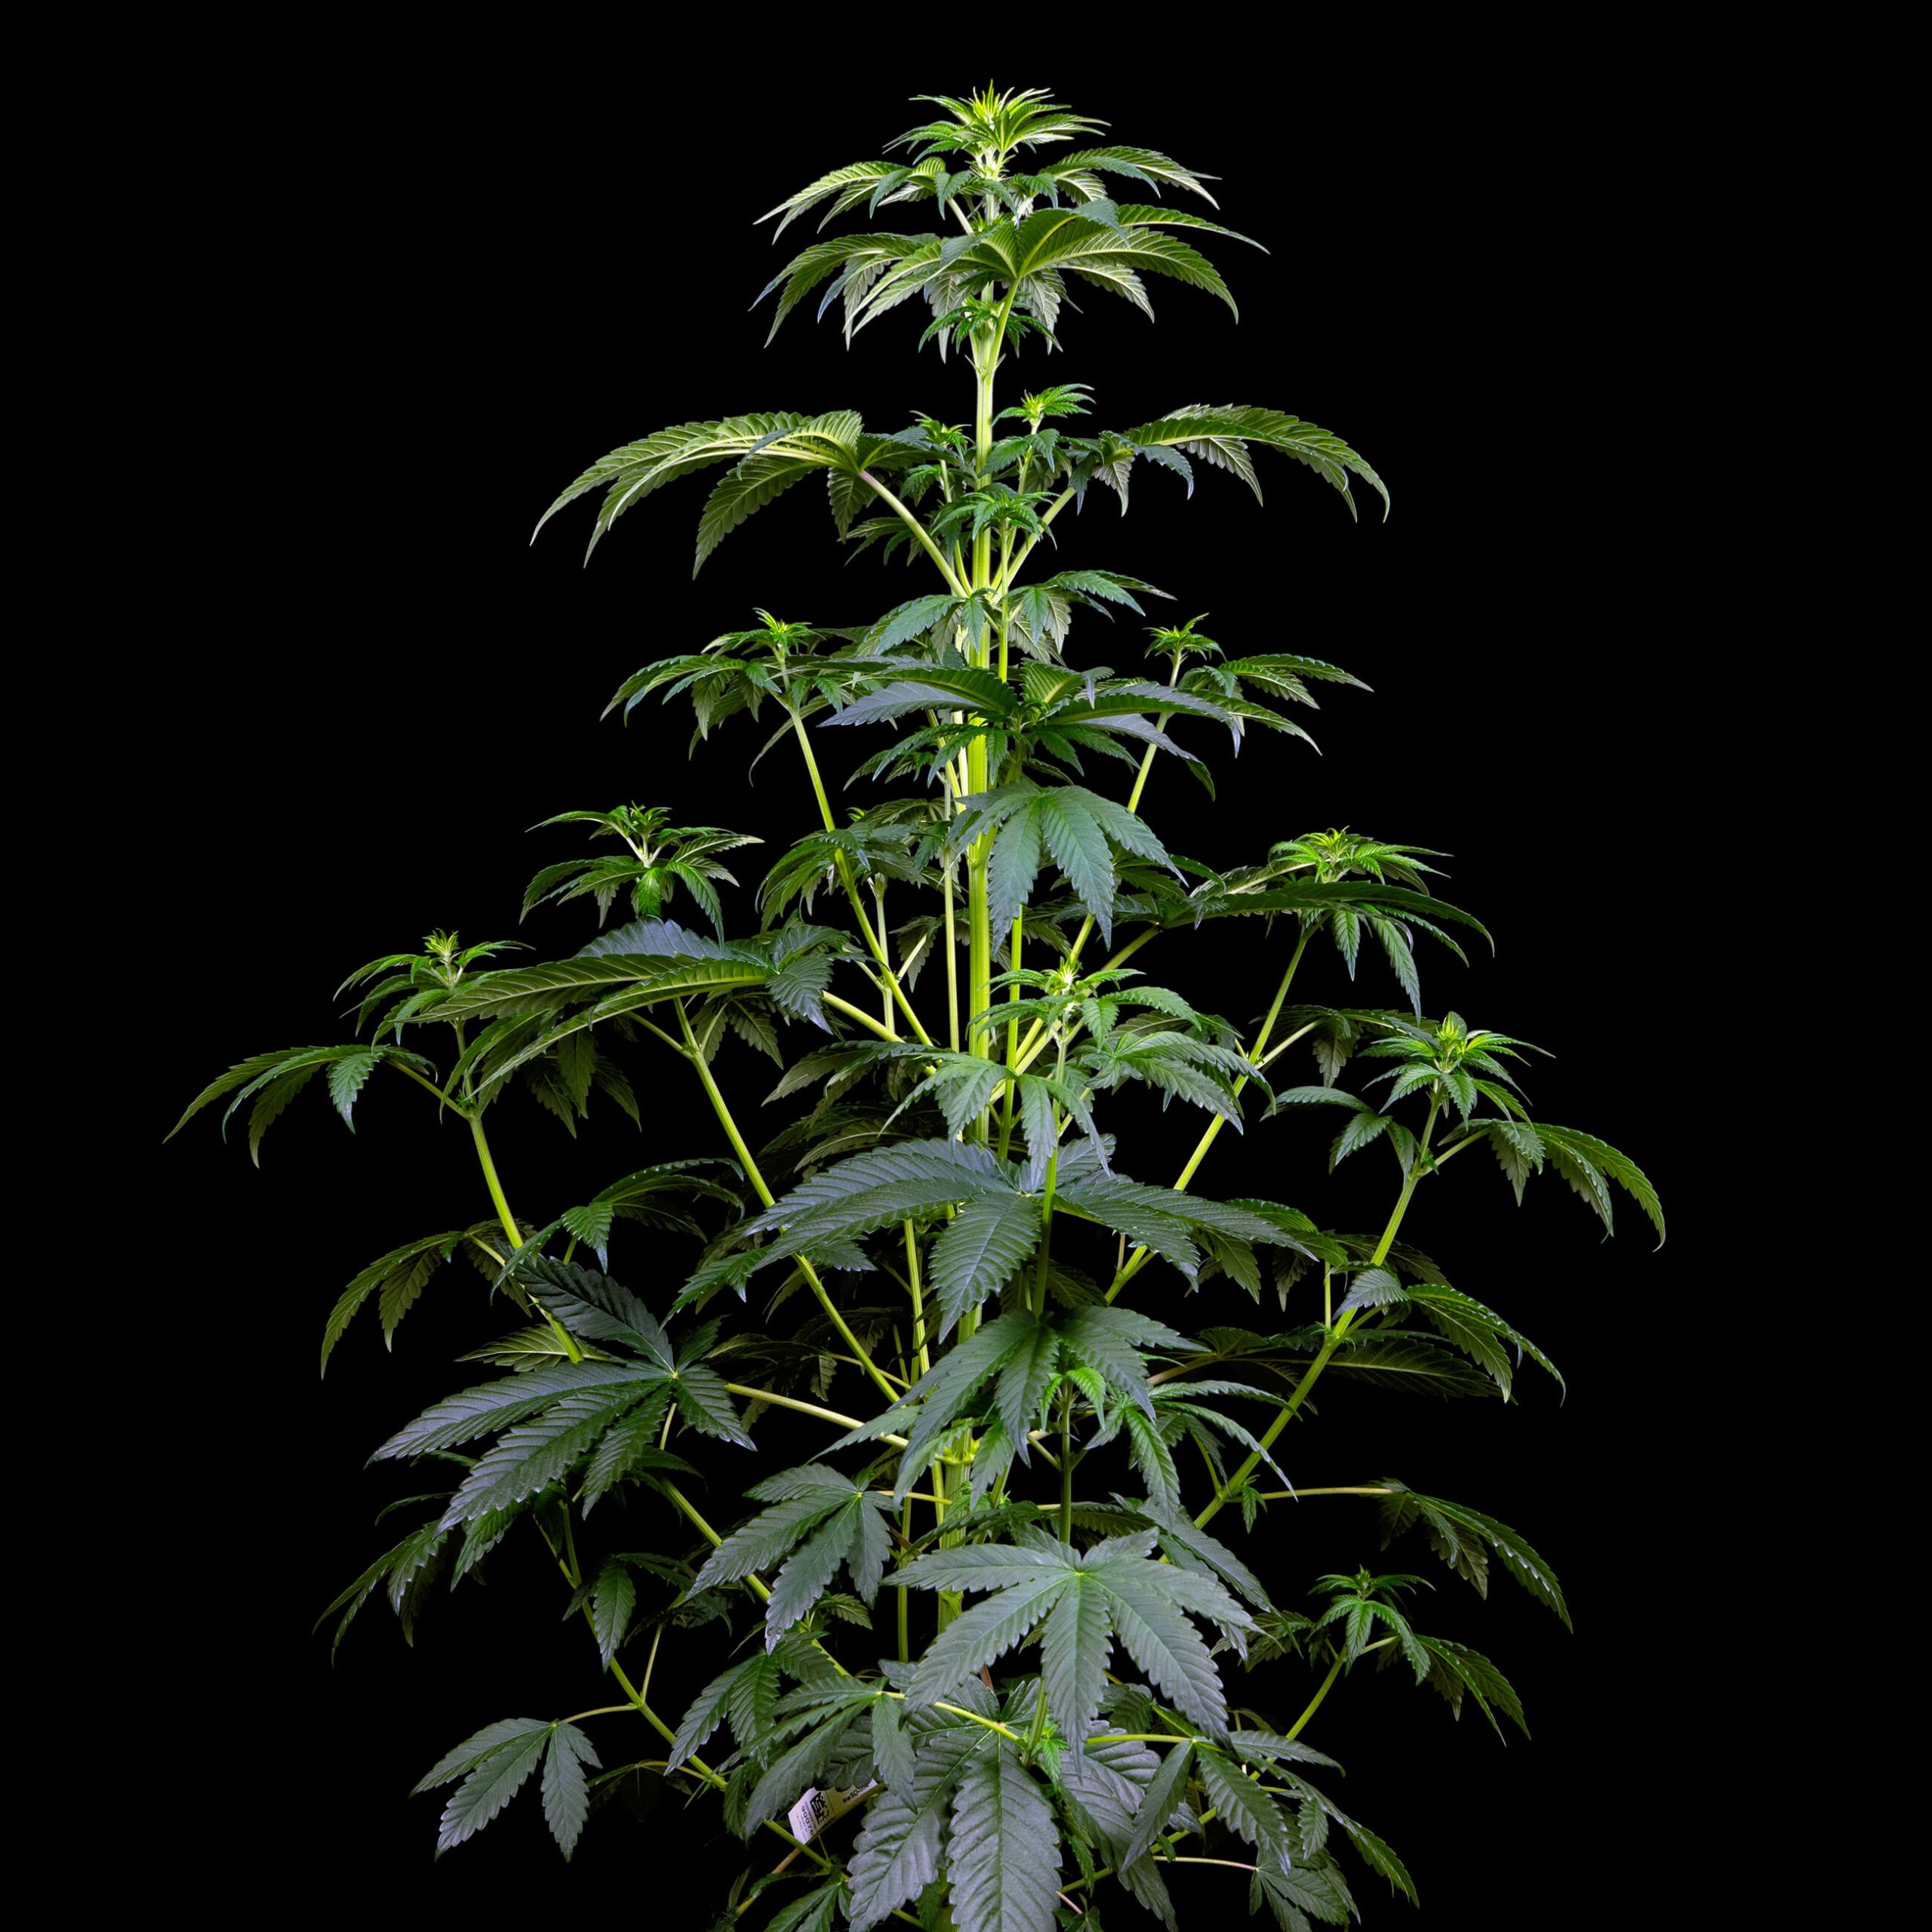
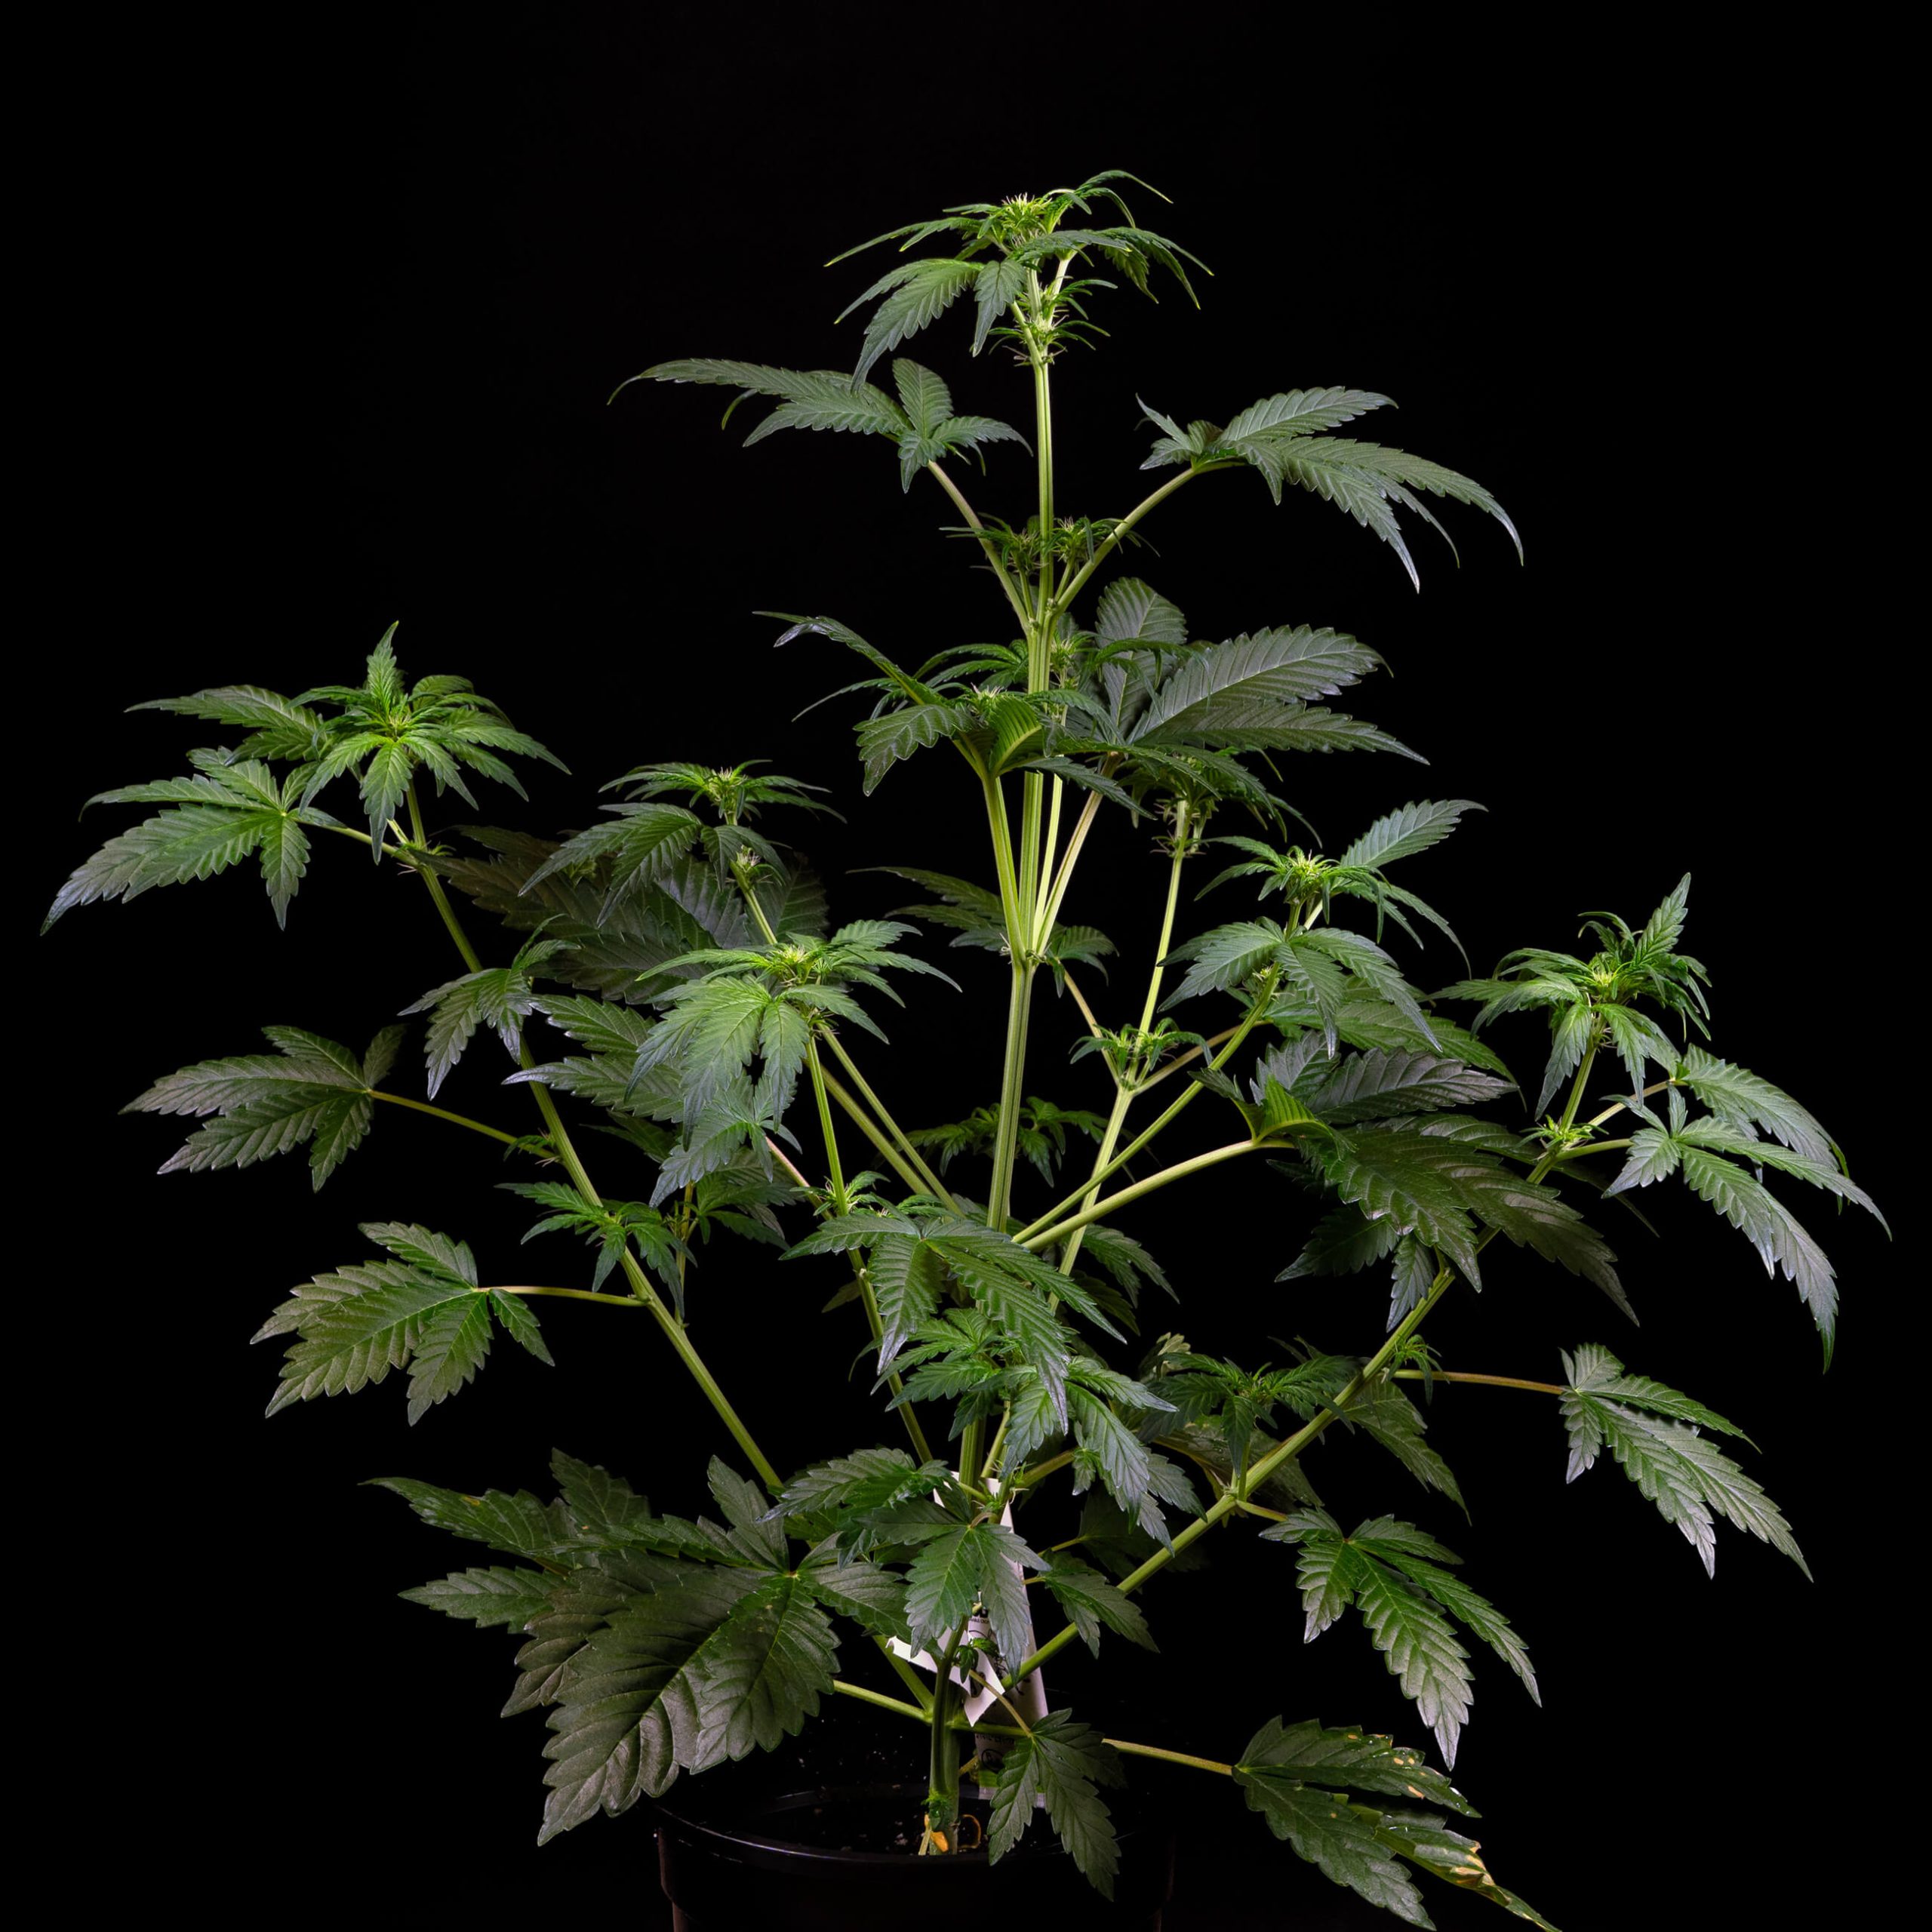
At the start of week eight, our Double Kush Cake Feminized now stood 118 cm. The leaves from the top to bottom displayed the same lush, dark green colour from top to bottom. The stigmas that started poking out last week were now fuzzy balls of soft white hairs on the tip of each branch.
The additional growth over the past few weeks had led to a bushy plant with many lateral branches reaching outwards. We used a stake in the soil to support the apical meristem. The branches were sturdy, so we did not need to support them.
Week nine seemed like the stretch had stopped, as our Double Kush Cake Feminized had not grown a centimetre since last week. To increase the airflow within the canopy and to divert energy to the central flowers, we removed the lower branches and buds on the bottom of the lateral branches.
We decided not to do any defoliation on our Double Kush Cake Feminized. The lateral branches had enough spacing that the adjacent leaves from the neighbouring branches were not blocking the light source. Leaving the leaves intact supports more photosynthesis, which drives growth.
Our lower leaves began to get a lighter shade of green, but the middle and top leaves still had a dark green appearance. This is normal as a plant gets closer to harvest or when mobile nutrients within the plant are in short supply in the soil.
The buds on our Double Kush Cake Feminized had rapidly begun to swell throughout week ten. We were still feeding 1500 ml of solution at an EC of 1.8, but the plant was now focusing all of its growth on the flowers. A few branches began to lean but did not need additional support. To reduce the risk of bud rot within the increasingly large and moist buds, we reduced the humidity in the room to 56%.
With possibly three or four weeks left before our Double Kush Cake Feminized reaches maturity, we decided to reapply sachets of our predator insects. They should keep any harmful bugs from becoming a problem before harvest.
It had been a full month since the last time we flushed the soil to remove any excess nutrients and sodium build-up. So, week eleven started with another flush of the soil using 5 litres of water.
The buds were increasing in size, and many of the lower branches needed additional support. The colas were dense and littered with trichomes. Only a few stigmas had turned brown, and many of the bracts had not begun their final push towards harvest. With all that growth potential remaining, we decided to continue feeding our Double Kush Cake Feminized at a 1.8 EC.
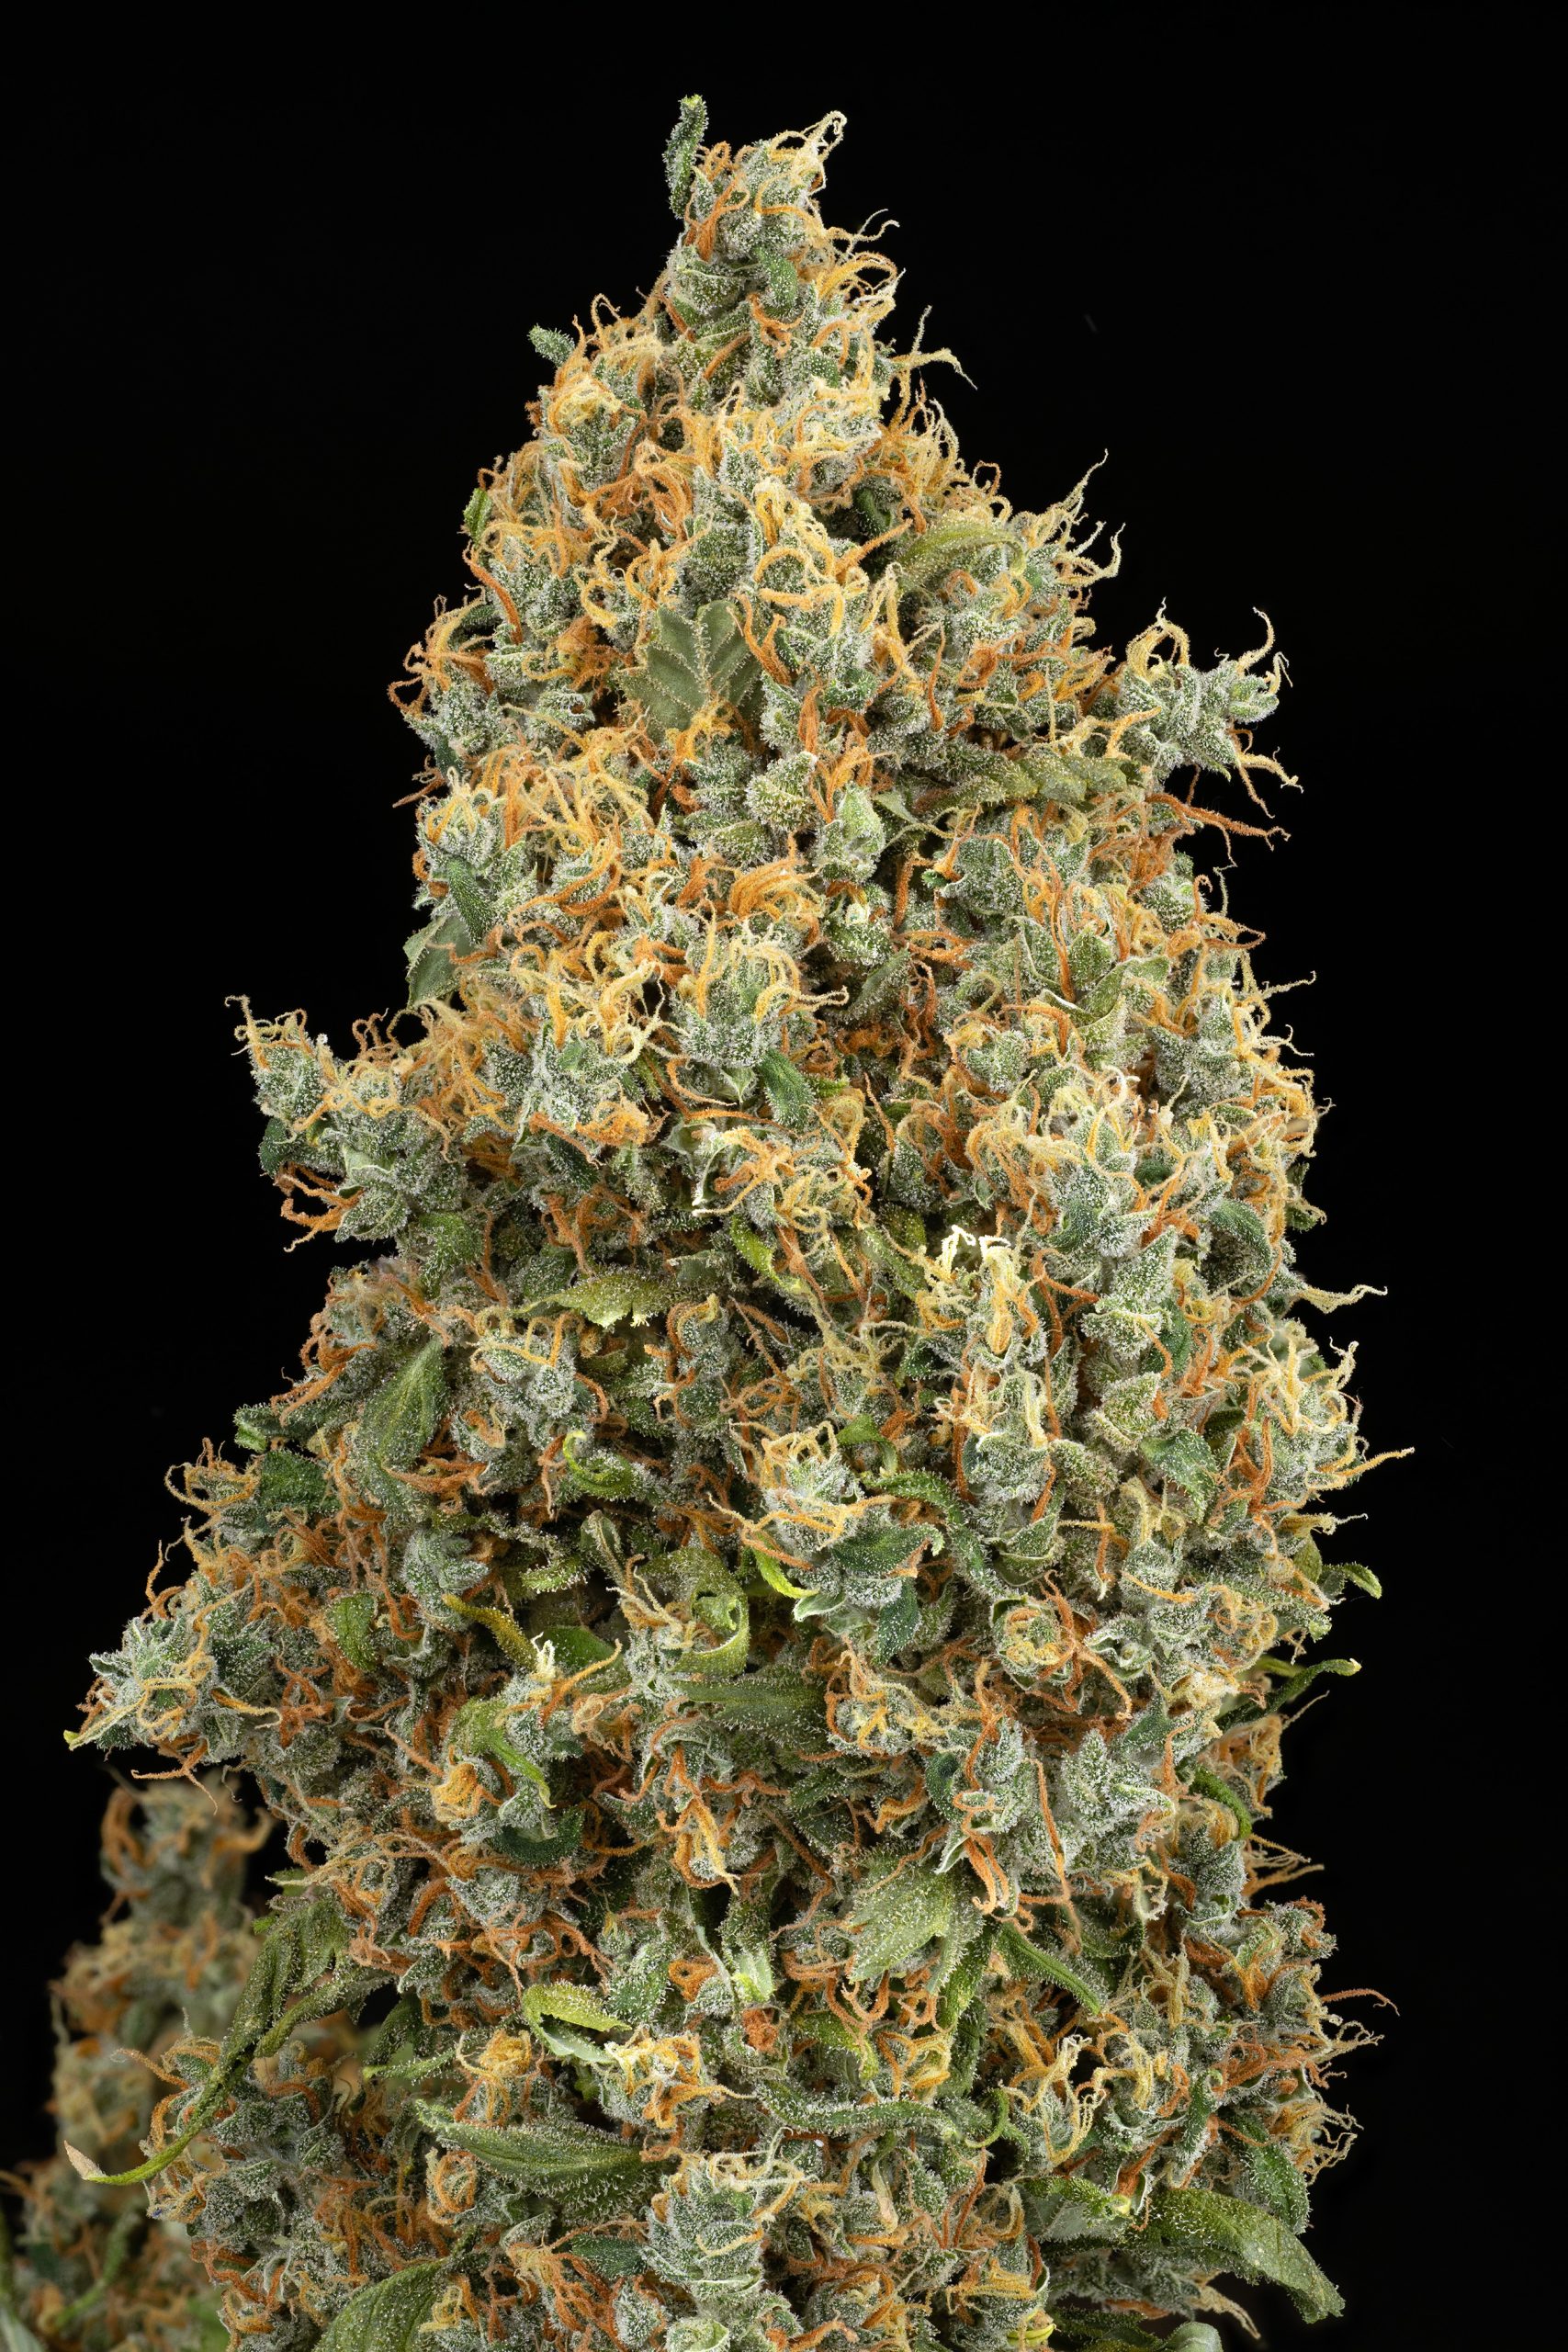
We noticed an intense floral aroma upon entering the growing area in week twelve. Our Double Kush Cake Feminized was getting close to peak ripeness. We were still waiting for physical signs to show us that the plant was finished. However, we decided to inspect the trichome heads to gauge how much time we may have left.
Although most trichome heads were milky as desired, there were very few amber heads and many clear heads. We always aim for an even ratio between the last two, so we knew the Double Kush Cake Feminized had a few more weeks to go. We inspected the buds (not the leaves) from the top and middle portions of the plant when checking the trichome heads for colour.
At the start of week thirteen, we saw the ratio between the clear and amber trichome heads shift towards a deeper amber hue. The buds also began their final push to increase their mass. Bracts were stacking on top of other bracts forming short vertical columns from the buds surface.
The lower leaves were now yellow and wilting, depleted of their mobile nutrients, which were sent upwards to support bud growth. Most stigmas had turned brown and retreated into swollen bracts. All of these things considered, we knew harvest would be soon. We stopped using Bio Flower nutrients and began flushing our soil with pure water on every feeding until harvest.
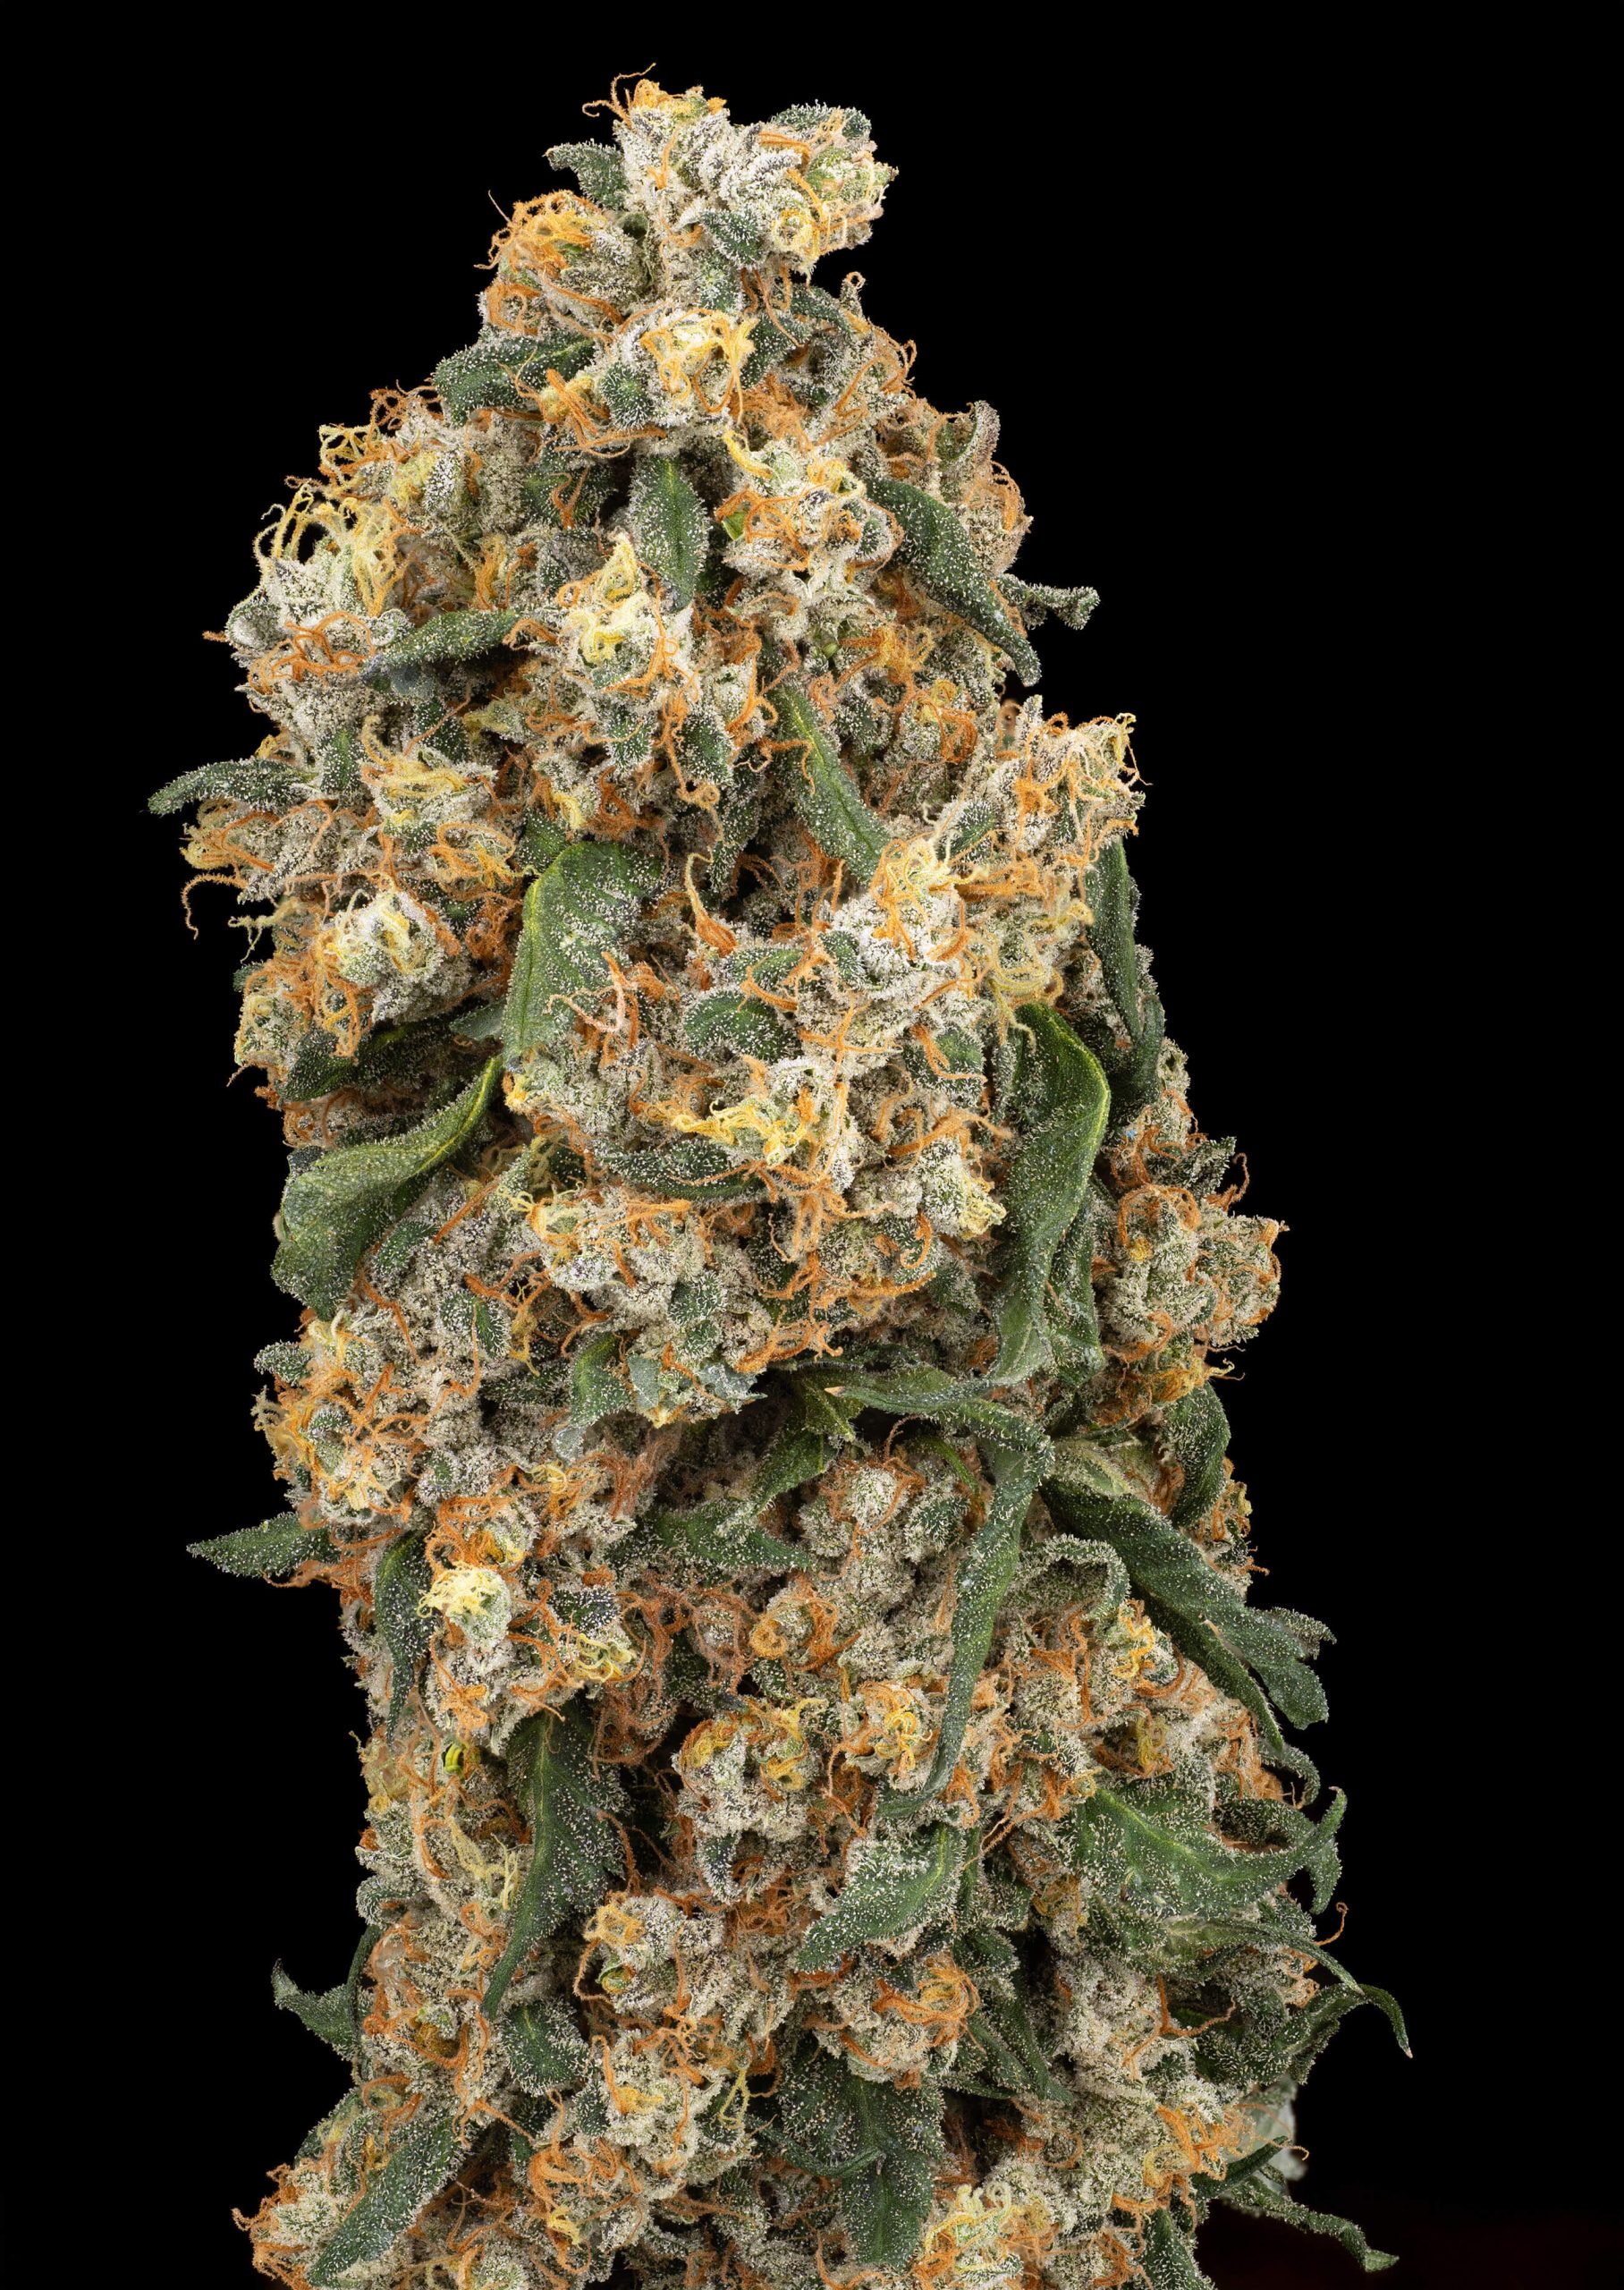
Week fourteen would be the final week for our Double Kush Cake Feminized, and she had reached a height of 122 cm. The floral smell had only intensified since first detected a few weeks back, and the flowers were covered with trichomes and had a low leaf-to-bract ratio making trimming easier!
We continued to flush the soil with pure water this week, but the flushing was already displaying the desired results. From bottom to top, our Double Kush Cake Feminized fan leaves faded to a light yellow. This indicated that we were effectively washing nutrients from the soil, forcing the plant to use its stored reserves.
After checking the trichome heads and finding the majority to be milky, with an even ratio of clear and amber, we decided to harvest our Double Kush Cake Feminized. This was an enjoyable plant to grow, and we could not wait for the next stage to be completed.
To make the harvesting and drying process seamless, we prepared our drying area before cutting down our Double Kush Cake Feminized. The two main environmental factors to control are humidity and temperature.
We kept the humidity at 60%, allowing our Double Kush Cake Feminized plants to dry evenly. Drying your plants too fast can diminish their terpene profile, causing your flower to taste like hay. Drying them too slowly can lead to mould. The temperature was maintained at 15.5°C for the drying period.
Two other essential factors for successful drying are airflow and darkness. We hung our Double Kush Cake Feminized plants in a dark room, but we turned the lights on to make our regular inspections. We took caution not to blow air directly on the drying plants, which could prematurely dry them out. We used a gentle breeze that circulated our Double Kush Cake Feminized perimeter.
Once the drying area was prepared, we cut the main stem at the base and hung our Double Kush Cake Feminized upside-down in the drying room. With the conditions we created, we aim for a drying period of 14 to 21 days. We returned multiple times daily to check conditions for the first week. When a plant is ready to trim, the outer layer of the flowers may feel slightly crispy and thin branches may snap when bent. Double Kush Cake Feminized met those parameters on day 18 of drying.
We removed the branches individually, trimmed the buds by hand, and placed them into glass jars for curing. On the first day in the jars, being in such tight proximity to each other, we knew the buds would rehydrate slightly.
Our buds still had moisture in the centre, which is released through the curing process. Sealing the jars directly after trimming can lead to a build-up of unwanted moisture, which is to be avoided, and we did not seal the lids on our curing jars until the second evening. Each jar was opened for two hours every few days for two weeks. This released the trapped moisture and equalized water content within the centre and outer portions of the bud.
It took two weeks for the Double Kush Cake Feminized buds to reach the right moisture level for us to finish the cure. We sealed the lids and let them sit for an additional four weeks. In the final month of curing, we opened the jars just once per day, for an hour, to allow an exchange of air.
At the end of this process, we harvested 117 grams of delicious, fragrant, sticky cannabis flowers. We sent a small sample to a professional lab for cannabinoid and terpene testing, and our Double Kush Cake Feminized finished with a THC level of 21.92%.
Double Kush Cake Feminized has a terpene profile dominated by caryophyllene, myrcene, and a touch of limonene from the heavy Kush influence. During the final weeks of flower, Double Kush Cake Feminized gives off a floral scent. Terpenes work together to create rich aromas of earth, spice, hash, and a touch of sweetness. After curing, the smell amplifies with an extra touch of dankness.
The flavour profile is very similar to the aroma of Double Kush Cake Feminized. Immediately, the subtle taste of earth comes through, coating the tongue with spicy undertones. The spice is not a heat-inducing sensation but is reminiscent of fine Moroccan hashish. Adding a lighter side to the flavour profile is a mouth-watering sweetness that rounds out the backend of the flavour.
Effects from Double Kush Cake Feminized are a peaceful and gradual slide into relaxation. The mind remains clear, and racing thoughts become slower and manageable as the effects set in. Because there is a strong sense of clarity, the deeply soothing, full-body effects may catch people off-guard. This strain is excellent for people who are seeking a full-body buzz.
Some strains are created to be enjoyed by connoisseurs but can be grown by everyone, and Double Kush Cake Feminized fits into that category! Nothing about this grow stood out as complex for a new grower to master, and we had a wonderful time during this grow cycle. It is also available as an autoflowering variety for an even easier experience.
Following a basic feeding schedule, we produced a heavy-yielding plant with multifaceted flavour and aroma profiles. The branching was easy to control, but our Double Kush Cake Feminized did require some stakes for support in the late flowering stages.
Our final dried flower total reached 98 grams, and the laboratory confirmed THC level hit 21.92%! Curious how that stacks up to the yields and THC% of other plants we have grown? You can compare the numbers by checking out our other grow diaries on the blog.
If you have grown Double Kush Cake Feminized before let us know in the comment section below. As always, happy growing!
-
Disclaimer:
Laws and regulations regarding cannabis cultivation differ from country to country. Sensi Seeds therefore strongly advises you to check your local laws and regulations. Do not act in conflict with the law.

Our detailed grow report provides a comprehensive overview of the entire growth cycle of this White Biscotti OG XXL, from the initial stages of germination to the final stages of harvest. It covers all the critical aspects of growing, including optimal growing conditions, nutrient requirements, and pest management strategies.
Flowering stage: 91 days
Total time, seed to harvest: 63 days
Final yield: 127 grams
THC content: 23.47%
As part of our grow report series, we were excited to cultivate the White Biscotti OG XXL Feminized, released in 2024. Its parental lineage includes the heavy-hitting Wifi OG with the flavour-packed Biscotti, and we were looking forward to experiencing some incredible terpene profiles.
Throughout the cultivation cycle, we maintained consistent daytime temperatures of 23°C and nighttime temperatures of 21°C. We also adjusted the humidity levels throughout the cultivation cycle, starting with a humidity of 65%.
Our chosen growing medium was BAC Lava mix, and we opted to use Bio Grow and Bio Bloom nutrients exclusively. We used a 1000W Green Power Philips HPS to provide optimal light coverage. During the vegetation stage, we followed a standard lighting schedule of 18 hours on and 6 hours off. For the flowering stage, we switched to a 12/12 lighting schedule. To ensure proper air circulation throughout the canopy, we used oscillating fans.

In the first week of the cultivation process, we used an 18-hour light cycle and a 6-hour darkness cycle to promote vegetative growth. We placed the seeds between two damp paper towels to germinate and then enclosed them between two plates. This helps retain moisture and creates a favourable environment for the seeds to sprout. We kept the seeds in a warm and dark location and waited 27 hours for the initial sprout to emerge before moving them to our rock wool cubes.
At the end of the week, our White Biscotti OG XXL seedling had reached 6 cm, and its roots started protruding from its rock wool cube. This indicated that the plant required more space, so we transplanted it into a larger 5-litre container to give the root zone enough space to develop. We watered the plant with 100 ml of water on the third day, ensuring the soil was moist but not waterlogged. We maintained EC levels at 0.8 and a pH of 6, vital for growth and nutrient uptake.

In the second week of growth, our plant was focused on developing its foliage, stems, and roots. The cotyledon was thriving, and we could see the emergence of true leaves as well. We introduced Bio Grow with a high nitrogen content to support optimal growth throughout the vegetation stage. As we increased the water intake to 200 ml, the plant demonstrated robust growth and developed healthy foliage.
We have taken a proactive approach to Integrated Pest Management (IPM). To combat thrip larvae and two-spotted spider mites in our indoor growing space, we have released Amblyseius Cucumeris and Amblyseius Californicus. We used fans to strengthen our seedling’s main stem by gently rocking it, resulting in a more robust structure. By the end of the week, our White Biscotti OG XXL seedling had grown to a height of 15 cm.
In the third week, we observed significant growth in our plant as it elongated its internodes and increased in height by 26 cm. To aid its continued proliferation, we introduced Bio Grow nutrients to our plant for the first time and increased the nutrient solution volume to 400 ml. We combined the nutrients with water to prepare the feeding solution and adjusted the pH to 6.2, resulting in an EC of 1.6. The increase in nutrient solution facilitated the production of more robust leaves and stems.
As we entered the fourth week of our growth cycle, we were thrilled to see that our White Biscotti OG XXL had grown to a height of 32 cm, indicating that it was thriving under our care. To initiate flowering, we adjusted the light cycle to 12 hours of light and 12 hours of darkness at the beginning of week four. During this stage, the plant requires less nitrogen and more phosphorus and potassium for optimal growth, so we switched to Bio Bloom nutrients to prepare for the flowering stage.
In addition, we adjusted the humidity level to 60%, which is ideal for promoting healthy flower development. We also increased the E.C. levels to 1.7 and increased the water volume to 800 ml to ensure that the plants were receiving enough nutrients and water to support their growth during this critical stage of development. Overall, we are pleased with our White Biscotti OG XXL’s progress and look forward to seeing it thrive during the flowering stage.
We anticipated the accompanying stretch as we entered the fifth week. However, the stretch had not yet begun, as our plant had only grown by 38 cm. Despite this, the fan leaves looked healthy and responded well to the nutrient intake without discolouration. We increased the watering volume to 1000 ml to account for the increased growth. The EC levels increased to 1.8 and will remain the same for the rest of the cycle.

In the sixth week of the flowering stage, we noticed the emergence of tiny hairs from the internodes of our White Biscotti OG XXL, also known as pre-flowers. This is an exciting development as it marks the beginning of bud development. Our plant grew to 51 cm by the week’s end, and we adjusted the water volume to 1500 ml to support this new growth. Additionally, we have maintained our IPM strategy and added more Amblyseius Cucumeris and Amblyseius Californicus sachets.
Due to the ongoing stretch, we noticed a minor shift in the plant’s morphology in the seventh week, especially in the internodal spacing near the main stem, and our White Biscotti OG XXL had grown to 76 cm! The canopy was developing nicely, and lateral branches were almost level with the apical mainstem. To improve light penetration, we applied slight defoliation and allowed the plant to grow naturally. We also noticed the development and swelling of tiny stigma hairs at the internodal joints.
We initiated a flush day at the beginning of week eight, which involved using 1500 ml of plain water to eliminate any buildup of salt nutrients that could negatively impact the quality of the buds. In addition to the flush day, we defoliated to create a uniform canopy that allows better light penetration to the lower bud sites. Our plant had reached an impressive height of 98 cm, and the bud growth was thriving, with calyxes swelling dramatically.
Towards the end of the ninth week, we carefully observed the growth of our White Biscotti OG XXL and noticed little to no significant vertical growth. However, upon closer inspection, we observed that the buds had significantly swollen in size. The buds had become denser and heavier, indicating they were now in the final stages of development. The calyxes were swelling, and the pistils started emerging from the biomass. By the end of the week, our plant had grown to a height of 111 cm.
Vertical growth subsided as we entered week ten, and our White Biscotti OG XXL has grown 8 cm since last week. We continued our IPM strategy by hanging Amblyseius Cucumeris and Amblyseius Californicus sachets to prevent thrip larvae or other unwanted pests. We have lowered the humidity level to 56% to account for the developing biomass and prevent mould or mildew from forming. For optimal growth, we will continue to water with 1500 ml at an EC of 1.8 until harvest.
Upon noticing the amber colour of the stigmas, we decided to flush the plant one more time to ensure that any remaining nutrients were removed to prevent any harsh taste or aroma that could result from excess nutrients. After flushing, we focused on inspecting the trichomes to determine their ripeness. We carefully examined each trichome using a magnifying glass to check for its colour, size, and transparency, which helped us determine the ideal time for harvesting the plant.
In the eleventh week, the plant’s upper leaves were thriving under the lights, providing ample energy to encourage bud growth, and our plants reached 125 cm. Some of the flowers started to display a beautiful light purple hue, which we attributed to the expression of anthocyanins in the plant. As we examined the plant, resin glands were rapidly increasing, indicating the plant’s final stages of growth. White Biscotti OG XXL had slowed its vertical growth, directing all energy to bud development.
We could see the buds maturing well when we reached the twelfth week. Upon careful inspection, we could observe that the bracts had swollen, and the buds were covered in a thick layer of trichomes. We could tell that the plants had reached their final stage of development due to the abundance of trichomes on the buds. Throughout this period, we ensured the plants were flushed every day until harvest, and our White Biscotti OG XXL reached 128 cm by the end of the week.
After thirteen weeks, the buds had grown dense and resinous with vibrant colours and a robust aroma. The milky white colour of the trichomes indicated that the THC levels had reached their peak, and it was time to harvest. Our White Biscotti OG XXL Feminized reached a height of 130 cm and now showcases big, chunky calyxes that are closely packed together. The buds are very resinous, dense, and chunky, with dark purple hues, deep orange pistils and olive green foliage.
To ensure the highest quality of our cannabis, we pay great attention to the post-harvesting process. Once the plant is cut down at the stem, we carefully maintain a steady room environment to begin drying. Our plant was then hung upside down in our designated drying area for 21 days. We kept the temperature at 15.5°C and maintained a relative humidity level of 60% to prevent any potential mould or disease.
After achieving the desired dryness level, we removed excess plant matter and fan leaves from the buds. We created a clean environment before collecting our trimming scissors to remove excess foliage from our buds. This made them more attractive and easier to dry with less biomass. After trimming, we placed the dried cannabis in airtight containers to start the curing process.
We cured the cannabis for three months by regularly opening the jars to preserve its terpene content. During the first week, we burped the jars daily to allow fresh air to replenish and remove stagnant air. Then, after the first four weeks, we burped them once a week for the remaining two months. It’s important to remember that patience is a virtue when it comes to curing cannabis, so taking the necessary time is vital!
The pungent floral aromas become more intense in the final few weeks of flowering. Once the buds have been dried and cured, the scent of caramelised cookie dough helps to balance out the sharp, diesel-like aroma. Additionally, there are scents of fresh pine trees and exotic sandalwood with a slightly gassy undertone.
We ground our cured cannabis flower, rolled it into an unbleached paper joint, and shared it with friends. We experienced a rich and silky vanilla cream taste, followed by a contrasting fuel flavour at the back of our palette. On exhaling, an extra touch of diesel added a layer of complexity to the flavour profile. Initially, it produced a burst of cerebral euphoria that was cheerful and uplifting. Eventually, the effects mellowed out into a soothing full-body high.
In conclusion, our cultivation report on White Biscotti OG XXL Feminized highlights the strain’s exceptional flavour profile, characterised by a delightful blend of sweet, fruity, and floral aroma complemented by a distinctive creamy taste. The strain’s unique genetic makeup, derived from the fusion of Wifi OG and Biscotti contributes to its one-of-a-kind taste experience. Whether you’re a seasoned grower or just starting out, White Biscotti OG XXL is an outstanding addition to any garden.
-
Disclaimer:
Laws and regulations regarding cannabis cultivation differ from country to country. Sensi Seeds therefore strongly advises you to check your local laws and regulations. Do not act in conflict with the law.

Explore our grow report detailing the growth cycle of Sweet & Sour Cream Automatic, from germination to harvest. This versatile hybrid, created by crossing Sour Florida OG and Gelato #420, showcases a compact size and abundant yields. Now, let’s delve into our detailed step-by-step guide; with any luck, you’ll pick up some expert tips along the way!
Flowering stage: 63 days
Total time, seed to harvest: 91 days
Final yield: 102 grams
THC content: 23.2%
In 2024, Sensi Seeds Research introduced Sweet & Sour Cream Automatic into their catalogue, a strain blending Sour Florida OG and Gelato #420. Anticipate a compact structure featuring short internodal spacing, sturdy branches, and vibrant green foliage. This cultivar typically forms a single large cola with minimal lateral branches, and we couldn’t wait to start our cultivation cycle with this exciting addition!
We cultivated the Sweet & Sour Cream Automatic in our controlled indoor growing space, maintaining a consistent temperature of 23°C during the day and 21°C at night. To optimize air circulation, we placed oscillating fans equipped with a carbon filter and intake fan. Throughout the various growth stages, we carefully managed humidity levels, tailoring them to the specific requirements of each phase. At the initiation of the cycle, we deliberately set the humidity at 65%.
For our growing medium, we used BAC Lava soil, supplemented with Bio Grow and Bio Bloom nutrients throughout the cultivation cycle. Opting for optimal illumination, we chose the 1000W Green Power Philips HPS light. In the vegetative stage, we maintained a lighting schedule of 18 hours on and 6 hours off, transitioning to a balanced 12 hours on and 12 hours off during flowering.
Our cultivation journey began by germinating our Sweet & Sour Cream Automatic seed in a propagation cube 80 cm below the grow light. As soon as roots emerged, we carefully transplanted our 6 cm seedling into a 3-litre pot filled with a BAC Lavasoil mix. Witnessing the onset of leaf development, our plant showcased robust cotyledons and two vibrant leaves.

We abstained from watering until the third day, when we poured 100 ml of water around the main stem to foster robust root growth. We carefully adjusted the pH to 6.2 upon watering, incorporating a root stimulant to achieve an EC of 0.8. Our proactive approach extended to pest management, as we introduced Amblyseius Cucumeris and Amblyseius Californicus predatory mites to address potential issues.
By the end of the second week, our Sweet & Sour Cream Automatic exhibited remarkable growth, doubling in size and reaching an impressive height of 11 cm. Evolving from cotyledons to broad-fingered leaves, the plant displayed distinct indica characteristics with multiple nodes and short internodal spacing. We increased our watering volume to 200 ml and elevated the EC levels to 1.4 in response to the heightened root development.
As a part of our organic pest management strategy, we introduced Neoseiulus Californicus and Amblyseius swirskii into our indoor garden. These beneficial predators play a crucial role in eliminating the risk of unwanted insects. Since our plant was still developing and we couldn’t hang them on the branches, we hung them on stakes close to the main stem.
As we progressed into the third week of cultivation, we adjusted our watering regimen to deliver precisely 400 ml of water, with a strategic emphasis on the base of the stem. Observing our Sweet & Sour Cream at this stage, it stood at an impressive height of 21 cm, exhibiting three well-defined nodes along its main stem. The plant’s growth was notably robust, characterised by luxuriant, dark green leaves that added to its overall vitality and visual appeal.
During the fourth week, the vigorous growth of our cultivation prompted us to enhance the solution volume to 400 ml, providing ample support for the expanding root system. At a height of 28 cm, our Sweet & Sour Cream displayed a more robust mainstem, adorned with an impressive array of over seven nodes, fortified by the continual gentle breeze from the oscillating fans.
This plant is an automatic strain, meaning it doesn’t require the traditional 12 hours on / 12 hours off lighting schedule to grow. However, we grew this plant alongside other varieties and anticipated potential vertical growth. Due to the limitations of our cultivation area, we delicately adjusted the light schedule to a balanced 12 hours on and 12 hours off to usher the plant into the flowering phase. We transitioned from Bio Grow to Bio Bloom nutrients to account for the elevated potassium levels.
In the fifth week, we augmented the solution volume to 800 ml per application, maintaining a strength level of 1.7. Additionally, rather than solely watering the base of the stems, we ensured comprehensive coverage of the entire soil surface. It had been a while since we introduced Neoseiulus Californicus and Amblyseius swirskii to our indoor garden. This time, as our Sweet & Sour Cream was more developed, we hung sachets from the branches in the lower canopy.
In its sixth week of growth, the apical main stem boldly extends beyond the lateral branches, and our plant has surged to a height of 46 cm. The dark green leaves proudly indicate an optimal nitrogen level, accentuating the plant’s health. As we transition into the flowering stage, the pre-bud sites are visibly swelling, adorned with tufts of emerging white hairs that lay the foundation for promising bud development, and we increased EC levels to 1.8 for the remainder of the grow cycle.
Sweet & Sour Cream reached 52 cm during the seventh week. Responding to its increasing needs, we’ve adjusted the water volume to 1500 ml. Notably, the tiny stigmas emerging from the bracts are showing continued development. The buds are now stacking on themselves, effectively closing the internodal spacing. Every lateral branch is flourishing, and it appears that we are poised for a substantial harvest.
Our plant underwent substantial vertical growth throughout the eighth week, extending impressively from its initial height of 50 cm to a remarkable 61 cm. The plant was a true sight to behold, with its dense and sturdy apical mainstem commanding attention. The buds had developed into a substantial size, with olive green hues and delicate white pistils.
The foliage was a lush and vibrant dark green, creating a beautiful contrast against the buds. And to top it all off, the leaves were pointing upwards in a prayer-like stance, as if in gratitude for the plant’s bountiful growth. To promote better airflow within the lower canopy, we removed larger fan leaves and introduced new Neoseiulus californicus and Amblyseius swirskii sachets throughout the canopy. We maintained consistent pH and EC levels and kept the water volume at 1500 ml.
In the ninth week, our Sweet & Sour Cream exhibited ongoing growth, expanding notably by 10 cm and attaining a substantial height of 71 cm. Notably, a delicate fragrance permeated the growing area, characterised by a distinctive and pungently sweet floral scent. The visual aspect of the plant appeared unrestrained and wild, with its limbs and fan leaves extending in diverse directions, creating an impression of exuberant and rampant growth.
As we reached the tenth week, our plant’s growth spurt stopped, and it stood tall at 77 cm. The plant was now focusing on developing its buds, and we could see the calyxes swelling and trichome production increasing. Additionally, the pistils on the plant were starting to change colour. During this week, our EC level increased to 1.8, where it would remain for the rest of the cycle, while the humidity remained constant at 60%.
The buds in the lower canopy have started to swell and are developing into larger-sized buds during the eleventh week. As the bud production was at its peak, we reduced the humidity levels to 56%. The buds displayed a captivating olive-green hue, adorned with a mesmerising glisten from the abundant trichomes. The sparse but noticeable amber pistils created a visually dynamic and aesthetically pleasing composition among the lush greenery.
Even though the growth cycle was almost complete, we decided to add another round of predatory mites to protect our Sweet & Sour Cream during the final weeks of flowering. A pest outbreak at this stage could be devastating, and by the end of the week, our plant had grown to 80 cm in height.
As we entered week twelve, the buds presented a pristine white appearance, veiled in a blanket of shimmering trichomes. Exhibiting a structure reminiscent of sativa strains, there was a subtle openness between the buds, allowing for adequate airflow, yet they artfully stacked upon each other. This unique combination of traits promised a harvest characterised by both quality and aesthetic appeal.
As the thirteenth week commenced, the eagerly awaited harvest period finally arrived. Throughout 91 days, our Sweet & Sour Cream Automatic underwent robust and vigorous growth, reaching a remarkable height of 84 cm. The dense clusters of elongated conical buds artfully entwined themselves, creating intricate and stacked formations with distinctive pointed calyxes and bright orange pistils, further adding to the visual allure of the plant.
Preparing for harvest, we assessed trichome colour with a jeweller’s loupe, targeting 70% milky white and 30% orange or amber. We removed large fan leaves to prevent excess moisture. Using pruning scissors, we cut the plant an inch from the base, separated smaller branches, and individually hung them. The plant was then transferred to a controlled drying area at 21°C with 50% humidity and hung upside down.
The buds were dried for 14 days to obtain a nearly crisp exterior while preserving moisture. To confirm the completion of the drying process, we performed a simple check by bending the small branches of the buds. They snapped when bent, indicating they were ready for the next step. This tip is helpful to ensure the buds are thoroughly dried.
After drying, we carefully trimmed off excess fan leaves and put the buds into air-tight containers ready for the cure. As a tip for beginner growers, it is recommended that you break larger colas into smaller buds before storing your dried flowers in airtight glass jars. For the first few weeks, we burped the jars daily and then weekly for the remaining three months. After weighing our harvest, we obtained __ grams. Lab tests revealed a THC content of 23.2% in our Sweet & Sour Cream strain.
A distinct floral fragrance delicately filled our grow room as the Sweet & Sour Cream entered its final flowering weeks. However, once cured, the intricate terpene profile unveiled a robust diesel aroma interwoven with subtle gas undertones and a potent skunky scent!

We ground our cured flowers in a grinder, grabbed an unbleached rolling paper and carefully rolled a fat joint, passing it around to our friends. As its flavour profile unfolds, subtle hints of sourness emerge, adding a layer of complexity to the overall taste. The strain revealed its rich character with a highly pronounced gassy flavour upon consumption, further intensified by prominent zesty citrus notes.
As the effects settled in, a pleasantly uplifting cerebral euphoria brought forth feelings of happiness, sparked creativity, and enhanced concentration. The experience’s notable potency was coupled with a delightful and pervasive sense of cheerfulness, fostering a laid-back and communal atmosphere for everyone involved.
Over a period of 91 days, we were able to yield an impressive amount of grams using our Sweet & Sour Cream Automatic. This particular strain was grown indoors and proved to be low-maintenance, yet remarkably robust throughout the entire cultivation cycle. With an impressive parental lineage and a delightful blend of sweet and sour flavors, the Sweet & Sour Cream Automatic is an excellent choice for cannabis enthusiasts.
Feel free to share any tips or questions about Sweet & Sour Cream Automatic in the comments below.
-
Disclaimer:
Laws and regulations regarding cannabis cultivation differ from country to country. Sensi Seeds therefore strongly advises you to check your local laws and regulations. Do not act in conflict with the law.

Throughout our comprehensive grow report, we provide detailed insights and guidance for every stage of the growing cycle, offering a step-by-step walkthrough from germination to harvest. This report aims to equip cultivators with the knowledge and techniques needed to successfully cultivate and appreciate the full potential of Blueberry Bubblegum Automatic.
Flowering stage: 63 days
Total time, seed to harvest: 84 days
Final yield: 151 grams
THC content: 24.6%
Launched in 2024, Blueberry Bubblegum Automatic was thoughtfully crafted for Sensi Seeds Research through a backcross of Sunset Sherbert with Gelato #420, enhancing its unique traits. This strain amplifies Gelato #420’s aroma, yields, and euphoric effects, complemented by the stability and relaxation of Sunset Sherbet.
We chose BAC Lava Mix as our substrate during this cultivation cycle and utilised 1000W Green Power Phillips lights for optimal growth conditions. As the plants progress through their development, varying humidity levels become necessary. However, we maintained a humidity level of 65% during the initial stages with seedlings. Daytime temperatures were kept at 23°C, and nighttime temperatures dropped to 21°C.
Autoflowers are not influenced by changes in lighting, and theoretically, you can maintain them under an 18/6 schedule throughout their growth. However, since we were cultivating them alongside other cultivars, transitioning to a 12/12 lighting schedule can aid in their maturation and production with reduced stress.
During the vegetative phase, we employed Bio Grow and maintained a lighting schedule of 18 hours on and 6 hours off. As we transitioned to the flowering stage, we adjusted our nutrient approach by introducing Bio Bloom to meet the specific requirements. Simultaneously, we modified our lighting schedule to 12 hours on and 12 hours off.
We initiated germination by situating our Blueberry Bubblegum seed within a pre-moistened rock wool cube positioned 80 cm below a 600W Green Power Phillips light. After 72 hours, the sprout had successfully emerged. On the third day, we introduced 100 ml of water around the stem. Throughout this phase, we maintained a pH level of 6 for the plants, and the electrical conductivity (EC) commenced at 0.8.

As the roots began to emerge from the bottom of the rock wool cube, we transplanted our seedlings into a 1L pot. Creating a small pocket beneath the soil line, we nestled the cube and covered it with soil. To enhance root growth, we also supplemented a rooting hormone, our tiny seedling was beginning to reach upward for the light, with the first set of leaves just visible. By the end of the week, our seedling had reached 6 cm.

Throughout week two, we moved the new plants under their long-term light – the 1000W Green Power Phillips. Our Blueberry Bubblegum continued growing, with the stem reaching 16 cm. The increased developments led to increased water consumption, so we upped our small amount of water to 200 ml and raised our EC to 1.4. At the end of the week, we moved the plant into an 8L pot so that the root system could continue to expand.

In the third week, as we gained confidence in the well-established root zone, we adjusted our watering intake to 400 ml and modified our watering technique to cover a wider radius around the stem. All other environmental conditions remained unchanged. The plant exhibited robust growth, revealing multiple visible bud sites and broad fan leaves strategically maximising light absorption. As the plant reached this advanced stage, By the week’s end, the plant had attained a height of 32 cm.
Our Blueberry Bubblegum thrived throughout the fourth week, becoming more luxuriant each day. The unique trait of these Feminized Autoflowers is their ability to induce flowering independently. Transitioning to the traditional flowering phase, we adjusted to a 12/12 lighting cycle, introduced Bio Bloom, and raised the water volume to 800 ml with an EC of 1.7. The plants displayed an impressive appearance, with robust development, heightened aroma, and early stigma development.
As part of our Integrated Pest Management strategy, we introduced Neoseiulus californicus and Amblyseius swirskii to proactively ward off spider mites and other potential pests in the fifth week. These resilient predator mites, when consistently applied, prove highly effective in maintaining a pest-free environment for your plants. The plant’s structure was noticeably robust, prompting us to enhance our watering routine with 1000 ml of diluted fertiliser. As the week concluded, our plant reached 60 cm.
In week six, we upped our water volume to 1500 ml, and the lush green colour of the plant provided reassurance that it was receiving the appropriate nutrient ratios. The rapid growth slowed a little with biochemical processes in the plant shifting from vegetative to reproductive. The height by the end of the sixth week was 68 cm. Some of the “stretch” between the nodes we expected is visible, but overall, the plant was filled out this week.
Week seven was another solid week of development. We are delighted with the plant’s health and have dropped our humidity levels to 60% to avoid potential mould issues. Still watering with diluted nutrients, we gave the plants 1500 ml at pH 6 and EC 1.8. A slight aroma is evident in the growing area, and the bud sites continue to develop with a long, bright stigma covering the flowers. We saw more growth now, and the plant reached 84 cm.
By the conclusion of week eight, our Blueberry Bubblegum stood at an impressive height of 93 cm, highlighting its robust growth and well-established stature. The plant displayed a sturdy apical main stem, broad fan leaves, and increasing trichome development, showcasing the intricate details of its maturation process.
In week nine, we performed a gentle defoliation, removing older fan leaves obstructing light for the maturing buds. Given the rapid lifecycle of autoflowers and their limited recovery time from pruning stress, we kept this process to a minimum. During this time, the plant extended another 12 cm, reaching a height of 105 cm. The aroma intensified daily, and a multitude of trichomes became visible on the developing buds.
By the conclusion of week ten, the plant had attained a height of 117 cm. The majority of the buds were fully developed, requiring only further ripening. As a result, some ancillary shoots began to bear the weight of the buds. While there was the option for training to support them if they seemed at risk of breaking, the plant demonstrated resilience—bending without breaking. In the final weeks, we flushed our medium to eliminate any residual salts that might affect the overall flavour of the cured buds.
In week eleven, we closely monitored the trichome colouration and density. Throughout these weeks, we focused on identifying the characteristic cloudy colour that signals the flower’s peak maturity. While some trichomes were transitioning to a more clouded and less clear state, our target was to observe a ratio of 70% cloudy trichome heads with 30% amber for optimal harvesting conditions. To complement the increased biomass, we reduced humidity to 56%.
Blueberry Bubblegum showcased sizable flowers adorned with sticky resin, creating a dense and compact appearance. Amidst the flowering stage, vibrant orange pistils and hints of purple hues emerged, adding a visually striking contrast among the abundance of trichomes.
After closely monitoring the trichomes and confirming they met our specific criteria, we decided to wrap things up with our Blueberry Bubblegum, which had reached a final height of 120 cm. This decision resulted from a detailed and careful approach, considering both the optimal timing and the ideal height for the harvest. As we reached the end of week twelve, we delicately cut down the plants, ensuring they were harvested at the peak of their maturity.
Upon achieving the recommended trichome ratios, we harvested the entire plant by cutting it down at the base of the stem. Following this, we meticulously removed all the large fan leaves, hanging the plant upside down in a dark environment for a meticulous 21-day drying period.
During this time, we regularly inspected the plant, testing the branches for dryness by snapping when bent. Once content with the dryness level, the entire plant was carefully broken down into larger branches to facilitate trimming. We meticulously trimmed the dried buds, removing excess foliage to enhance the curing process and ensure optimal quality.
The buds were carefully placed in glass jars, kickstarting the essential curing process. To remove excess moisture, we left the lids open on the first day. Following this, we sealed the jars, and a meticulous burping routine was adopted, allowing air to escape for approximately one to two hours, 2 to 3 times daily, for one week.
Subsequently, for four weeks, the jars were opened once daily. To enhance the curing process, the buds were then transferred to a Cvault container for an extended 2-month period, maintaining a consistent 62% humidity level.
Blueberry Bubblegum began emitting pungent floral notes in the final weeks of flowering. However, post-curing, the aroma transformed into a sweet profile, embodying the essence of its “blueberry bubblegum” namesake, complemented by an underlying pungent scent with subtle hints of pine.
Its distinctive terpene profile showcases rich citrus notes complemented by herbal and peppery tones. Additionally, a subtle hint of diesel fuel adds depth to the overall aromatic experience.
Upon loading our vaporizer, distinct flavours of citrus, herbs, fuel, and pepper unfold in this strain, accompanied by a notable grassy undertone. Blueberry Bubblegum offers a calming and uplifting high, delivering a comprehensive full-body buzz. Its effects seamlessly blend complete relaxation for the body with a stimulated and inspired mental state. With a tested THC content of 24.6% we’re very proud of this grow.
Blueberry Bubblegum is an excellent choice for beginners or those desiring a high-yielding plant without adding undue stress to their daily routine. The outcome is a resilient plant boasting impressive and dense colas. As our Blueberry Bubblegum flowers matured during the meticulous curing process, they revealed an aroma perfectly aligned with the taste profile. The consumption experience is further enhanced by a delightful body effect, making it a gratifying for cultivators of all skill levels.
If you have any experience with Blueberry Bubblegum as a cultivator or consumer, please leave your thoughts in the comments section below. Thanks for reading, and as always, check out more articles like this in our grow report archive.
-
Disclaimer:
Laws and regulations regarding cannabis cultivation differ from country to country. Sensi Seeds therefore strongly advises you to check your local laws and regulations. Do not act in conflict with the law.

Senate Leadership Pushes End of Federal Prohibition Of Cannabis

Off To The Horse Races With Cannabis

The Future Of Cannabis After Rescheduling

A Happy Hippie’s Journey of Love, Cannabis, and Self-Discovery

But What about the UN Drug Treaties?

The Best Tips To Up Your Intimacy Game While High

What Can Consumers Expect From Marijuana Rescheduling

The Gilded Age Heiress Who Helped The Marijuana Movement

Tips For Your Body After Hours Of Sitting

Why Falling THC Test Results Matter

Distressed Cannabis Business Takeaways – Canna Law Blog™

United States: Alex Malyshev And Melinda Fellner Discuss The Intersection Of Tax And Cannabis In New Video Series – Part VI: Licensing (Video)

Drug Testing for Marijuana – The Joint Blog

What you Need to Know

Cannabis, alcohol firm SNDL loses CA$372.4 million in 2022

NCIA Write About Their Equity Scholarship Program

City Of Oakland Issues RFP For Employee Training Programs

It has been a wild news week – here’s how CBD and weed can help you relax

A new April 20 cannabis contest includes a $40,000 purse

UArizona launches online cannabis compliance online course
-
 Cannabis News1 year ago
Distressed Cannabis Business Takeaways – Canna Law Blog™
-
 One-Hit Wonders1 year ago
United States: Alex Malyshev And Melinda Fellner Discuss The Intersection Of Tax And Cannabis In New Video Series – Part VI: Licensing (Video)
-
 drug testing5 months ago
Drug Testing for Marijuana – The Joint Blog
-
 Cannabis 1011 year ago
What you Need to Know
-
 Marijuana Business Daily1 year ago
Cannabis, alcohol firm SNDL loses CA$372.4 million in 2022
-
 Education1 year ago
NCIA Write About Their Equity Scholarship Program
-
 Education1 year ago
City Of Oakland Issues RFP For Employee Training Programs
-
 Cannabis1 year ago
It has been a wild news week – here’s how CBD and weed can help you relax