

Autoflowers
How to Maximize Your Autoflower Yield
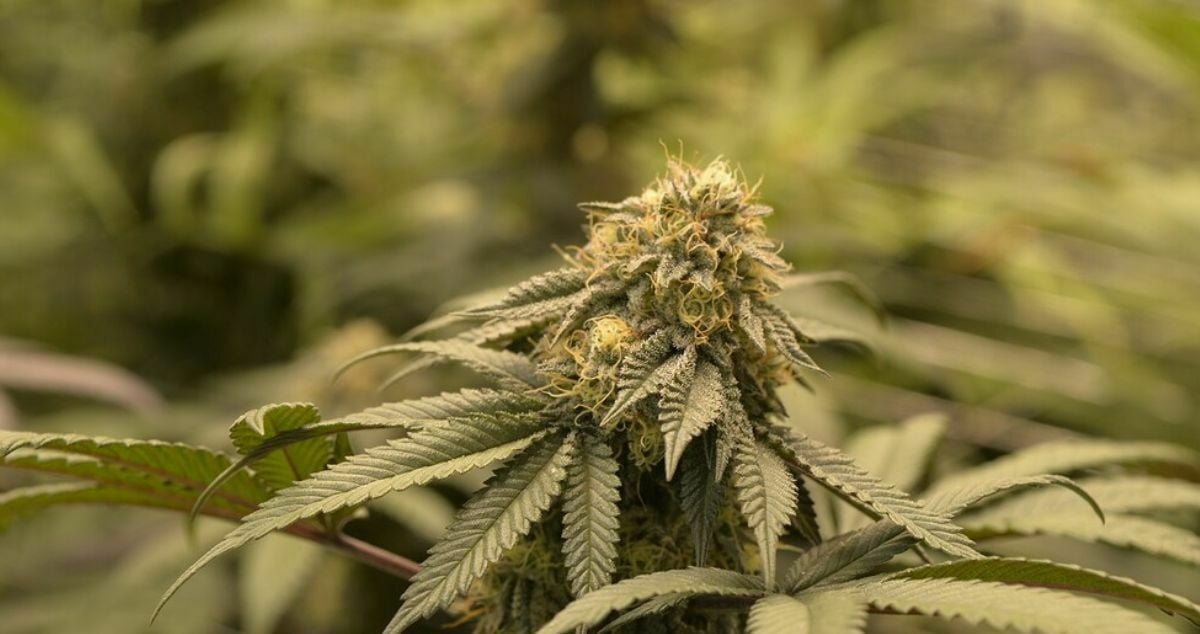
Regarding the wide world of growing, autoflowers have developed a reputation for low yields and quality. However, through the work of breeders and growers, those days are behind us.
Along with their hard work, there are various ways to help autoflowers reach their full potential. When asked how to maximize autoflower yields, it breaks down to training, nutrients, and environment.
Grow your autoflower cannabis plants indoors
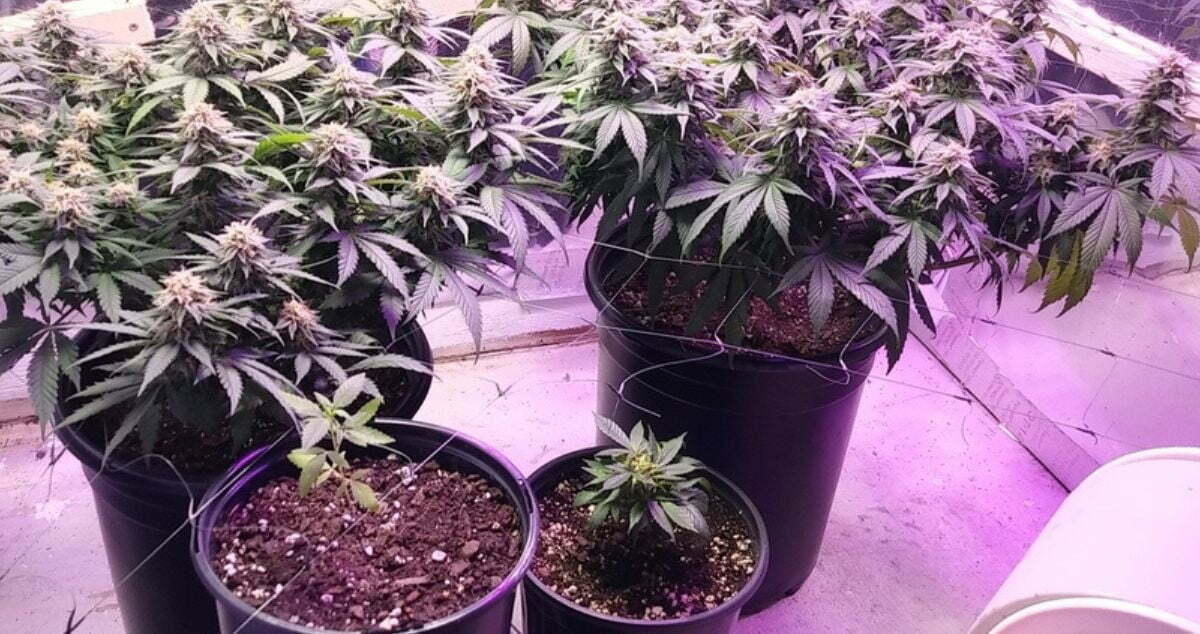
The best way to grow a high yield autoflower is to grow it indoors. Growing indoors assures that you’ll have complete environmental control of your crop, and you can maximize their conditions and, ideally, their output. By having an indoor grow, you reduce the number of variables that can ruin your crop, like diseases and accidental pollination, and optimize for aspects like temperature, humidity, and wind resistance.

Grow your autoflowering seeds in the same pot you harvest them in
To get the highest-yielding autoflowers, starting with a large pot is best to accommodate the entire plant’s growth. A small pot may restrict the plant’s growth, leading to lower yields. Additionally, transplanting the plant from a small to a large pot can cause unnecessary stress, slowing growth and reducing yields. Starting in the final pot also allows for better root development, as the roots can spread out and establish a strong foundation for the plant.
Don’t give your auto plants too many nutrients
Overfeeding your autoflowering plants can result in a nutrient burn, stunted growth, and lower yields. These plants have a shorter life cycle than photoperiod plants and, as a result, have a limited time to recover from overfeeding. Using a light hand regarding nutrients is best, starting with a lower dose and increasing it as needed.
High-yielding autoflowers run their course without nutrient lock-up, burn, or other deficiencies from feed issues. Additionally, monitoring the plant’s pH level in the watering runoff is essential to ensure optimal nutrient uptake and prevent defects.
There are ways to increase the yield of autoflowering seeds, Download my FREE marijuana grow bible to learn how to get high yield.
Make sure your autoflowering marijuana plant is getting the 18/6 formula for light
Autoflowering plants have a set life cycle, and their growth is not dependent on the light cycle. However, providing your plant with 18 hours of light and six hours of darkness can maximize its yield.
This light cycle ensures that the plant has enough light to photosynthesize and grow, while the six hours of night provide the plant with time to rest and recover. It is worth noting, however, that different genetics perform differently for other light cycles. If you have multiple harvests under your belt, try adding or subtracting an hour in flower to see the difference in your plant’s performance!

Use a bigger pot to grow your auto seeds
Using a larger pot allows your autoflowering plant to grow more roots, providing more space to absorb nutrients and water. A larger pot also ensures better aeration, which is essential for healthy root development.
A pot of at least five gallons is recommended, although growers can use larger pots for even higher yields. A big autoflower comes from having the perfect conditions for plant growth and giving your root zone the space and support it needs.

Buy Autoflowering Seeds
- Easy to grow
- Beginner friendly
- Guaranteed germination
- Grow guide available
Use airy grow mediums
Airy grow mediums, such as coco coir, allow for better aeration and drainage, ensuring that your plant’s roots receive enough oxygen. This results in faster growth and higher yields.
It is essential to choose a high-quality grow medium specifically designed for cannabis and contains the necessary nutrients for healthy growth. It is vital to understand that airy mediums require more oversight since they drain quicker, so be prepared to give your plants multiple daily feeds.
Add a cannabis root stimulant
Root stimulants like mycorrhizal fungi can help your autoflowering plant establish a robust root system. This results in faster nutrient uptake, healthier growth, and higher yields. These products are usually powder or liquid and can be added to the growing medium when planting.
Get strong roots and maximize your autoflower yield with ILGM Marijuana Fertilizer
Train your marijuana plants
Training your autoflowering plant can help maximize its yield by increasing light exposure, improving airflow, and increasing bud development. However, not all training methods are suitable for autoflowers, as these plants have a limited life cycle and can be easily stressed. Low-Stress Training (LST) is good, but pruning/defoliation, topping, FIMMing, and super cropping are not recommended as they can cause unnecessary stress and lower yields.
Can you use LST on your autoflowers?
When dealing with how to get bigger buds on autoflowers, I recommend Low-Stress Training since it gives your plants room to grow without the worry of shock stunting their growth. ScrOG and SoG are the two best LST methods for autoflowering plants.
ScrOG is a recommended training method, as it involves tying down the branches to expose more buds to light and opening the canopy for increased airflow. This is the absolute best method to train your autoflower and will give you the best answer to how big do autoflowers get.
Does HST work for autoflowering weed plants?
I do not recommend High-Stress Training methods for your autoflowers. HST creates too much shock in an autoflower because there is insufficient vegetative time for the plant to recover, leading to reduced yield and quality. Usually, HST is needed for photoperiod plants when you’re looking to manipulate certain aspects of the plant and give it enough time for recovery.
Can you use Sea of Green (SoG)
Sea of Green is the other preferred method of growing autoflowers; the caveat is that you need multiple small pots and many quality autoflower seeds. The SoG method involves growing many small plants instead of a few larger ones, allowing for more efficient use of space and light.
With autoflowers, the SoG method is beneficial because it will enable you to take advantage of the short vegetative stage and fast flowering time. By planting many autoflowering plants close together, you can quickly fill up a space and achieve high yields. Additionally, the smaller size of autoflowers makes them perfect for the SoG method, as they can easily fit into small spaces and require less vertical height.
Use reverse osmosis water and Distilled water
Using reverse osmosis (RO) or distilled water for your autoflowers can prevent the buildup of minerals and impurities in your growing medium, negatively affecting plant growth and yields. These types of water have lower dissolved solids, which can lead to more stable pH and nutrient levels in your growing medium. It is equally important to understand that to get the highest-yielding autoflower; you’ll need to use distilled water and nutrients.
Osmosis is quite an interesting topic, learn more about using reverse osmosis for growing.
Use proper nutrients and the necessary pH
Understanding when nutrients need to be introduced into the plant’s feeding schedule is vital to growing a high-yield autoflowering plant. Nutrient feeds are typically labeled with NPK to denote Nitrogen, Phosphorous, and Potassium, respectively. During vegetative stages, the plant needs a feed high in Nitrogen but low in Phosphorous and Potassium, with the opposite being true during the flowering stage.
Need nutrients for your autoflowers? Check out ILGM’s fertilizer set!

Practice progressive harvesting
Progressive harvesting can increase the yield and quality of your harvest by giving each branch time to mature and fully develop its trichomes. You’ll know when your auto is ready for harvest because the hairs on your buds will be amber, and the heads of the trichome stalks will be cloudy instead of clear.
Autoflowers yield differently from photoperiod plants. Learn how much an autoflower yields.
Provide proper support for your auto plant
A crucial part of growing your autoflower and ensuring you have the highest yield autoflower strains is supporting your plant and giving it whatever proactive or preventative treatments are needed for your environment. Cannabis plants communicate what they need and how they feel through many visual elements, so keep an eye on the leaves and always measure your runoff from feeding.
Use Co2
Using Co2 in your grow is an effective way to get a high-yielding autoflower because it helps propel photosynthesis. Plants take Co2 and turn it into glucose, which they use to make energy, enabling more robust growth. Depending on your airflow system, you can hook up Co2 canisters to your air delivery system.
Differences between autoflower vs photoperiod yield
Maximizing yield varies greatly between autoflowers and photoperiod plants. Autoflowers are more challenging to train than photoperiod plants because of their recovery timelines. The methods you use to make the highest-yield autoflower differs from methods needed for high-yielding photoperiods.
Autoflowers prefer less training
Autoflowers have a limited 8-10 weeks to grow, flower, and produce buds. They have a fixed life cycle that is not affected by the light cycle. This makes them ideal for growers who want to put less effort into plant training.
Autoflowers are known for their ability to grow small and compact, producing dense buds. They do not require topping or extensive training, making them a low-maintenance option for beginners.
Autoflowers prefer less fertilizer
Autoflowers prefer lower nutrient levels. Overfeeding can lead to nutrient burn, which can reduce the yield. The recommended level of nutrients for autoflowers is lower than for photoperiods. With their short lifespan, providing nutrients in the right amount is crucial to achieve maximum yield.
Stress harms the autoflower grow cycle
Autoflowers are generally hardy plants and can tolerate harsh conditions such as temperature fluctuations and light changes. However, they must be more amenable to significant stress, like topping, pruning, or transplanting. Any significant stress can disrupt their growth cycle, reducing yield. That said, providing them with a stable and comfortable growing environment is essential throughout their life cycle.
Photoperiod plants produce more when trained and topped
Photoperiods have a more extended vegetative phase, allowing them to grow taller and produce more. They respond well to high-stress training techniques such as topping, pruning, fimming, and low-stress training, resulting in increased yields. With proper training, photoperiods can produce multiple colas, producing a heavy harvest.
Photoperiod plants can be kept in the vegetative phase longer
One advantage of photoperiods is their ability to stay in the vegetative stage for an extended period. This allows growers to control the plant’s size, shape, and yield better. With the right light, photoperiods can be kept in the vegetative phase for several months, giving growers more time to train and prepare the plant for maximum yield.
Harvesting autoflower strains is generally easier than harvesting photoperiod strains because they do not require a change in light cycles to trigger flowering. Download My FREE Harvest Guide to know everything!
Thrive in nutritionally rich soil
Like autoflowers, photoperiods will have a reduced yield and added stress when given too many nutrients. Still, photoperiods need essential micro and macronutrients to help them sustain their size and bear quality fruits with a full spectrum of cannabinoids, terpenoids, and flavonoids.
Make sure you consider the right things when cultivating high-yield autoflowering plants. Growing autoflower plants indoors allows for total environmental control, reducing the number of variables that can ruin the crop and optimizing aspects such as temperature, humidity, and wind resistance. A larger pot, airy grow mediums, and cannabis root stimulants help promote root growth, nutrient uptake, and higher yields.
When training, use Low-Stress Training and ScrOG methods to avoid unnecessary stress that could lower yields, as autoflowers have a limited life cycle and cannot recover from HST methods. Providing 18 hours of light and six hours of darkness can also maximize autoflower growth during veg. One of the most significant factors you can account for before even putting a seed in the soil is picking the proper genetics for a yielding auto.

FAQs About High-Yielding Autoflowers
Are autoflower cannabis plants one and done, or can they have more than one harvest?
Autoflower cannabis plants can only have one harvest at a time; this differs from photoperiod plants which you can “reverse” back into a vegetative state. It’s best not to reuse autoflower plants or try to take clones from them since the shock will affect your yield.
When should I start training my autoflower?
Begin training your autoflower around week three; this allows the plant to get a bit more stretch and has more branches to manipulate. Knowing when to start training is a central point to how to get bigger yields from autoflowers.
What is a good yield for an autoflower?
For a good grow cycle with high-yield autoflower strains, a good yield for your plant should be anywhere between 100-300 grams depending on the genetic lineage of the plant.
How big do autoflowers get indoors?
Generally, autoflowers can reach heights between 1-3 feet, with some strains potentially growing taller due to the “stretch” from their genetics.
How big do autoflowers get outdoors?
Autoflowers grown outdoors can grow an average of 2-4 feet, yielding 50-150 grams.
Growing a great crop of autoflower cannabis requires attention to detail regardless of the growing medium you use. If you’re going to grow in soil, you should understand how to prepare (or purchase) the best soil for autoflowers.
The best soil for growing autoflowers in any environment should drain well and dry out on a daily basis. This will allow the plant to maintain a high metabolism and growth rate. Additionally, as a general rule-of-thumb, the best potting soil for autoflowers consists of about 65% soil and amendments and 35% aeration materials like coco coir and perlite for a 2-to-1-ratio.
This differs from what you may find in the stores, since most of the soils you’ll find in nature are one of the following:
- Clay: Higher pH (over 7.0) due to dense mineral & nutrient content; very fine particles that stick together, causing poor drainage and holding less oxygen.
- Loam(y) – Moderate-high pH(6.0-7.0) with ideal mineral & nutrient content, medium fine particles that hold water & oxygen well. These typically have good drainage and are a balanced mix of all 4 types but with higher clay content.
- Silt(y) – Moderate-low pH(5.0-6.0) with lesser mineral content than loam soil; medium-coarse particles that drain well and hold oxygen. This is also a balanced mix of all 4 types but with higher sand content.
- Sand(y) – Low pH (under 5.0) due to its low mineral & nutrient content. This soil has coarse particles that don’t stick together and has excellent drainage with high oxygen levels.

Creating the best soil for autoflowers
To reduce the chances of making costly mistakes, we need the right ingredients to make the best soil for autoflowers. I suggest using a simplified super soil recipe (or purchasing super soil here) so that you only need to use plain water (preferably filtered of chlorine) without additional fertilizer to feed your plants.
Which ingredients make the best super soil for autoflowers? Start by looking at some of the base ingredients used for making soil today. We will look at the best nutrients for autoflowers in soil so we can craft the best water-only soil for autoflowers to use for your grow. If you want to grow your own autoflowers from seed to harvest? Check out our legendary grow bible for a full guide!
Autoflower base ingredients
Coco coir (coconut fiber) is a biodegradable medium made from the fibrous husks (pith) of coconuts.
Coco coir can hold a lot of water and oxygen while maintaining its structure, making it very versatile for use as a growing medium.
It is durable, easy to use, rot-resistant, and fairly inexpensive, with a slightly acidic pH of 5.5-6.5 Some growers use it as a stand-alone medium with perlite or clay pebbles for aeration, but this method also requires regular use of water-soluble fertilizers.

Perlite is made from heating and expanding sand or volcanic glass into a semi-solid puffed structure similar to puffed wheat cereal. This allows perlite to be both lightweight yet structurally sound enough to create aeration and adequate drainage in potted plants. Perlite is one of the main ingredients of almost all bagged and bulk soil types. Perlite can also hold water and nutrients on its irregular surface area.

Vermiculite is a softer, more porous version of perlite made by heating and expanding mica, a softer type of rock. It is useful for its ability to absorb water, nutrients, and air. It is used in hydroponic wick applications and outdoor growing containers to hold extra moisture, especially in drier climates.

Biochar is made from slow-burning (charring) organic materials like wood at elevated temperatures in a process that uses little to no oxygen (pyrolysis). The resulting charred solids will improve a soil’s ability to hold water, absorb nitrogen, and increase soil microbial activity. Biochar is slow to break down and has been proven to sequester carbon.
A great crop starts with the proper genetics for your situation, a balanced soil mix, and an ideal growing environment. This will help ensure a successful cultivation effort and a rewarding harvest. ILGM also has their own curated fertilizers and grow kits for autoflowers that can enhance your harvest! Check out our selection below!

Buy Cannabis Nutrients
- Fertilizer
- Grow kits
- Plant Protectors
- Grow bible
Nutrients for autoflowering plants
Autoflowers won’t require the type of nutrient-dense soil mix used for photoperiod cannabis cultivars with longer growth cycles. That type of soil mix can potentially cause nutrient burn and stunt or slow plant growth. Remember that autos are native to areas with poorer soil and climate conditions. It’s important when creating the best soil to use for autoflowers that it meets their needs without causing harm. The best soil medium for autoflowers will have adequate aeration and absorption and won’t contain an excessive amount of fertilizer and nutrients.
Are soil requirements different when growing autoflowers outdoors?
The best soil mix for growing autoflowers should suit the cultivars being grown and the environment they’ll be grown in. It’s important to properly assess the area you will use for growing outdoors.
For example, a small yard with a fence or tall surrounding foliage may block the wind or add shade versus a farm or open field which has less restriction.
If you’re uncertain about your conditions or the best method for growing autoflowers in soil, use

An aerated mixture and add or top dress with worm castings or a denser mix if it dries too quickly.
Photoperiod cultivars grown outdoors can have slightly different soil aeration requirements than those grown indoors because they’re subjected to more temperature variation and extremes. Conditions that dry plants quickly, such as wind and bright sunlight, are more present in an outdoor growing environment, especially during the long days of the peak summer season.
Outdoors, the soil mix can be a bit denser, with slightly less aeration. A taller plant in a heavier container will also have an easier time staying upright when windy conditions prevail.
How can you tell if your soil is healthy or not?
The two main factors that most affect the overall health of your soil and plants are the amount of water and the amount of food (fertilizer) they get. Cannabis plants need the right amounts of each to thrive, but overdoing it will cause harm and potential problems.
Healthy soil should absorb water and hold it in the organic matter. At the same time, it should drain excess water easily and fairly quickly within a 24-hour period. This will keep the microbiology alive and maintain a functioning root zone. Healthy soil maintains an even balance of oxygen and moisture in the root zone and has a pleasant earthy smell.
Unhealthy soil tends to have a rotten (sulphur) smell, usually caused by overwatering and/or overfertilization. This drowns the microbiology and displaces the oxygen in the root zone, creating anaerobic conditions (no oxygen) which end up killing the roots and eventually the plant.
Proper watering is key
It is critical that your soil mix has enough pore space in it to maintain healthy oxygen levels. Overfertilization can cause damage to plant tissue, soil microbiology, and soil texture.
Proper hydration (watering) is one of the toughest concepts for a new grower to master, as it’s nearly always learned by trial and error (mostly error if nobody is teaching you). As a landscape installer, indoor plant technician, and cannabis cultivator, I’ve seen more plants die from drowning than for almost any other reason.

If you’re unsure you gave it enough water, you tend to give it a little more. The plant starts turning yellow as the soil’s nitrogen evaporates. Is the plant sick? It’s turning yellow. Well, I better give it some more water. More is better, right?? WRONG!
The advice I would give to any new grower is to eventually learn, by feel, the proper weight of your plant In its container after you have watered it correctly. When in doubt, always err on the side of caution. It’s much easier to save a plant that is wilting than one that is drowning!
The benefits of organic soil when growing autoflower seeds
If you can’t make the best living soil, make the best organic soil for autoflowers.
Using organic soils for your auto flower cannabis seeds will give your plants a slow & steady release of nutrients. This will allow them to maximize their growth rate after transplanting and reduce the need for supplemental feeding. It will reduce the risk of nutrient burn and will help ensure a quality harvest with minimal effort and interruption. If you’re search for the best autoflowering seeds with guaranteed germination, hop on over to ILGM by clicking the button below!
Buy Autoflowering Seeds
- Easy to grow
- Beginner friendly
- Guaranteed germination
- Grow guide available
Common amendments used in making organic soils and living soils for autoflowers
Bat Guano is the accumulated excrement of seabirds or bats. Guano is a highly effective fertilizer due to its high nitrogen, phosphate, and potassium content, all key nutrients essential for plant growth. It is used as an organic fertilizer and soil conditioner. It has a high amount of organic matter. Bat guano feeds soil bacteria and is high in nitrogen, which gives plants a quick boost of green growth. https://en.wikipedia.org/wiki/Guano

Worm Castings are the end-product of the breakdown of organic matter by earthworms. Worm castings are a nutrient-rich organic fertilizer and soil conditioner in a form that is relatively easy for plants to absorb. Worm castings (also called vermicompost) are sometimes used as an organic fertilizer. The earthworms grind and uniformly mix minerals in simple forms so plants only need minimal effort to obtain them. https://en.wikipedia.org/wiki/Vermicompost

Manure is organic matter that is used as organic fertilizer in agriculture. Most manure consists of animal feces; other sources include compost and green manure. Manures contribute to the fertility of soil by adding organic matter and nutrients, such as nitrogen, that are utilized by bacteria, fungi, and other organisms in the soil. Higher organisms then feed on the fungi and bacteria in a chain of life that comprises the soil food web.

Kelp Meal (dried & ground kelp) is a completely natural, organic product and a source of over 70 vitamins and minerals. Organic kelp fertilizer is valued for its micro-nutrients as well as its macro-nutrients of nitrogen, phosphorus, and potassium. Organic kelp fertilizer is dried seaweed which is used to encourage healthier plant growth, promote greater fruit and vegetable yields, and to overall enhance the general appearance of a plant or garden.

Mycorrhizal fungi help break down nutrients and make them more available to a plant’s roots through a symbiotic association between the fungus and the plant (“root fungus”). These fungi play important roles in plant nutrition, soil biology, and soil chemistry and will help increase the nutritional uptake and growth rate of your plants. https://en.wikipedia.org/wiki/Mycorrhiza
Bone meal & blood meal are the processed and dried by-products of animal slaughter operations used primarily as a source of phosphorus and nitrogen, respectively. Both have well-known uses in farming & agricultural operations, but in recent years have fallen out of favor with many farmers out of concerns over higher levels of hormones and other substances used on animals which are processed in those facilities. These powdered fertilizers can be quite irritable and dangerous to inhale.

It is a best practice to use a respirator or fine particle mask to protect your lungs when making or mixing soils and fertilizers, as well as a hat, gloves, eye protection, and long sleeve clothing to keep the dust off your hair and skin.
What is the best soil for autoflowers? I often hear this question, and the answer depends on many factors. I prefer to grow my cannabis using organic amendments and practices, so I prefer to use a living soil that I make myself. I have the time and materials to make the best living soil for autoflowers, but you may not, and that’s just fine. Use what you have available to you or what you can afford.
Remember, with a faster growth cycle and automatic flowering, there is less margin for error. Autoflowers won’t have time to recover from mistakes. It’s important that we understand this when deciding on the best soil for growing autoflowers.
Using the best soil for autoflowers will simplify your cultivation effort and make it more enjoyable, as the right soil mix will do most of the work for you. Nature performs marvelously under the right conditions. Cultivation should be a fun and enjoyable experience. It can help you understand the nature around you and within you. Cultivation can be your meditation. Learn more tips on growing marijuana at ilovegrowingmarijuana.com and don’t forget to Let it Grow!
FAQs about the best soil for auto flowers
How much soil does an auto flower need?
A good rule of thumb is to budget for 1 gallon of soil per 1 foot of vertical growth. (Convert to liters and cm?)
Can you use super soil for auto flowers?
Yes, you can, but you may want to dilute your super soil, or create a pocket of potting soil for transplanting into. That way you reduce the chance of having nutrient burn when using or transplanting, and the plant will have time to adapt and grow into the super soil when it’s ready.
How wet should soil be for auto flowers?
It’s important not to overwater your autoflowers! You want to make sure your soil has plenty of oxygen, especially during the first month of growth as they are not the vigorous growers that photo cannabis cultivars are.
Do bigger pots mean bigger buds?
Genetic factors will determine the overall size of your plants. Bigger plants and bigger buds usually result from having a bigger light source: Plants grown outdoors in full sun tend to be larger and have bigger buds than plants grown indoors under artificial light.
How can I make my auto flower grow faster?
The secret to faster growth is making sure you have the right mix of oxygen and water in the root zone, and not overwatering. Higher levels of oxygen in the root zone will help increase the overall metabolic rate of the plant and allow the plant to achieve a greater biomass (roots, shoots, and leaves).
Proper sizing of growing containers is equally important. If you transplant into a container that’s too big, the plant may grow vertically slower at first because the roots are exploring and searching for the bottom before the plant will add more top growth and weight than it can support.
Germinating autoflower seeds is an important first step on your grow journey. Keeping sterile conditions and controlling the environment will propel your plants toward success. Autoflower seeds can be germinated using common techniques; what happens after germination makes the autoflower process slightly different. By giving your seedling a healthy, stress-free start, you establish a strong base for high yields.
Should you germinate autoflowering seeds differently?
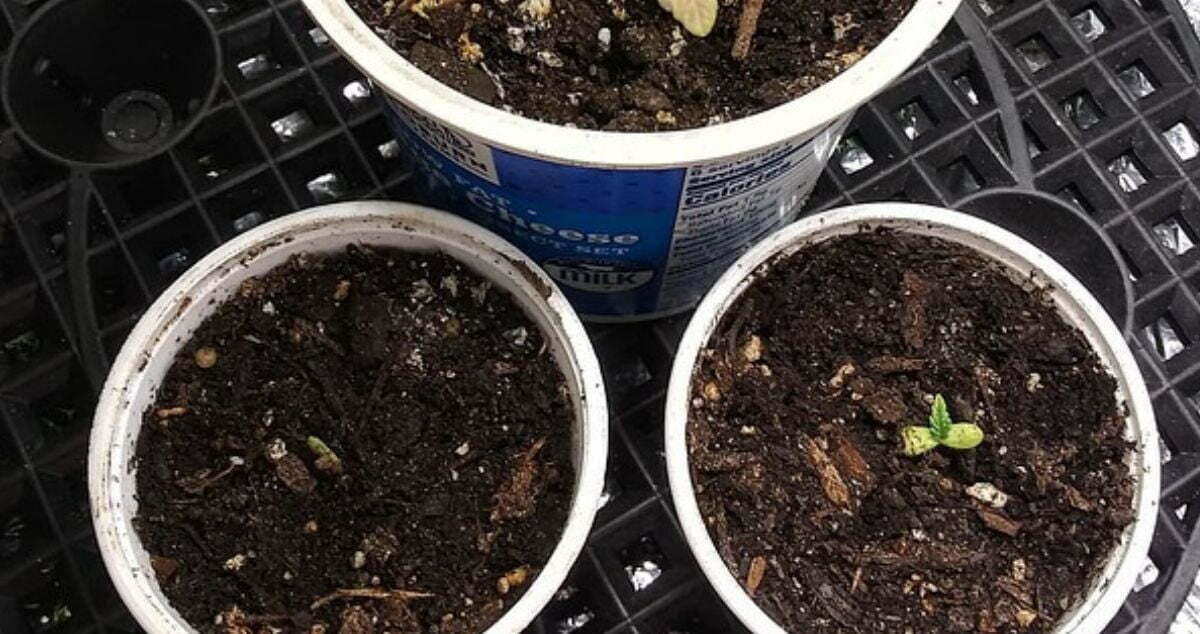
When people think of temperature, they usually think of the air around them. When germinating autoflower seeds, growers must also be conscious of the soil temperature. The best way to germinate autoflower weed seeds is in an air temperature of 21°C – 28°C (70°F – 82°F). The ideal soil temperature would be between 20°C – 30°C (68°F – 86°F). You can achieve this with controllable heat mats, but they aren’t necessary on every occasion.
The main difference for growers germinating autoflower seeds compared to photoperiod seeds is that autoflowers should be placed into the final container once sprouted. Photoperiod seeds are commonly transplanted into larger pots as the roots reach the bottom of the container. Some hypothesize that with autoflower strains, this action initiates flowering. By using the larger final pot right away, autoflower plants get maximum vegetative time.
Find a step by step germination guide for your autoflowering seeds in Robert’s Grow Bible below!
Should I germinate autoflower seeds in the dark?
All seedlings require light. Actively germinating auto seeds, however, prefer the dark. Not all seeds from the plant kingdom need darkness; some prefer light, but autoflower germination is best under dark conditions. Creating a dark environment by using something as simple as a cupboard drawer will do.
You need autoflower seeds before you can germinate them! ILGM has some of the most popular and easy to grow autoflowering seeds available. Click below to see our collection!
Buy Autoflowering Seeds
- Easy to grow
- Beginner friendly
- Guaranteed germination
- Grow guide available
How to germinate autoflowering seeds
Equipment and supplies
Growers don’t need to break the bank by buying special equipment to germinate autoflowers. The two most common methods of germinating autoflower seeds involve a glass of water and the other, a wet paper towel. The space required to germinate auto seeds is also minimal. Many times a dresser drawer or a spot on the shelf in a dark closet will do fine. Direct sow into the soil is also a popular option.
Learn the best tips and tricks to maximize your autoflower yield in our dedicated guide!
If growers want to invest in specialized gear, some options can assist the germination process. Cloning and seedling kits, consisting of a tray and clear dome, are popular. Water in the base of the tray condensates on the dome, which helps maintain humidity levels. Popular germination media to place inside those domes include rock wool cubes, peat pellets, and seed plugs.

Preparing medium
Preparations will vary depending on your final medium, whether it be coco, soil, living soil, or hydroponics. The latter is unique in that there isn’t a true medium the roots live in. Oftentimes, roots grow around small clay-expanded balls in net pots. Be sure to wash these balls before use and check their runoff water’s pH before placing your germinated seedling in the net pots.

The main consideration with other mediums is to get them pre-moistened. Roots, especially new roots, need an even balance of water and oxygen to succeed. Coco has excellent aeration and can be given more water than traditional soil. When germinating autoflower seeds in soil, add a slight amount of water around the buried seed, not on the outer walls of the container. Living soil in general, needs to stay wet at all times to support the microbial colonies, but be careful not to drown the new seedling.
Tips before germinating auto seeds
Keep your germination area clean
Establish the location you wish to germinate your autoflower seeds in and confirm that the environment meets the required temperature, humidity and darkness needed. Keep a clean environment. Prevent dirt and dead leaves accumulating in tent corners. Don’t have small pools of spilled water on the floor. Reduce the chance for pathogens to enter the garden and kill your fresh seedlings.
Don’t touch the first root of your autoflower seedling
Don’t touch the radicle, which is the first part of the seedling to emerge from the shell. People often refer to it as the “little white tail.” The radicle is fragile. Do not touch it with your hands. Use tweezers to plant the germinated autoflower seeds into your medium. Clearly label your seedlings. Have tags and sharpie next to you as you move the germinated auto seeds into your medium. Immediately label each container with the strain name.

Do you have to soak autoflower seeds?
Autoflower seeds, just like photoperiod seeds, have a hard outer shell. Soaking the seeds in water for 12-24 hours before germination can soften the shell, making it more permeable for water to enter. Depending on your germination method, this step may not be needed. Older seeds tend to have thicker shells; soaking older seeds first often helps with germination rates.

The pH of the water you use to soak or germinate seeds is important. It would be bad news if the sensitive radicle emerged into a hostile environment. Everything a gardener does is designed to make the plant comfortable in its surroundings, autoflower germination is no different. Having the right pH can have an impact on your success.
Find out more information in this related article about why pH when germinating autoflower seeds matters.
How long does it take for an autoflower seed to germinate?
The time it takes an autoflower weed seed to germinate in the ideal environment will depend upon a few things. Age is a large determining factor. Older seeds generally take a few more days to germinate than fresh autoflower seeds. This is due to reduced vigor over time, which occurs naturally but can be accelerated by poor seed storage.
Vigorous autoflower seeds will crack and expose the radicle typically within 36-48 hours when using the soak or paper towel method. If placing your autoflower seeds directly into the soil or into a rockwool cube or seed plug, 5-7 days is common. In the latter method, the seedling is more established than the tiny tail we might see in earlier-mentioned methods. All seeds should emerge with their cotyledon* first, which is where they get the energy to grow until newly formed leaves can photosynthesize.
* The cotyledon is essentially the “embryo” of a plant seed. It’s packed with nutrients for the first days of a developing seedling. Later, once the seed has fully sprouted, it will grow into the seedling’s first leaves.

How many weeks/days is an autoflower seedling stage?
Once you see the cotyledon above the surface, the autoflower seedling stage has begun. This stage lasts roughly 10-14 days as the root system establishes. Usually, the plant transitions into the vegetative stage when the autoflower seedling produces its first five-fingered set of leaves.
How often should I water autoflower seedlings?
It is better to give soil-based autoflower seedlings regular small amounts of water than a lot at once. Do not drown the small and fragile roots. Your autoflower will drink more as the root zone develops.

The best methods to sprout autoflowering seeds
Paper towel germination method
Time needed: 2 days.
- Wet and cut your paper towel in half.
Wet a paper towel and ring out roughly 80% of the water.
- Place seeds inside the paper towel.
Fold the paper towel in half and ensure the seeds are in full contact with the paper towel.
- Place the paper towel in an open plastic bag to retain moisture.
Place this in a warm, dark location. Check daily to ensure the paper towel stays moist.
- Transfer radicle to your grow medium.
Once the radicle emerges 0.7 – 1.3 cm (1/4” – 1/2”) from the autoflower seed, place it into your medium with the tip pointing down.
Want to know what the best nutrients for autoflowering cannabis are? Checkout our autoflower nutrient guide!
Soaking overnight in a glass of water

- Step 1 – Pour pH’d water into a glass. It does not need to be deep, but enough for the autoflower seed to float and sink to be fully submerged.
- Step 2 – Add your seeds into the water. Wait until the radicle emerges.
- Step 3 – Once the radicle emerges 0.7 – 1.3 cm (1/4” – 1/2”) from the autoflower seed, place it into your medium with the tip pointing down.
Using a germination chamber
There are many kinds of germination chambers. The principle behind them is that they are an enclosed area where temperature and humidity can be set and maintained. In the commercial environment where 1,000s of seeds are germinated simultaneously, these devices are a time and labor saver.
Rockwool cubes and peat pellets
The process of germinating autoflower seeds in rockwool or germinating autoflower seeds in peat pellets is very similar. In both instances, you place your autoflower seed into a predrilled hole and then moisten the media. The hole firmly holds the autoflower seed, giving it the contact, moisture, and darkness it needs to germinate.
Want to know what to do once your buds are ready to harvest? Download our free harvesting guide for a comprehensive overview!
Planting directly in soil
Many growers directly germinate autoflowers seeds in soil. To do this, place the autoflower seed about 0.7 cm under the soil with the pointed side down. Provide the soil in the immediate area with a small amount of water. Some people ask, how long does it take for autoflower seeds to germinate in soil? If the temperature and moisture levels are on-point, the seedling should emerge within 5-7 days.
Germinating autoflower seeds can use the same processes as germinating photoperiod seeds. A wet paper towel, a glass of pH’d water, rockwool, peat pellets, or direct sow can all be effective. In each scenario, the temperature and humidity must be in the desired range.
Want to try out some of the best autoflower seeds? Checkout our mixpack for your next grow!

Buy Autoflower Mix Seeds
- Amnesia Haze Autoflower
- Blueberry Autoflower
- Northern Lights Autoflower
- Saves up to $168
But what if your autoflower seeds are not germinating?
Evaluate your process, and figure out the problem. Do you want a guaranteed 100% success rate? Order your autoflower seeds from ILGM. We stand behind our products and the education we offer by guaranteeing germination on all our ILGM seeds. What is your favorite method for germinating autoflower seeds? Do you have more than one way? Share it in the comments, and also let us know your favorite ILGM autoflower strain. Stay groovy!
Citations
Autoflower varieties are unique, thanks to the exclusive trait allowing these plants to flower under different light cycles. With a handful of autoflower lighting schedules to choose from, curious growers want to know, what is the best light cycle for autoflowers? Light drives growth, but is there such a thing as too much light, do plants need to sleep? What about the light spectrum for autoflowers, does that make a difference? Fortunately, we have the information you need to make an informed decision on your autoflower light cycle.
What’s the best light schedule for autoflowers?
Although there are a number of possible light schedules for your autoflowers, there are four commonly used light cycles for autoflowering strains.
| Light Schedule | 24/0 | 20/4 | 18/6 | 12/12 |
|---|---|---|---|---|
| Pros | Maximum light exposure | Lots of photosynthetic activity | Balance of growth vs. recovery | Lowest power bill |
| Cons | Highest power bill | Lighting may produce too much heat if growing in a warm region | May not be enough light if using a low-powered light source | Reduced yield potential |
24/0 light schedule for autoflowers
At face value, it is easy to assume this would be the best lighting schedule for your autoflowering strains. Plants need light to perform photosynthesis, which drives growth. However, there is such a thing as too much light. Cannabis plants exhibit this with droopy or tired-looking leaves. The appearance is similar to a thirsty plant.
If the light intensity is too high and the light is positioned too close to the canopy, this combination can create leaf burn and discoloration. A 24/0 light schedule for autoflowers is not widely used. The largest benefit it offers is to heat the grow room if you are growing in colder climates.
If you want to learn more about growing cannabis plants from the seedling stage to the harvest stage, and the best light schedule for your plants, download our famous Grow Bible below!
20/4 light schedule for autoflowers
This is a popular autoflower light schedule for growers. This schedule provides lots of light to fuel the creation of sugars and carbohydrates via photosynthesis, but it also provides the plant with a rest period. During the dark hours, many beneficial phytochemical reactions occur in the plant (2).
Some autoflower growers will switch from an 18/6 light schedule to a 20/4 lighting schedule for their autoflowers once the plant begins to show signs of flowering. Regular and autoflower varieties benefit from a higher light intensity as they progress to the flowering stage.
18/6 light schedule for autoflowers
An 18/6 lighting schedule for autoflowers is widely used by autoflower growers. It has the benefit of encouraging healthy growth, which includes a rest and recovery period during the dark cycle. This is also a common light cycle for photoperiod plants in the vegetative stage, meaning your autoflowers can be flowering in the same tent, maximizing a grower’s footprint.
Over the course of the average autoflowers lifecycle (90 days), an 18/6 lighting schedule is best for your autoflowers can save 180 hours of electricity compared to a 20/4 light cycle. This schedule can also reduce the heat needed to be managed by other equipment in the grow room.
If you want to know the best light schedule for all types of marijuana plants, check out our guide on: What is the best light cycle for weed plants?
12/12 light schedule for autoflowers
A common yield-limiting factor in the indoor garden is the lack of lighting. Lower-powered lights or shorter lighting durations will produce lower yields. For this reason, many autoflower growers stay away from this lighting schedule. If a grower has a very high-intensity light, this can still be a viable option.
An autoflower plant will continue to flower using a 12/12 lighting schedule, which means it can be grown alongside flowering photoperiod plants. This flexibility gives growers with only one flowering area the ability to grow a variety of cannabis types. For growers trying to reduce heat in the grow room, 12 hours of light daily produces less heat to mitigate. Although not a common lighting schedule for autoflowers, it has its place.
Now that you’ve learned about the best light schedules for autoflowering seeds, head over to our store to purchase your very own autoflowering seeds and get to growing!
Buy Autoflowering Seeds
- Easy to grow
- Beginner friendly
- Guaranteed germination
- Grow guide available
What light spectrum should I use for autoflowers?
Determined by wavelength and energy, there are seven wavelengths of color in the visible spectrum (3). These wavelengths are measured in nm (nanometers). Plants react in predictable patterns when grown under specific wavelengths of light. This knowledge can be used to select the best light spectrum to grow autoflowers, depending upon the growth stage.

6500k blue light during the vegetative stage
The K at the end of 6500k stands for Kelvin. Kelvin temperature identifies the perceived color emitted by the light source. Compact fluorescent lamp (CFL) bulbs are commonly labeled in Kelvins ranging from 1000k to 8000k. The higher the number, the bluer the light will appear. Kelvins are not the same unit of measurement as nm, which measures the wavelengths of light.
Blue light sits in the wavelength range of 400-500 nm. Blue light regulates the opening of the stomata, which control transpiration and uptake of CO2 (4). This spectrum is also used in the photosynthesis process, which drives growth. Autoflowers grown under this spectrum generally have thicker stems and shorter intermodal spacing. Blue light has been shown to suppress extension growth. Ceramic Metal-Halide light (CMH) bulbs are known for their characteristic blue color output, making them a popular choice for the vegetative stage.

2700k red light during flower
This Kelvin range appears to the eye as a yellow, orange, reddish combination often described as warm lighting. High-pressure sodium (HPS) bulbs are commonly known to be in this range, giving them a distinct color signature. The visible spectrum for red light sits in the 620-700 nm wavelength range. Red light has been shown to increase flower production but can cause stem elongation. The red spectrum is also the most efficient group of wavelengths for powering photosynthesis.
Although these two colors are highly beneficial to the growth of autoflowers, growers will not achieve optimal results with red and blue lighting exclusively. The best light spectrum for autoflowers includes a wider range of wavelengths, often referred to as full spectrum lighting.

Common questions about light and autoflowers
Do I even need to change the light schedule for autoflowers at all?
No, you do not need to change your lighting schedule to trigger flowering in autoflower varieties. Autoflowers have an internal clock that will initiate these changes. If growers want to switch their lighting schedule while growing, this will not negatively impact the plant.
Do Autoflowers need darkness? And Why?
Autoflowering plants do prefer a period of darkness. It is completely possible to grow an autoflower on a 24/0 light schedule, but the results will be less than optimal. Plants undergo chemical processes during the dark cycle, which contribute to the health, vigor, and pest resistance of the plant. By giving autoflowers at least a few hours of rest each day, growers can increase their yields.
What are the total light hours recommended for autoflower seeds?
This is the most pertinent question when determining the absolutely best lighting schedule for autoflowers. To answer this question most effectively, growers must know their DLI (daily light integral). DLI measures the total amount of Photosynthetically active radiation (PAR) received in a day as calculated by intensity and duration that arrives at the canopy. This calculation is also known as Photosynthetic photon flux density (PPFD).
Cannabis plants will perform best under varying DLIs during different stages of growth. Seedlings need less light and, therefore, less DLI. As the cannabis plant grows, the DLI requirement will increase. Flowering plants produce best with a 40-50 DLI and roughly 25% lower for the vegetative stage. Whether growing autoflowers or photoperiods, the DLI numbers remain constant. The variable that changes is duration.
| 24/0 | 20/4 | 18/6 | 12/12 | |
| DLI of 15 = PPFD of | 174 | 209 | 232 | 348 |
| DLI of 30 = PPFD of | 348 | 417 | 463 | 695 |
| DLI of 40 = PPFD of | 463 | 556 | 618 | 927 |
| DLI of 50 = PPFD of | 579 | 695 | 772 | 1158 |
This chart represents the level of PPFD needed to hit optimal growth potential under the different light schedules.
Lighting manufacturers will commonly publish PPFD charts for their lighting online. To find the best lighting schedule for autoflowers under your own light, find the PPFD of your light. The recommended hours will be directly related to the intensity and quality of the light source. Once you know your PPFD, use the chart above to set your autoflower lighting schedule appropriately. Knowing that you can calculate the total light hours for your autoflower seeds.
How far should an autoflower be from the light?
There are many variables to consider, but a constant principle is that the light distance from the canopy will change depending on the age of your autoflower. Lights will be placed furthest away during the seedling stage. Flowering is the stage when growers keep the light closest to the canopy.
Want to know the optimal lighting conditions for all types of seeds? Check out our cannabis lighting guide!
Lights placed close to the canopy will have a higher PPFD in the center of the canopy, but the PPFD will be far less in the corners. Raising the light will provide a more even distribution of PPFD, but those numbers will be lower. It is important to know that light follows the inverse square law in regard to distance (6).
**Inverse Square Law relates to the intensity of the light on an object at different distances from the light source.
A light source at a distance of one meter from a floor is lighting one square meter (1×1), which is receiving 100% light. At a distance of two meters from the floor, the light now covers four square meters (2×2), which is receiving 1/4 of the light than it received at one meter away (1 m2 vs 4 m2). At a distance of three meters from the floor, light is now covering nine square meters (3×3), and receiving only a ninth of the light compared to one meter away (1 m2 vs 9 m2).
As you can see, light intensity rapidly falls off the further from an object the light source is. It doesn’t follow a linear reduction. Instead of decreasing in equal increments, each interval is decreased by a factor of the base.**
Life stage, intensity, and distance are important things to consider. Many lighting manufacturers will provide recommendations on their websites. The chart below shows common hanging heights for commonly used lighting sources.
| Plant growth stage | LED (600W+) | HID (MH/HPS) (1000W) | CFL |
|---|---|---|---|
| Seedling | 20-24” | 32-36” | 10-12” |
| Vegetative | 16-18” | 20-24” | 8-10” |
| Flowering | 12-14” | 14-18” | 6-8” |
What are the best lighting options for growing autoflowering cannabis indoors?
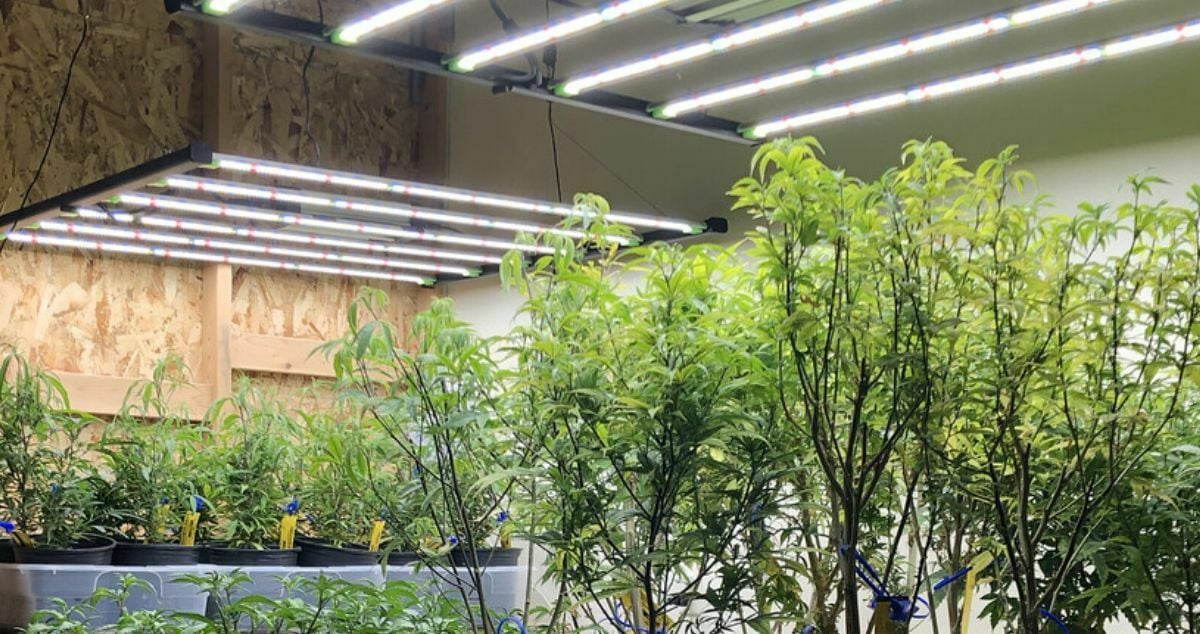
LED
Over the past ten years, lighting companies have poured millions of dollars into the research and development of this lighting sector, primarily fueled by demand from indoor gardeners. As the discoveries were made and the implementation refined, LED now stands as the top lighting choice for growing autoflowers.

The efficiency per watt has surpassed HID/HPS systems. Color spectrums can be precisely tuned and, in some cases, adjustable by the grower. LED lighting converts more energy into usable light. It also does so with less heat signature aimed at the canopy. The lower cost of entry and savings on energy bills are all reasons why growers are switching to LED.
High-intensity discharge lamps (HID lamps) – MH/HPS
HID systems were the powerhouses of indoor gardening. They have been the go-to lighting solution for gardens growing more than a few plants at a time. The cost of entry is low, which makes them more accessible. Autoflowers will grow under both metal-halide (MH) and HPS exclusively, but it is preferred to switch bulbs depending on the stage of growth.

MH is preferred for the vegetative growth stage of autoflowers due to the boost in the blue spectrum. Autoflowers prefer a bump of red spectrum lighting during flowering and the HPS bulb suits that need perfectly. Growers in cold regions can take advantage of the high heat output from HID systems to assist in heating the grow space during winter months.
CFL
This type of lighting has the lowest cost of entry, although you will need several to successfully grow a meaningful harvest. CFL bulbs come in various shapes, colors, and power outputs. Growers can find the right CFL bulb to grow autoflower plants based on their needs. Because CFL bulbs have a lower heat signature than HID or LED systems, CFL lighting can be run closer to the canopy. This is an advantage for growers with low ceiling clearance.

Conclusion / Summary
The best lighting schedule for autoflowering plants will be custom to each grower, but the requirements of the plants remain the same. Using the information and charts provided in this article, growers can confidently select the best lighting schedule and hanging height for their autoflowers.
Lighting, or lack thereof, is one of the largest yield-limiting factors. Use this information to grow the best autoflowers on the block. Be sure to check out more of our insider tips by downloading the ILGM Grow Bible. Please let us know what you are using to illuminate your autoflowers and how it stacks up on the PPFD chart in the comments below.
Additional FAQs
Is It okay to change the lighting cycle during the grow?
Yes, unlike photoperiod plants, the growth cycle of autoflowers is not tied to light hours. The majority of autoflower growers will pick a lighting schedule and stick to it. Some growers will increase the lighting hours during the flowering stage to increase DLI.
How do I know if my autoflower is getting too much light?
The most conclusive way to know if your autoflower is getting too much light or not is to calculate the DLI. There is such a thing as too much light, and this will result in diminishing returns. There is a point where the amount of light can damage the plant.
What are the first signs of stress?
Commonly when autoflowers receive too much light, there is also a heat buildup at the canopy level. Too much heat will result in the leaves folding upwards like a taco. The more severe the taco, the likelier there is a heat issue. Autoflowers also tend to transpire more to deal with extra heat, and this can be manifested by the very edges of the serrated leaf portions curling upwards.
Some LED lights can put out very intense light without much additional heat. The most obvious sign the light is too intense will be manifested by the bleaching of bud tips and occasionally on the foliage. In most cases, the foliage will show nutrient deficiencies or toxicities first. The extra light and heat create rapid transpiration and root uptake, which can deplete the nutrient reserve in the soil. This reaction can also draw too many nutrients into the tissue as the plant seeks to pull in more water.
Sources:

Tips For Your Body After Hours Of Sitting

Why Falling THC Test Results Matter

How Do You Get THC Out of Your System Fast?

MedMen, The $1.7 Billion Apple Store of Weed, Goes Bankrupt Just as Marijuana Gets Rescheduled in America

US cannabis business licenses down 6% in first quarter of 2024

The Economic Impact of Cannabis

“A big deal”: What the feds’ move to reclassify marijuana means for Colorado cannabis

Star signs and cannabis strains: May 2024 horoscopes

Yesterday’s Marijuana Rescheduling News, Explained

The Marijuana Industry’s Secret Playbook to Get Weed Legalized in All 50 States

Distressed Cannabis Business Takeaways – Canna Law Blog™

United States: Alex Malyshev And Melinda Fellner Discuss The Intersection Of Tax And Cannabis In New Video Series – Part VI: Licensing (Video)

Drug Testing for Marijuana – The Joint Blog

What you Need to Know

Cannabis, alcohol firm SNDL loses CA$372.4 million in 2022

NCIA Write About Their Equity Scholarship Program

City Of Oakland Issues RFP For Employee Training Programs

It has been a wild news week – here’s how CBD and weed can help you relax

A new April 20 cannabis contest includes a $40,000 purse

UArizona launches online cannabis compliance online course
-
 Cannabis News1 year ago
Distressed Cannabis Business Takeaways – Canna Law Blog™
-
 One-Hit Wonders1 year ago
United States: Alex Malyshev And Melinda Fellner Discuss The Intersection Of Tax And Cannabis In New Video Series – Part VI: Licensing (Video)
-
 drug testing4 months ago
Drug Testing for Marijuana – The Joint Blog
-
 Cannabis 1011 year ago
What you Need to Know
-
 Marijuana Business Daily1 year ago
Cannabis, alcohol firm SNDL loses CA$372.4 million in 2022
-
 Education1 year ago
NCIA Write About Their Equity Scholarship Program
-
 Education1 year ago
City Of Oakland Issues RFP For Employee Training Programs
-
 Cannabis1 year ago
It has been a wild news week – here’s how CBD and weed can help you relax